
Although Windows 11 has various attracted features, it also has some disturbing bugs. Windows Start Menu not working is one of the common issues. After upgrading to Windows 11, you may find your Start Menu not opening, stuck or frozen. Don't worry. Here this article will walk you through 8 ways to fix Windows 11 Start Menu not working after update.

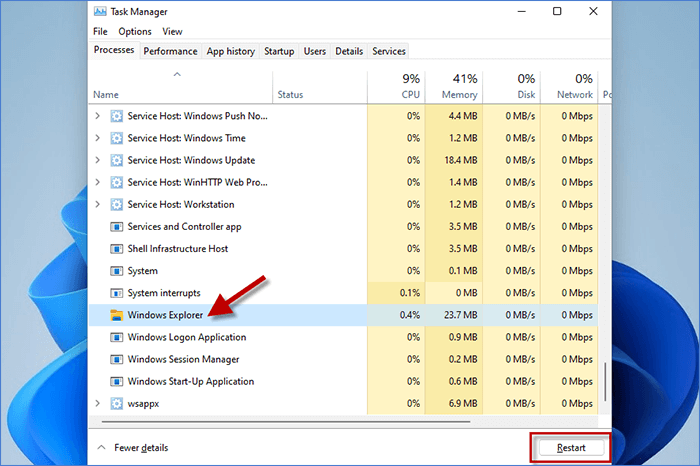
Window Explorer is a graphical file management utility for the Windows operating system. It can control various services including Start menu, Taskbar, etc. When you find Windows 11 Start Menu not working after update, you can try to restart your Windows Explorer first.
Step 1: Press Ctrl + Shift + ESC to enter Task Manage.
Step 2: Choose Windows Explorer, and click on Restart at the right bottom.
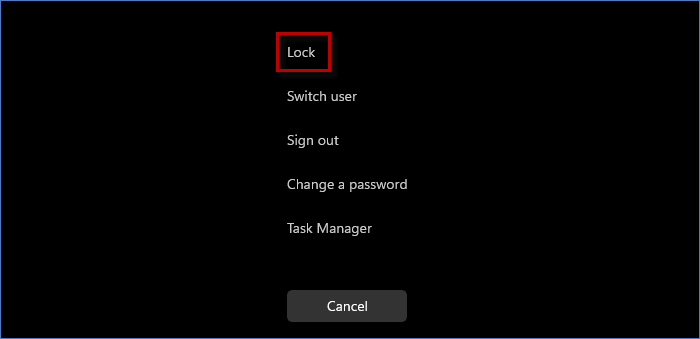
Another easy way to fix Windows 11 Start Menu not working is to lock computer and log back in. Some users find their Start Menu stopping responding when they switch the mode from HIGH CONTRAST to NORMAL and back to HIGH CONTRAST. The only thing they do is to lock the computer and log back in, and the Start Menu works again. You can also try on this way since it is so easy without any changes on system.
Step 1: press Ctrl + Alt + Delete and click on Lock
Step 2: Then log back in. When completed, the Start Menu may behave normally again.
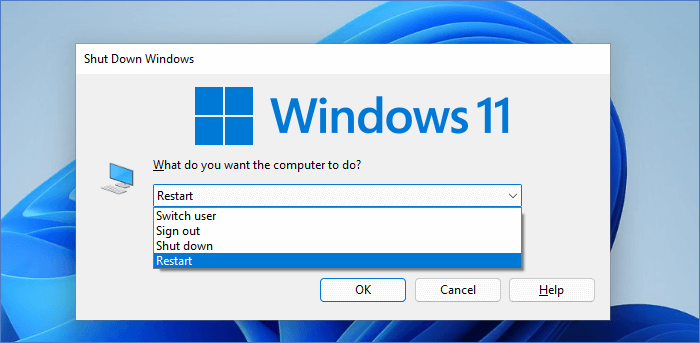
When there is something wrong occurring to your Windows 11 PC, the first solution coming to your mind is to restart PC. Usually, if you restart your PC, all of the services and process will be forced to restart as well. Thus, restarting PC can restart your Start Menu, which may fix your Windows 11 Start Menu not working.
Step 1: Press Alt + F4 to run the Shut Down Windows
Step 2: Expend the drop-down menu to choose Restart.
Step 3: Click OK to restart Windows 11.
If there are some issues inside your account, it may also cause your Windows 11 Start Menu not working. The easy way to fix it is to log out current account and log in with a new local administrator account.
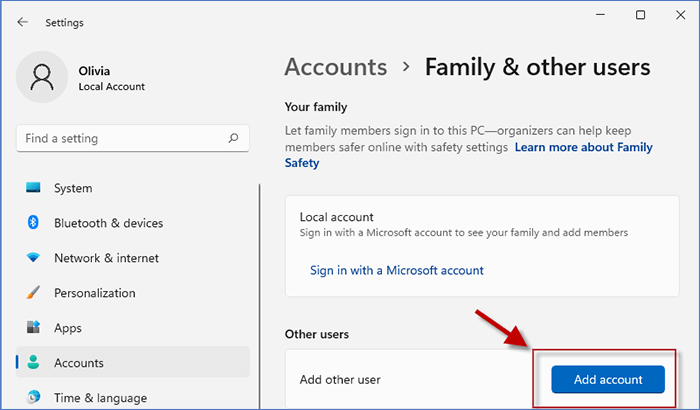
Step 1: Press Windows Key + I to enter Settings. Then click on account name and choose Family & other users option. 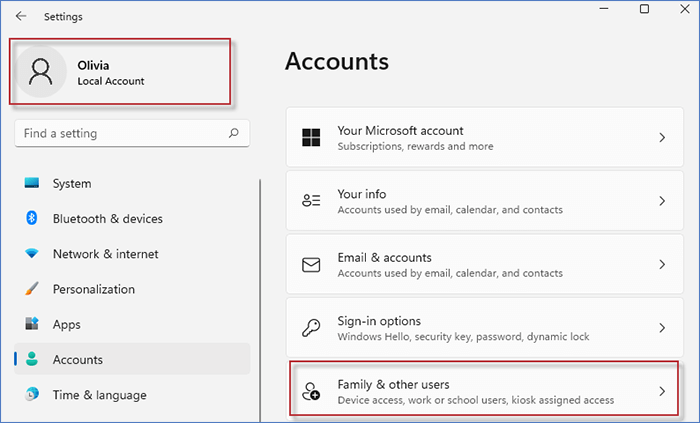
Step 2: Under Other users section, you can click on Add account to create a new account.
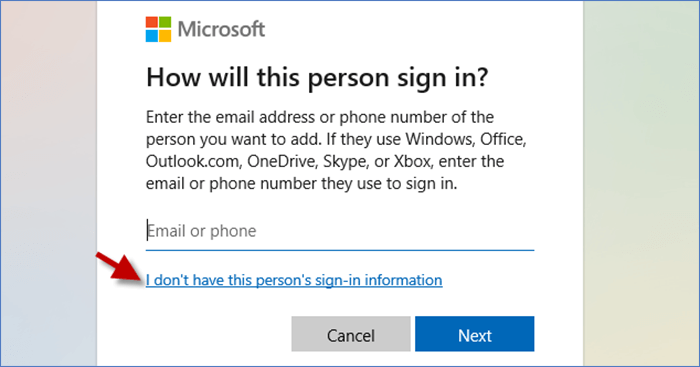
Step 3: Click on I don’t have this person’s sign-in information.
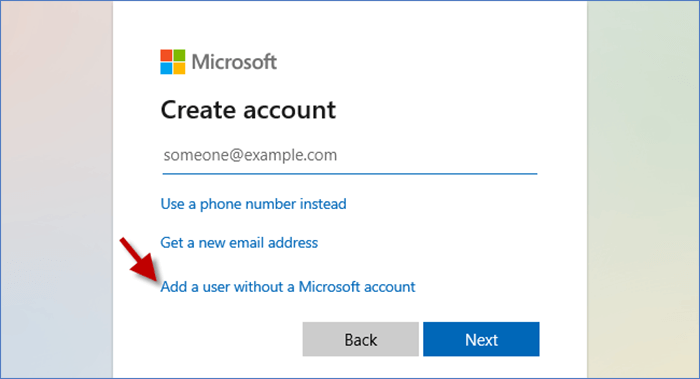
Step 4: Select Add a user without a Microsoft account.
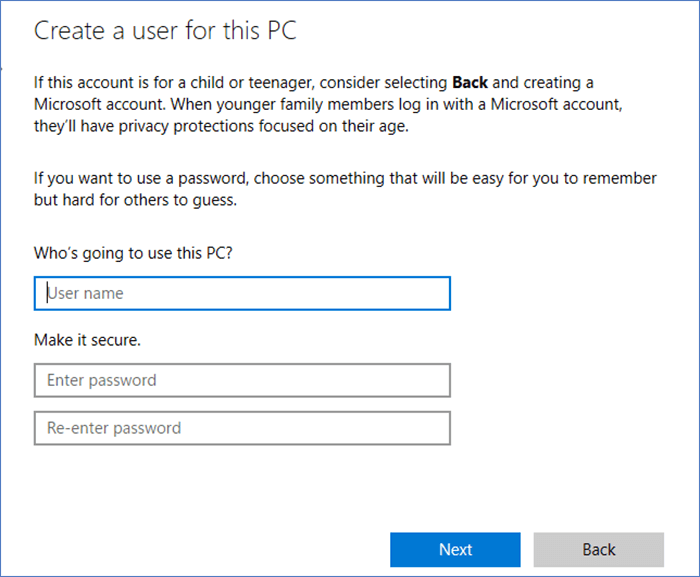
Step 5: Set your account name and password. Then click Next to finish creating the new account. You can log in with this new account to see if it can fix your Start Menu not working on Windows 11.
Safe mode is used to troubleshoot a system that has crashed, failed to boot correctly. If an issue doesn’t happen in safe mode, default settings and basic device drivers are not the causes. Thus, the issue may be caused by the third-party software on your PC. To fix your Windows 11 Start Menu not working, you can run a safe mode first.
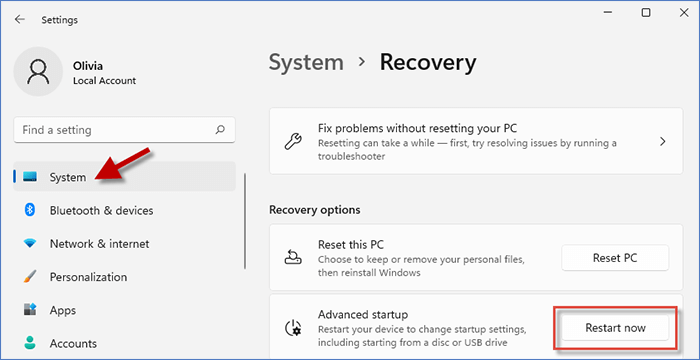
Step 1: Press Windows Key + I to go to settings. Then choose System > Select Recovery. Under Recovery options, click on Restart now.
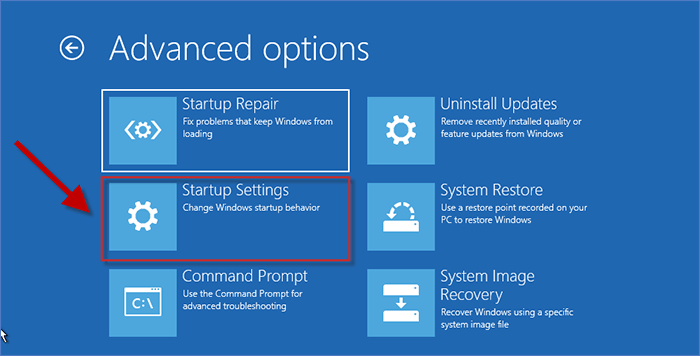
Step 2: Choose Troubleshoot > Advanced options > Startup Settings. Then click on Restart.
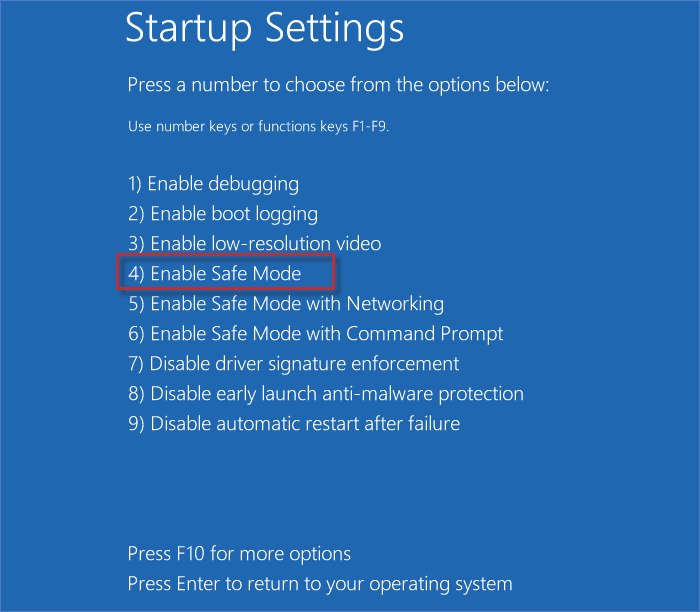
Step 3: Press 4 or F4 to run Windows in a safe mode.
If your Start Menu works in safe mode, the problem may be caused by your third-party apps on PC. To fix Start Menu not working on your Windows 11, you can try to uninstall the third-party apps related to your Start Menu customization and see if the problem can be solved.
DISM (Deployment Imaging and Servicing Management and SFC (System File Checker) are the tools to repair your system file. If your Start Menu not working on Windows 11 is caused by the damaged or incorrect system file, you may fix it by running DISM and SFC:
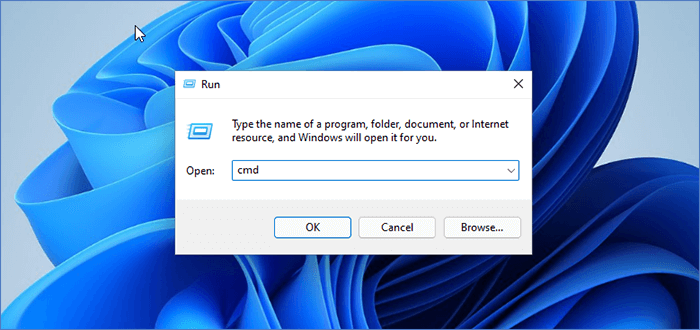
Step 1: Press Windows Key + R. When Run Windows appears, enter cmd. Then hold Ctrl + Shift + Enter together, an Administrator Command Prompt will open up.
Step 2: In the Administrator Command Prompt, type DISM /Online /Cleanup-Image /RestoreHealth and hit Enter on the keyboard. Wait for running DISM to check and repair the damaged system image with a clean one.
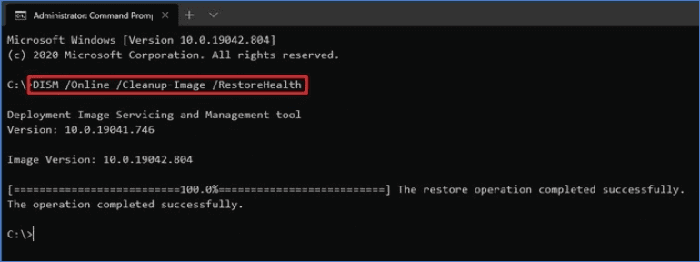
Step 3: Enter SFC /scannow in Command Prompt window and hit Enter button to run the SFC command. This step will check the integrity of Windows system files and repair them if required. After finished, reboot your PC.

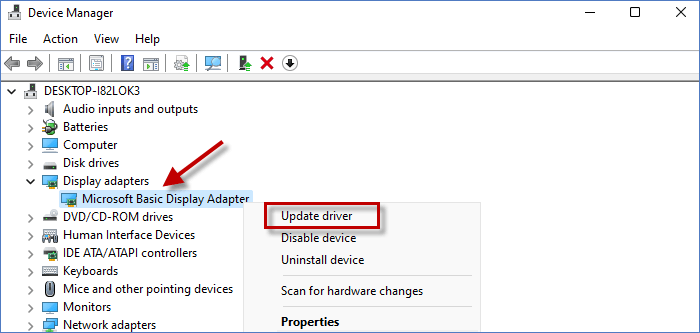
Outdated graphics drivers may lead to your Windows 11 Start Menu not working. Thus, you can try to update your graphics drivers in this way:
Step 1: Press Windows key + X and select Device Manager.
Step 2: Expand Display adapters. Then you can right-click the Display adapters and select Update driver.
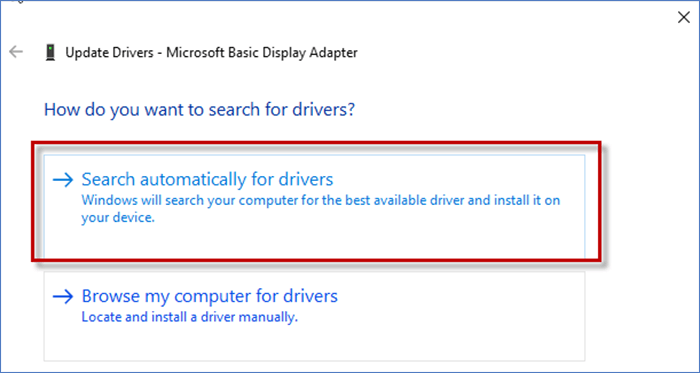
Step 3: Select Search automatically for drivers and wait until the best drivers is found and installed on PC.
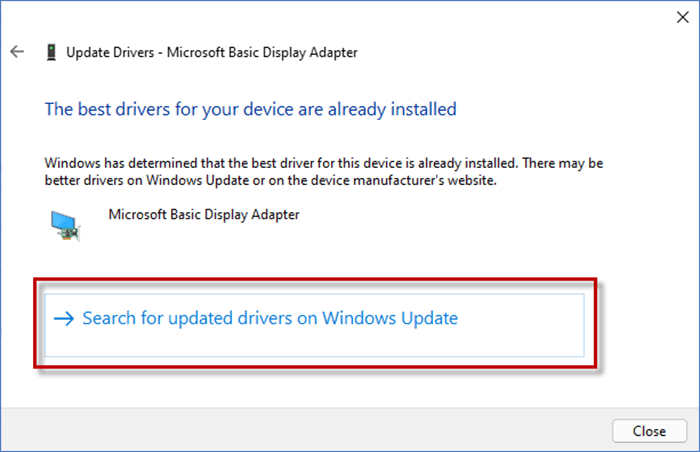
Step 4: Click Search for updated drivers on Windows Update option. When your driver is updated successfully, quit the Windows to check if it works.
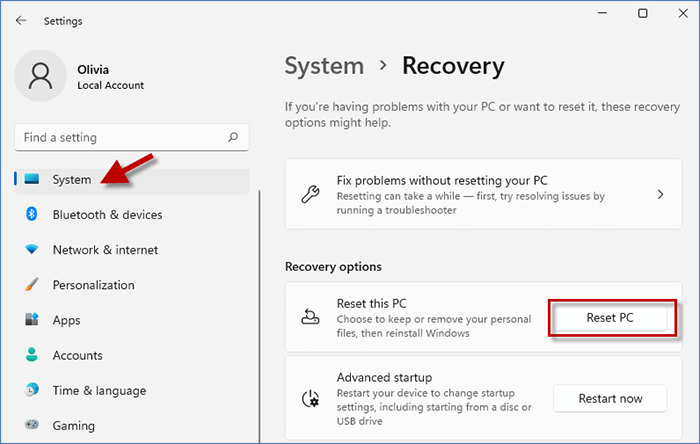
If none of the ways above can fix your Start Menu not working on Windows 11, here you can try to reinstall your Windows PC. Fortunately, you have an option to reset your Windows system but keep your personal files. Here come the steps.
Step 1: Press Windows + I to open Settings.
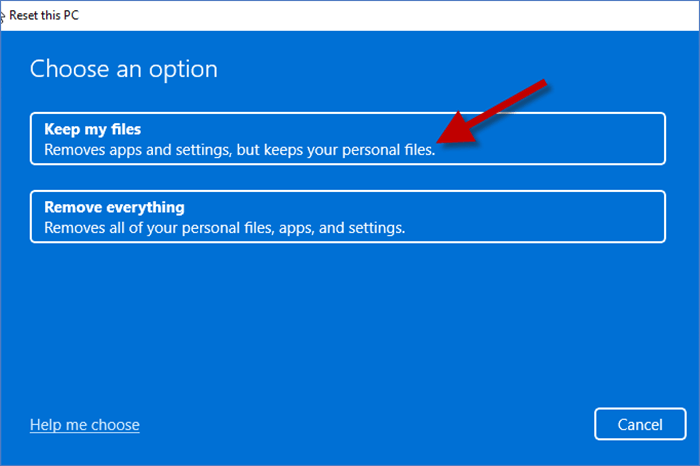
Step 2: Go to System > Recovery. Under Recovery options, click on Reset PC.
Step 3: Choose Keep my files, and you can remove your apps and settings on Windows but keep your personal files. After resetting, your Start Menu may work normal on Windows 11 again.
That's all the ways to fix Windows 11 Start Menu not working after update. Hopefully, with the ways above, you can make your Start Menu work on Windows 11 as soon as possible and customize your Start Menu according to your preference.
 8 Ways to Fix Windows 11 File Explorer Not Responding
 8 Ways to Fix Can't Type in Windows 11 Search Bar
 3 Methods to Enable Drag and Drop in Windows 11 Taskbar
 6 Ways to Fix Taskbar Missing from Windows 10
 How to Downgrade from Windows 11 to Windows 10 without Losing Data
 Fix "There are currently no power options" in Windows 11
 How to Fix Power Button Missing from Windows 10 Login Screen