iPhone Recovery Assistant Keeps Failing? How to Fix It

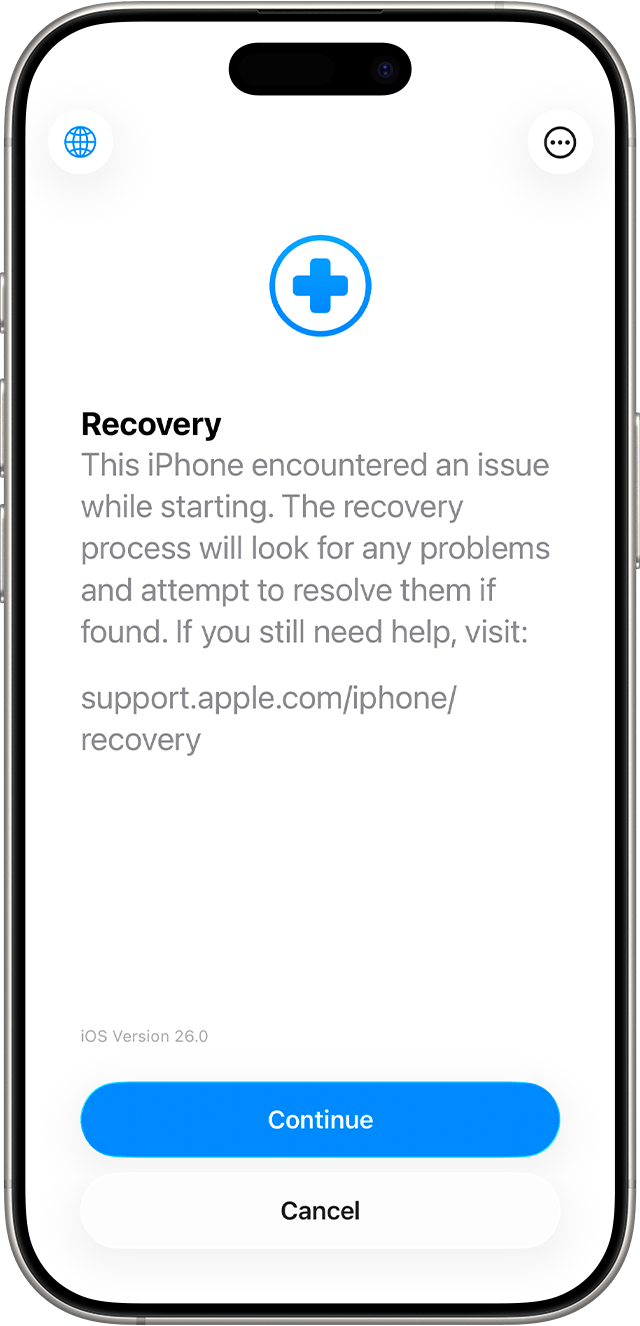
If your iPhone displays “This iPhone encountered an issue while starting” and opens Recovery Assistant, it has detected a problem preventing iOS from starting normally.
Recovery Assistant can attempt to diagnose startup problems and download software required for recovery. Sometimes the process fails, gets stuck, or repeatedly returns to the same screen. This can be especially concerning if your iPhone contains photos or messages that have not been backed up.
If iPhone Recovery Assistant is not working, a failed attempt does not automatically mean you need to erase your iPhone. This guide explains six troubleshooting options, starting with those that do not intentionally remove your data.
Data safety
- Before choosing Restore, Erase, or any third-party mode that resets the device, check whether you have a current backup. No software-repair method can guarantee preservation of data from a severely damaged device.
- What Is iPhone Recovery Assistant?
- Why Does iPhone Recovery Assistant Keep Failing?
- Fix 1: Complete Recovery Assistant on a Supported Wi-Fi Network
- Fix 2: Force Restart the iPhone Once and Check the Result
- Fix 3: Update the iPhone Using Apple Devices on Windows 11
- Fix 4: Check the USB Connection and Computer Environment
- Fix 5: Consider iSumsoft iOS Refixer for a Compatible Software Issue
- Fix 6: Contact Apple Support if Recovery Still Fails
- Recovery Assistant vs. Restore: Which Option Should You Choose?
- How to Reduce Future Data-Loss Risk
- Frequently Asked Questions
- Conclusion
What Is iPhone Recovery Assistant?
Recovery Assistant is an Apple feature that attempts to resolve certain iPhone startup issues. It can appear automatically if the phone detects a problem during startup and may download recovery software over Wi-Fi. It is distinct from traditional Recovery Mode, which allows a Mac or Windows computer to update or restore iOS. See Apple’s Recovery Assistant explanation.
| Feature | Recovery Assistant | Computer Recovery Mode |
|---|---|---|
| Primary purpose | On-device repair for startup issues | Update or restore iOS using a computer |
| Computer required | Not for the first attempt | Yes, via USB |
| Network | Supported Wi-Fi | Internet access on computer |
| Data | Does not start with a device erase | Update attempts to preserve data; Restore erases it |
Why Does iPhone Recovery Assistant Keep Failing?
Possible causes include an interrupted iOS update, an incompatible Wi-Fi network, an unresolved software problem, or a failed software download. In some cases, persistent startup failures can indicate a hardware issue. The screen alone cannot identify the root cause.
1. A failed or interrupted iOS update
An update that did not complete properly can leave an iPhone unable to start normally.
2. An unsupported Wi-Fi network
Recovery Assistant needs Wi-Fi. According to Apple, networks requiring a web-browser sign-in or 802.1X authentication are not supported for this recovery process.
3. A persistent system issue
If the underlying problem remains after recovery, the iPhone may return to the same screen.
4. An incomplete download or recovery attempt
Network interruptions or another unsuccessful recovery stage can prevent completion.
5. A possible hardware issue
If software recovery repeatedly fails, professional hardware diagnosis may be needed. Do not diagnose a specific component solely from the Recovery Assistant message.
Fix 1: Complete Recovery Assistant on a Supported Wi-Fi Network
Step 1 Connect the iPhone to a reliable power source if necessary.
Step 2 On the Recovery Assistant screen, tap Continue. Enter your passcode if requested, and follow the prompts on your device.
Step 3 Join a stable, ordinary Wi-Fi network when prompted. Avoid captive-portal hotel or airport networks and unsupported enterprise authentication networks.
Step 4 Follow the on-screen instructions and allow the download and recovery to finish.
Step 5 When recovery finishes, restart the iPhone and check whether it starts normally. Sharing diagnostic logs with Apple is optional; review the on-screen privacy information before choosing.
If it returns to Recovery Assistant, proceed to the next method.
Fix 2: Force Restart the iPhone Once and Check the Result
For iPhone 8 and later: For other models, see how to force restart an iPhone.
Step 1 Quickly press and release Volume Up.
Step 2 Quickly press and release Volume Down.
Step 3 Hold the Side button until the Apple logo appears, then release it.

Allow the device to start. If it succeeds, back up your data and check Settings > General > Software Update. If it immediately returns to Recovery Assistant, repeated force restarts are unlikely to resolve the issue.
Fix 3: Update the iPhone Using Apple Devices on Windows 11
If on-device recovery fails, try computer-based Recovery Mode. Update is the first option to consider when available because it attempts to reinstall iOS without erasing user data. Restore erases the device.
Step 1: Prepare Apple Devices
Install or update Apple Devices from the Microsoft Store on Windows 11, and ensure the computer has an internet connection.
Step 2: Connect the iPhone
Use a data-capable USB cable, preferably directly connected to the computer.
Step 3: Enter traditional Recovery Mode
For iPhone 8 and later, press and quickly release Volume Up, then Volume Down, then keep holding the Side button past the Apple logo until the Connect to Computer screen appears. Other models use different button combinations; refer to Apple's instructions. See Apple’s recovery instructions or our iPhone Recovery Mode guide.
Step 4: Select Update first
Open Apple Devices and select the connected iPhone. If offered Update and Restore, choose Update first. The application will download and reinstall iOS.

If the download takes longer than 15 minutes and the phone leaves the Connect to Computer screen, allow the download to finish, then enter Recovery Mode again if required.
Step 5: Verify the outcome
Check whether the phone reaches the Lock Screen. If updating fails and the data is irreplaceable, seek advice before selecting Restore.
Fix 4: Check the USB Connection and Computer Environment
If Apple Devices does not detect the iPhone, or computer-based updating fails with connection errors: Our Apple Devices detection guide covers further Windows checks.
Step 1 Try another known-good USB data cable.
Step 2 Try a different direct USB port, avoiding hubs during troubleshooting.
Step 3 Restart the computer and reopen Apple Devices.
Step 4 Update Apple Devices and relevant system software.
Step 5 Try another trusted computer if available.
Step 6 Record the exact error number and consult Apple's error-specific guidance.
A connection failure during a computer update does not prove the original Recovery Assistant problem was caused by USB.
Fix 5: Consider iSumsoft iOS Refixer for a Compatible Software Issue
iSumsoft iOS Refixer offers repair options for certain iOS startup and Recovery Mode problems. Support for a specific Recovery Assistant loop is not confirmed by the general product description. Check the current device and iOS compatibility with support before buying or starting a repair. This article does not report a device test proving that this utility fixes the Recovery Assistant error.
About these screenshots
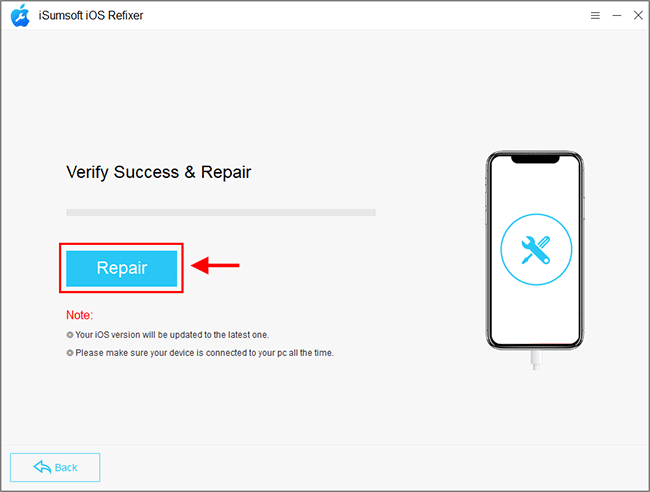
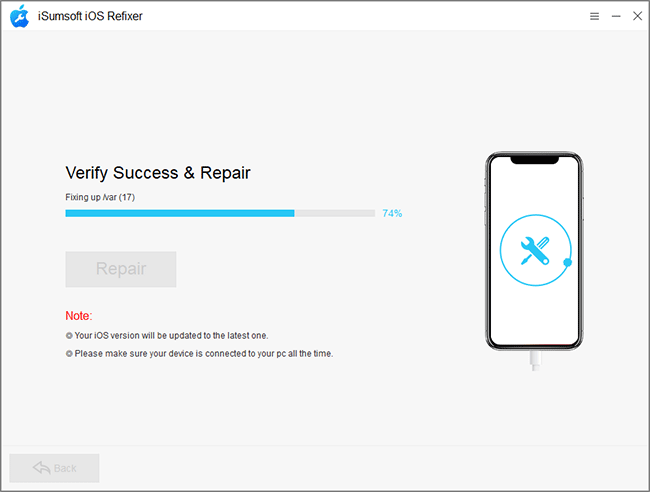
- The images below come from the existing iOS Refixer user guide. Some show an older device or firmware version; they illustrate the workflow only. They do not verify compatibility with your iPhone or show a tested Recovery Assistant repair. Advanced Mode deletes data.
Step 1: Open iOS Refixer
Install the current supported version on Windows and connect your iPhone by USB.
Step 2: Choose System Repair
Select System Repair from the application interface. Check the interface against the current iOS Refixer user guide.

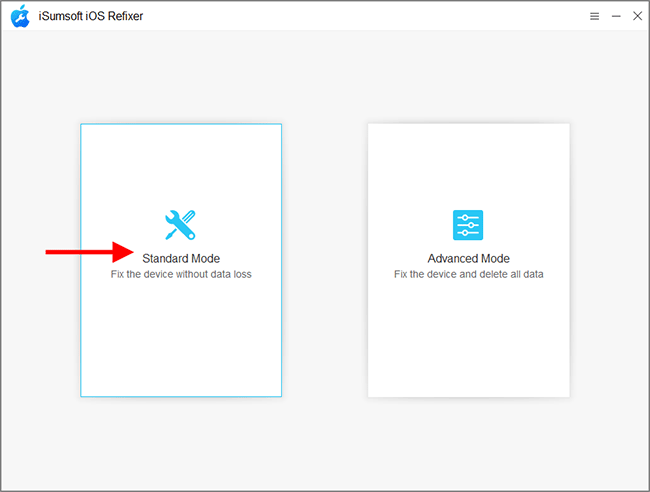
Step 3: Select Standard Mode if appropriate
Standard Mode is intended as a data-preserving option for supported issues, but this does not guarantee successful repair or preservation on every damaged device. After choosing Standard Mode, click Start to continue. Advanced Mode involves data loss and should not be used without understanding that consequence.
Step 4: Detect the device and obtain firmware
Follow the application's device-detection instructions. It may ask you to enter Recovery Mode or DFU Mode. Check that firmware and device details match before proceeding.
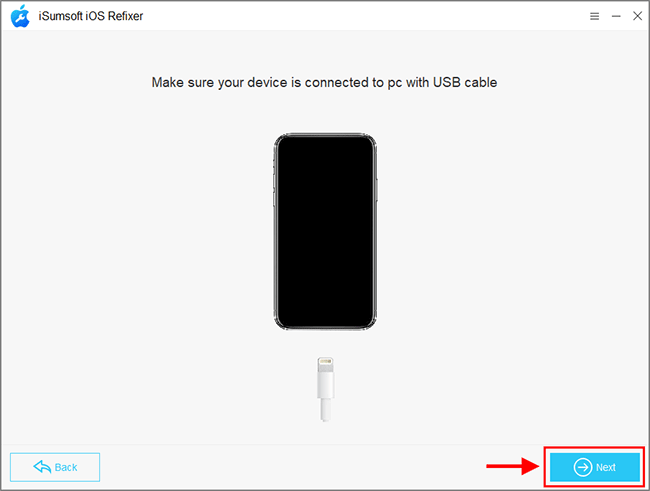

Step 5: Run the repair and verify it
Begin the repair only after confirming compatibility and understanding the risks. Do not disconnect the cable during repair. Afterward, check that the phone actually boots and the expected data is accessible.
Fix 6: Contact Apple Support if Recovery Still Fails
Consider professional diagnosis if the iPhone repeatedly enters Recovery Assistant, cannot complete an update in Recovery Mode, consistently reports restore errors, or keeps restarting after software restoration.
Tell the service provider if the device contains important unbacked-up data. Ask about the data consequences before authorizing an erase or replacement. Hardware service and data recovery are not the same service, and preservation cannot be guaranteed.
Recovery Assistant vs. Restore: Which Option Should You Choose?
| Situation | Next step | Data risk |
|---|---|---|
| Recovery Assistant appears once | Follow the built-in prompt on supported Wi-Fi | No initial erase requested |
| On-device recovery fails repeatedly | Try Update via USB | Aims to keep data; no guarantee |
| Apple Devices cannot see the phone | Check cable, USB port, and app | No erase required |
| Compatible system fault remains | Check support for your device first | Check device and iOS support |
| Only Restore remains | Check backups before erase | Restore erases data |
| Still fails after restore | Ask Apple for help | May need hardware repair |
How to Reduce Future Data-Loss Risk
After the phone works again, make a current iCloud or computer backup; confirm the backup can be accessed; keep sufficient free space for updates; and avoid disconnecting devices during computer-based update or restore operations. These steps reduce risk but cannot prevent every hardware or software failure.
Frequently Asked Questions
Why does my iPhone keep opening Recovery Assistant?
The phone may be detecting a startup issue that remains unresolved. Recovery Assistant can appear again when the same failure persists, but the screen does not identify a precise hardware or software cause.
Does Recovery Assistant erase my iPhone?
The initial feature is intended to attempt a repair, not to serve as an erase operation. However, later actions such as Restore or device reset can erase data.
Does Recovery Assistant require Wi-Fi?
Yes. Apple says it requires supported Wi-Fi; captive-portal and 802.1X networks are not supported for this feature.
Can I repair Recovery Assistant without a computer?
You can first try its built-in process. If it fails, Apple may direct you to computer-based Recovery Mode.
How is Recovery Assistant different from Recovery Mode?
Recovery Assistant is an on-device startup recovery feature. Computer Recovery Mode enables a connected computer to update or restore iOS.
Will Update in Apple Devices delete my photos?
Update is designed to reinstall iOS while preserving data, but no repair can guarantee data survival on a severely damaged device. Restore erases the device.
Can iSumsoft iOS Refixer fix an endless Recovery Assistant loop?
It may be considered for supported software-related problems, but the specific fault, device and iOS version must be confirmed. A successful outcome is not guaranteed.
When should I stop troubleshooting?
If important data has no backup or repeated attempts fail, consult Apple Support or a qualified recovery professional before any erasing procedure.
Conclusion
When Recovery Assistant fails, first try Apple's built-in process with supported Wi-Fi. If the phone still will not start, use Apple Devices on Windows or Finder on Mac to attempt Update before considering Restore. For compatible software issues, a repair utility may be evaluated, but its limitations and risks must be clear. Do not erase the iPhone until you understand your backup options and the consequences.