iPhone Screen Goes Black After Screen Replacement? What to Check

You just replaced your iPhone's broken screen (or picked it up from a repair shop), but the new display stays pitch black. The phone still vibrates, rings, and is recognized by a computer, yet nothing appears on the glass. This guide provides a technician-grade diagnostic checklist to identify loose flex cables, blown backlight fuses, defective replacement parts, or software handshake errors.
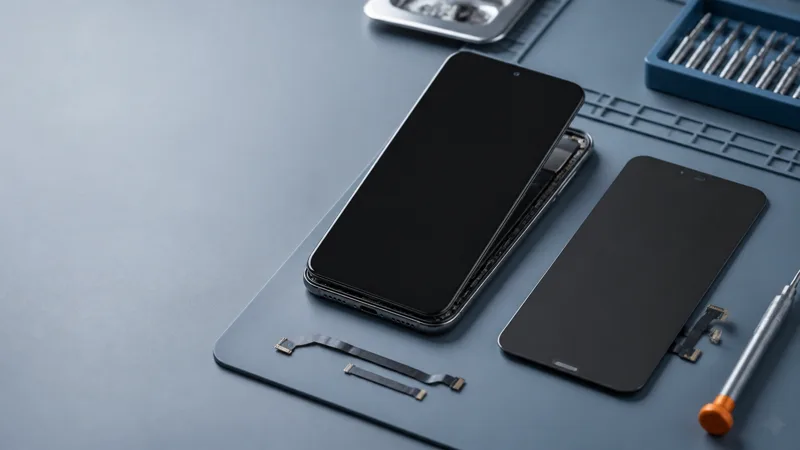
Having an iPhone screen stay black after a screen replacement is one of the most frustrating experiences in DIY repair and third-party servicing. In most cases, the iPhone itself is functioning perfectly—you can hear charging chimes, feel haptic feedback from the mute switch, and receive notifications, but the display panel emits no light.
If your device experienced sudden blackouts on an untouched original display during daily use, refer to our general guide on why an iPhone screen goes black randomly. If the blackout started right after installing a new screen assembly, follow the hardware inspection protocol below.
| Failure Pattern | Probable Root Cause | Recommended Action |
|---|---|---|
| Phone vibrates, rings, but screen is 100% black | Display flex cable loose, or battery wasn't disconnected during swap | Disconnect battery, reseat display FPC connectors, and force reboot |
| Faint Apple logo visible under bright flashlight | Blown backlight filter / fuse diode on logic board | Microsoldering repair required on logic board backlight circuit |
| Screen flashes Apple logo once then turns black | Damaged upper earpiece / proximity sensor flex assembly | Disconnect proximity flex cable and test display boot alone |
| Black screen only during phone calls after repair | Proximity sensor misaligned or blocked in replacement bracket | Check call black screen guide and reposition sensor |
- Why Does the Screen Stay Black After Replacement?
- Step 1: Perform a Hardware Force Restart
- Step 2: Disconnect Battery and Reseat All Display Cables
- Step 3: Check for Damaged FPC Pins and Long Screw Damage
- Step 4: Isolate the Upper Sensor / Earpiece Flex Cable
- Step 5: Perform the Flashlight Backlight Test
- Step 6: Test with the Original Screen or an OEM Part
- Step 7: Check Software vs Hardware Repair Boundaries
- Frequently Asked Questions
Why Does the Screen Stay Black After Replacement?
Modern iPhone screens are precision assemblies containing digital display panels (OLED or LCD), capacitive digitizer layers, EEPROM identity chips, and upper ambient sensor arrays. When a replacement screen remains dark, one of the following hardware issues is usually responsible:
- Display FPC connector seated improperly: The microscopic pins on the motherboard connector did not snap into full contact, leaving the display driver unpowered.
- Hot-plugging with connected battery: Connecting a new screen while the battery terminal is still plugged in causes a voltage spike that can blow the backlight filter diode or short-circuit the PMIC.
- Damaged proximity / flood illuminator flex: Tears in the delicate upper sensor flex during transfer can cause iOS to abort the display boot sequence as a safety measure.
- Dead on Arrival (DOA) aftermarket panel: Low-cost aftermarket hard-OLED or copy LCD screens suffer high defect rates out of the box.
- Long screw damage (LSD): Inserting a longer screw into the EMI shield bracket crushes copper traces on the logic board directly under the screw hole.
Step 1: Perform a Hardware Force Restart
When iOS detects a hardware disconnect, the display subsystem may enter an inactive sleep state that persists across normal power cycles. A forced hardware reboot forces the kernel to query and initialize the new display controller IC.
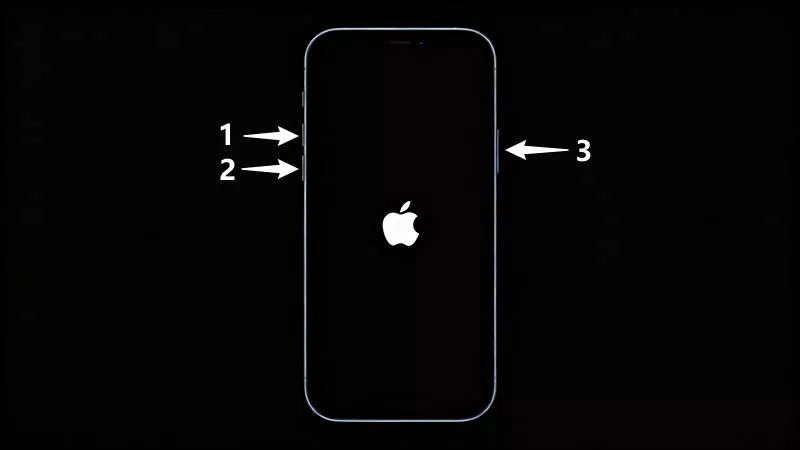
iPhone 8 / X / 11 / 12 / 13 / 14 / 15 / 16 Press and immediately release the Volume Up button. Press and immediately release the Volume Down button. Then press and hold the Side Power button for 15 to 20 seconds. If the screen is working, the Apple logo will appear.
iPhone 7 / 7 Plus Press and hold both the Volume Down button and the Power button together for 10–15 seconds until the Apple logo shows.
Step 2: Disconnect Battery and Reseat All Display Cables
The golden rule of iPhone repair is to **always disconnect the battery first**. If you or your technician plugged in the screen while the battery was connected, you must perform a clean power cycle of all connectors.
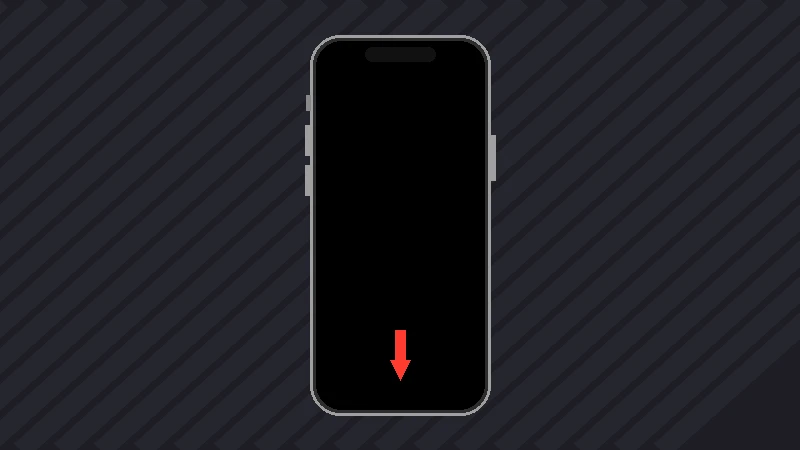
Step 1 Power off the device (or ensure it is in a resting state) and remove the pentalobe bottom screws. Open the display panel carefully from the correct side.
Step 2 Remove the EMI shield bracket over the battery connector and **disconnect the battery flex cable first** using a plastic spudger.
Step 3 Disconnect the display, touch/digitizer, and front sensor flex cables.
Step 4 Reconnect the display and touch cables first, pressing firmly on both ends of each connector until you feel a distinct mechanical click. **Do not force them down at an angle.**
Step 5 Reconnect the battery terminal last, plug in a charging cable or press the Power button, and verify if the display illuminates.
Step 3: Check for Damaged FPC Pins and Long Screw Damage
Inspect the motherboard connectors under magnification with a bright light:
- Bent or missing connector pins: If any gold pin inside the board connector is bent sideways or flattened, use a fine pair of non-conductive tweezers under a microscope to realign it gently.
- Thermal debris / flux: Clean the connector area with 99% isopropyl alcohol (IPA) and an anti-static brush to remove non-conductive adhesive particles.
- Verify screw lengths: If the metal shield screws were mixed up, inspect the screw standoff posts. If you notice a circular crack around the screw hole, long screw damage has severed board traces, which requires professional trace jumper repair.
Step 4: Isolate the Upper Sensor / Earpiece Flex Cable
On iPhone X and newer models, the front earpiece speaker and sensor flex cable carries the ambient light sensor, flood illuminator, and microphone. A short circuit on this ribbon cable will cause the entire iPhone to freeze on a black screen or enter an endless boot loop.
Step 1 Disconnect the battery terminal, then unplug ONLY the upper front sensor/earpiece ribbon cable.
Step 2 Leave the main display and touch cables connected, then reconnect the battery and power on the iPhone.
Step 3 If the screen now powers on and shows the lock screen normally, your display is functional, but the transferred upper sensor flex is torn or shorted. You will need to replace the front sensor flex assembly (note: Face ID pairing will require specialized recalibration).
Step 5: Perform the Flashlight Backlight Test
On LCD-based models (iPhone 11, iPhone XR, iPhone 8, iPhone SE) and certain OLED driver boards, a blown backlight fuse produces a screen that appears pitch black under normal room lighting, but the image is actually being rendered.
Step 1 Take the iPhone into a completely dark room.
Step 2 Turn on a bright external flashlight and hold it directly against the front glass at an angle while pressing the Power button.
Step 3 Look very closely for the faint outline of the white Apple logo, the numeric keypad, or time text. If you can see faint images without light, your logic board's backlight filter diode has burned out due to a short circuit during repair.
Step 6: Test with the Original Screen or an OEM Part
If you still have the old damaged screen (even if the glass is shattered), plugging it back in is the definitive way to prove whether the issue is the new replacement part or the phone's motherboard.
If the shattered original screen lights up and displays graphics while the new screen stays 100% black, the replacement panel is defective (DOA) or uses an incompatible display driver chip. Contact your parts vendor or repair shop for an immediate warranty replacement.
Step 7: Check Software vs Hardware Repair Boundaries
Important Diagnostic Distinction:
- Physical / Hardware Failure: If the display panel has no image, damaged flex cables, or a blown backlight diode, no software tool can fix it. You must reseat cables or replace the screen panel.
- Software Firmware Lockup: If the screen hardware is intact and detected by a computer, but iOS crashed due to an interrupted firmware update or display driver conflict, a clean system repair can restore operation.
If your device is recognized by your computer via USB and you want to ensure the operating system is not stalled in a kernel panic, you can use iSumsoft iOS Refixer to reflash clean system firmware with zero data loss before sending the phone for hardware return.
Frequently Asked Questions
Why does my new screen work for a few minutes and then go black?
This typically indicates an overheating display driver IC on low-grade aftermarket copy screens, an improperly seated FPC connector that loosens as the chassis warms up, or an iOS display handshake failure after the initial lock timeout.
Will Apple repair my iPhone if a third-party screen went black?
Yes. Under Apple's current service policies, Apple Authorized Service Providers will service devices with third-party displays, provided you pay their standard out-of-warranty screen replacement fee to replace the third-party part with an authentic Apple OEM display.
Can I get True Tone back if my replacement screen is black?
To retain True Tone, the original display's EEPROM serial data must be read using an EEPROM programmer tool and written to the replacement screen. If the replacement screen is completely unresponsive, a technician can often read the True Tone data directly from the logic board via software.