You need to root your phone if you want to run a specific app that requires root access. Apps that require root aren't hard to find, they're available in Google Play, but they won't work until you gain root access. Some apps have features that only work on a rooted device, like iSumsoft Windows password refixer for Android.
Rooting is the process of enabling access to the root account, installing the Su binary. Applications can call Su to gain elevated privileges, so they can break free from Android's security sandbox and do more powerful things. Android devices come with a "root" user that functions like te Administrator user account on Windows. By default, Android doesn't give you access to the root account for security purposes. However, there are many ways to root an Android phone, and which one you should use depends on your phone.
Common Android rooting ways including: Using the built-in one-click root process, Meizu and XiaoMi phone have Root Permission option, which can be enabled in Settings. You can root android with One-click tool, like Kingoroot. TWRP recovery method, which is the most widely supported method for rooting your device.
SuperSU was created by world-famous Android developer Chainfire. It is an app that allows for advanced management of superuser access on a rooted Android device. Rooting can be done through two methods: Using Android Application Package (APK), which is usually provided by 3rd party rooting service, and manually granting root access (can be achieved in recovery mode).
SuperSU is available in the Google Play Store, but that version doesn’t actually give you root access. In fact, you need root access to use it in the first place. Thankfully, SuperSU is also available as a .zip file that we can "flash" with TWRP.
To use SuperSU, you first of all need to install TWRP recovery environment on your device. Go to TWRP site to download the right one for your device. Once TWRP recovery environment is installed on your device, you are ready to Flash SuperSU and gain root access. Just do as the following steps below.
Note: Make sure it is fully charged so that it cannot be switched off while being rooted. Backup your Android before proceeding. Since there are risks that it will brick your phone if the rooting doesn't go well, it's important to back up your phone data before rooting. So if anything goes wrong, you don't end up to losing all precious data on the phone.
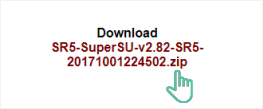
Step 1: Go to SuperSU Root site and download the SuperSU zip file. If you download it on your computer, you need to transfer it to your device.
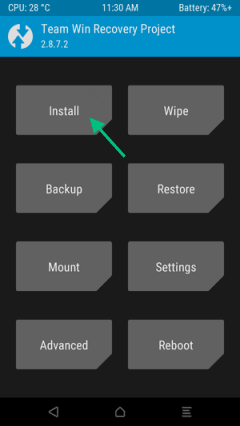
Step 2: Get the device in the TWRP recovery environment. To do:
Hold down specific buttons on your device. This buttons you have to hold down vary from one device to another. for example, you may have to hold the Power and Volume Down buttons simultaneously, then use the volume keys to boot Recovery Mode. For your specific device, find the proper button combination by searching for "TWRP (Device Model name)" in Google.
On the TWRP recovery screen, tap "Install" to begin the process.
Step 3: Scroll down and navigate to the SuperSU ZIP file you downloaded. Select it and then Swipe to confirm flash.

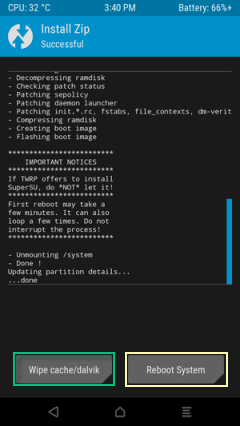
Step 4: Wait for it flashing. Tap Wipe cache/Dalvik when SuperSU is installed. When that finished, select the Reboot System to continue your operation.
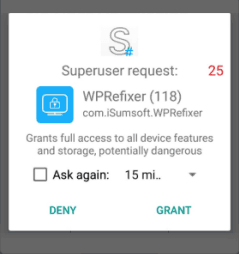
When you reboot your phone, you should see the new SuperSU icon in your app drawer. SuperSU controls which other apps on your phone get root permissions. Whenever an app wants to request root permissions, it has to ask your SuperSU app, which will show a request prompt asking for root access. If you click Grant and you get a success message, you have successfully achieved root on your phone.
To manage root permissions, open your app drawer and tap the SuperSU icon. You'll see a list of apps that have been granted or denied superuser access. You can tap on an app to change its permissions.
If you ever want to unroot, use the following steps, this is definitely the easiest way to unroot your phone.
Step 1: Open SuperSU app.
Step 2: Go to the Settings tab.
Step 3: Scroll down below to the Cleanup section.
Step 4: Tap on Full Unroot to uninstall SuperSU and unroot your phone.
Step 5: Confirm by pressing Continue.
Step 6: Reboot your phone.