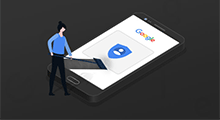
Your Android phone says it has been reset and requires Google account verification, as shown in the figure below, but you don't have the Google account credential? This article will show you how to bypass Google account verification after factory reset on Android phones.

If your Android phone is linked to a Google account and you reset it via a method other than the device Settings, it will ask for Google account verification after the reset. This is due to the Factory Reset Protection feature on Android OS version 5.1 and higher, which was designed by Google to ensure that no one can use your Android phone through a simple Factory Reset if it is lost or stolen.
When the Google account verification appears, you have to enter the Google account and password that were previously synced on this phone to verify before you can reactivate and use the phone. There is no button to skip this interface and all you can do is look for a way to bypass it if you don't have the Google account.
In some cases, you have to reset your phone to factory settings, before which you can't delete your associated Google account or even access your phone. For example, your phone is freezing or not booing, you forgot your phone's lock screen password, etc. If this is the case, your phone will inevitably display Google account verification after being reset.
If this happens to you, not to worry, here is how to bypass Google account verification after factory reset. All you need is the powerful and yet easy-to-use software tool - iSumsoft Android Password Refixer.
Download and install iSumsoft Android Password Refixer on your computer, then connect your phone to this computer, and then follow the steps below to bypass Google account verification. Don't worry. The whole process takes only a few minutes and a few clicks of your mouse, without any complex steps.
iSumsoft Android Password Refixer
Once iSumsoft Android Password Refixer is installed on your computer, it automatically creates a shortcut on your Windows desktop. So you just need to double-click the desktop shortcut to launch the software.
Then, you need to click the Install button at the top of the software interface (if displayed) to install the specific USB driver required by the software to detect the phone.

Choose the "Unlock Google Lock" option from the two options given on the software interface, and when you enter the next page, click the Start button to proceed.

The software provides a list of options for bypassing Google account verification on different Android versions. Simply select the first option "All Android Versions (2023 New method)" and click Next.

Now you need to follow the instructions on the software's screen to configure your phone to access the diagnostic menu. The specific procedures are as follows.

Your phone will receive a notification from the software and display the "Allow USB debugging" dialog. In this dialog, check "Always allow from this computer" and tap OK to allow USB debugging, which is the key to bypassing Google account verification on your Android phone. After that, click Next on the software screen.

The software will immediately begin bypassing the Google account verification on your phone, and you will shortly receive a success notification. Your phone will then restart itself and go to the Home screen, and you will be able to continue using it and add new Google accounts.

With this method, you can bypass FRP without computer, Talkback and SIM PIN. But before getting started, a new available phone, a USB cable and a USB connector are necessary.
Step 1: On the Emergency call page, tap Next > I have read and agree to all of the above > Next > Skip this for now > Next.

Step 2: Connect to the Wi-Fi network and the device will check for updates. Wait for the updates to complete. You will be taken to the Verification page, then tap Back.

Step 3: Back to the Bring your old data for quicker setup page, select Cable and USB connector option, then tap Next, and your device will update Smart Switch automatically. Then you will be prompted to use a USB connector and cable to connect to a new phone.

Step 5: On the new device, download and install Samsung Smart Switch Mobile and Apex Launcher from the Samsung Store.

Step 6: Launch the downloaded Smart Switch on the new device, and tap Send> Cable, and then connect the two phones together with a USB cable and a connector according to the onscreen instructions.

Step 7: On the new device, tap Allow from the dialog box. After the data has been transferred successfully, on the Choose what to bring page of the old device, select Apps only, and then tap it again. You need to uncheck All on the top, then scroll down the page to select the Apex Launcher application, then tap Done.

Step 8: When the data has been successfully transferred, unplug the USB cable and restart the old device. After rebooting, back to Check out some info to get started page, tap Terms and conditions > Terms of Service.

Step 9: On the new device, launch Smart Switch again and tap Send > Cable, then connect the two phones together with a USB cable and a connector according to the onscreen instructions.
Step 10: Now the old device will display Bring your data to your new phone, tap Receive data > Continue > Copied items > Apps > Apex Launcher. You will then be able to access your phone automatically, and you have successfully bypassed Google Account verification.

If you're going to (but haven't) reset your Android phone to factory settings, you should know which way to reset your phone to avoid Google account verification. You can do any of the following.