
The computer can automatically connect to the router if we have previously entered the WiFi password into the PC. However, there may be situations where you need to connect other devices to the same WiFi network, and you might not remember the password. In such cases, you can follow the methods below to view the WiFi password in Windows 11.
Note: You must first have a wireless card to connect to the WIFI (such as the wireless card that comes with the laptop or a desktop computer plugged with a USB wireless card) before you can view the WIFI password.

Step 1: Click Search button on the taskbar and enter "Control Panel" in the input box. Then select the best match.

Step 2: Click on View network status and tasks.

Step 3: Locate the hot spot connected to your computer, then select it.

Step 4: Choose Wireless Properties in the dialog box.

Step 5: Switch to Security tab, then check Show characters. Now you can view the WIFI password in Windows 11.

Step 1: Right-click on the Start button and select Windows Terminal (Admin).

Step 2: Click Yes to allow this app to make changes to your device.

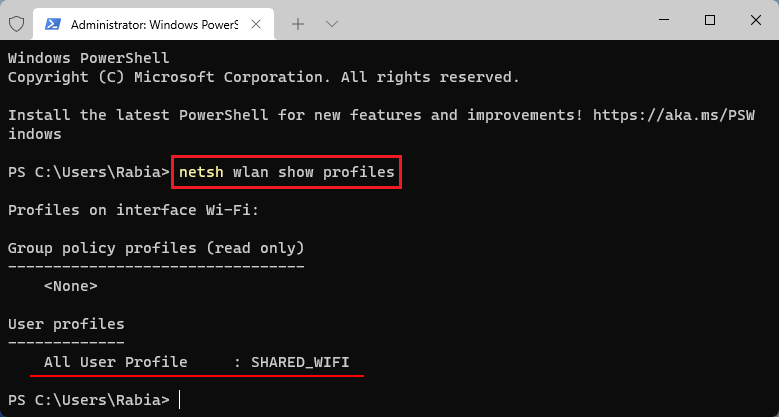
Step 3: Type netsh wlan show profiles and press Enter to check the name of the connected network. Here, my internet name is "SHARED_WIFI".
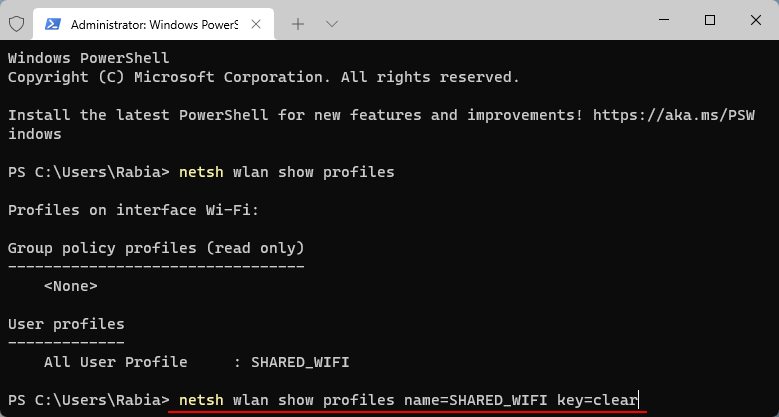
Step 4: Type netsh wlan show profiles name=SHARED_WIFI key=clear and hit Enter.
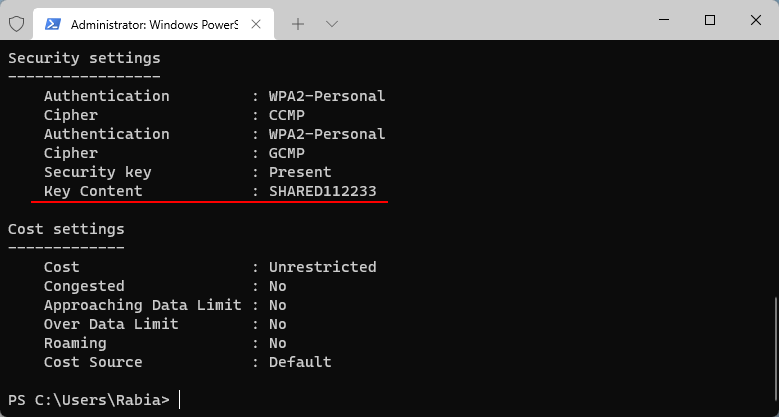
Step 5: The value of Key Content is the WIFI password.
 Solutions for
Recovering an Unsaved Word Document
Solutions for
Recovering an Unsaved Word Document
 How to Recover
Hidden Files from a Virus-attacked USB Drive
How to Recover
Hidden Files from a Virus-attacked USB Drive
 Permanently
Delete Files from Computer – No One Can Recover Them
Permanently
Delete Files from Computer – No One Can Recover Them
 3 Ways to
Recover Deleted Files from USB Flash Drive on Windows
3 Ways to
Recover Deleted Files from USB Flash Drive on Windows
 2 Methods for
the Recovery of Encrypted Word Files
2 Methods for
the Recovery of Encrypted Word Files
