
Restoring Windows 11 system from a system image backup can be a lifesaver in case of system failure, malware attacks, or other issues that prevent your system from working correctly. Windows 11 provides various ways to restore your system from a system image backup, depending on your needs and preferences.
In this article, we will introduce some of the most common ways. Whether you prefer to use built-in tools or third-party software, there is a solution that can help you restore your previous system quickly and easily.

Step 1: Insert USB drive (F disk) to your computer. Then right-click the Win icon and select Disk Management.

Step 2: Right-click on your USB drive and select Format. In the dialog box, rename Volume label USB. Then select OK button.

Step 3: Choose Search icon on the taskbar, input "Control Panel", and then select Open.

Step 4: Type Recovery in the search bar, then select Create a recovery drive.

Step 7: Click Yes to allow program make changes to your device.

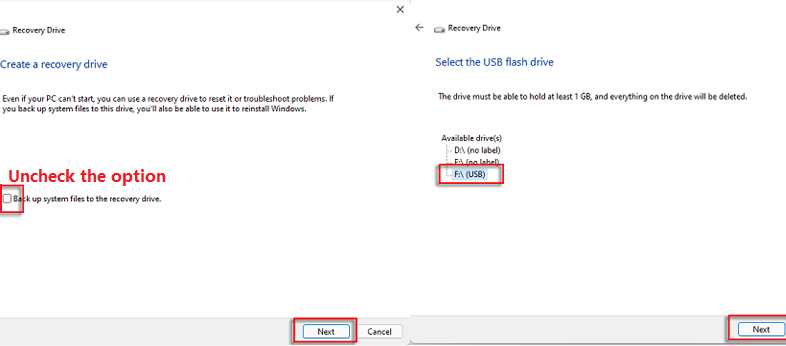
Step 8: Uncheck the "Back up system files to the recovery drive" and click Next to go forward. In the following dialog box, select your "USB drive" and click Next.
Step 9: Click Create to create a Recovery Drive.

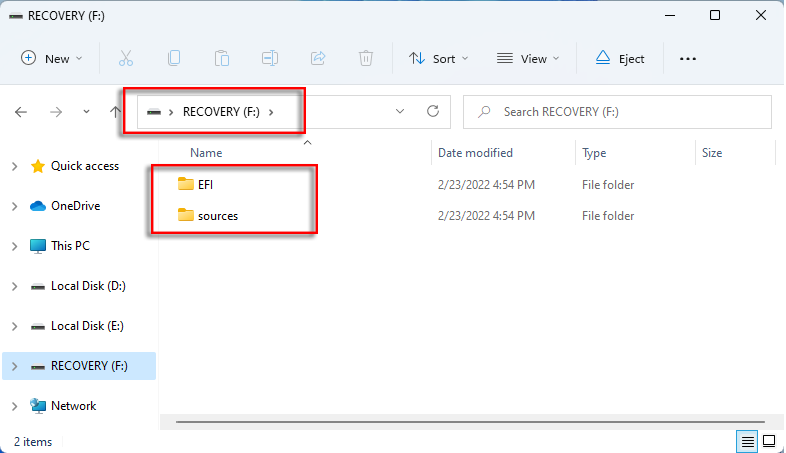
Step 10: After the operation, files are saved in the USB drive.
Step 11: Click Start » Settings » Recovery » Restart now in sequence.

Step 12: Click Restart now to proceed.

Step 13: Select Use a device » USB drive » US » Troubleshoot » System Image Recovery » Windows 11.

Step 14: Select Use the latest available system image » Next » Next » Finish » Yes.

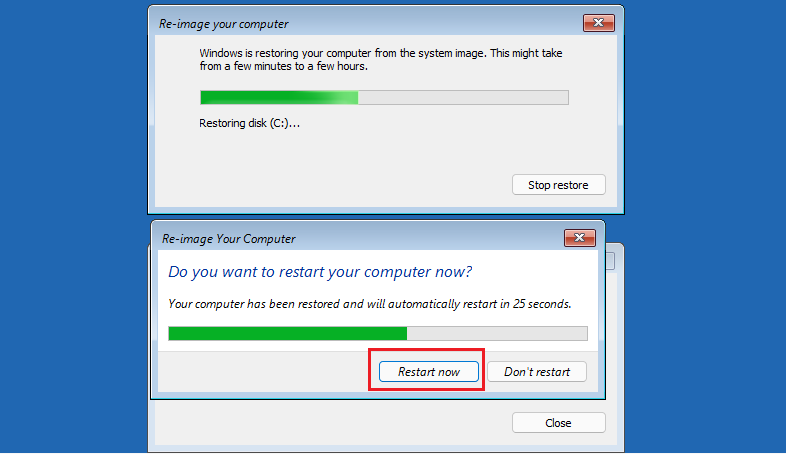
Step 15: Windows is restoring your computer from the system image. After the operation, click Restart now and you can access your previous system.
This method is used when the computer has crashed and cannot be started. With the third-party tool
iSumsoft Cloner, you can resolve the issue quickly
and easily without reinstalling system. Furthermore, this software can
restore your system without data loss.
(NOTE: Before using the tool, you need to enter
Windows PE (WinPE)
first. And then install the software
from external disk.)

Step 1: In WinPE, launch iSumsoft Cloner, and choose the Restore option.
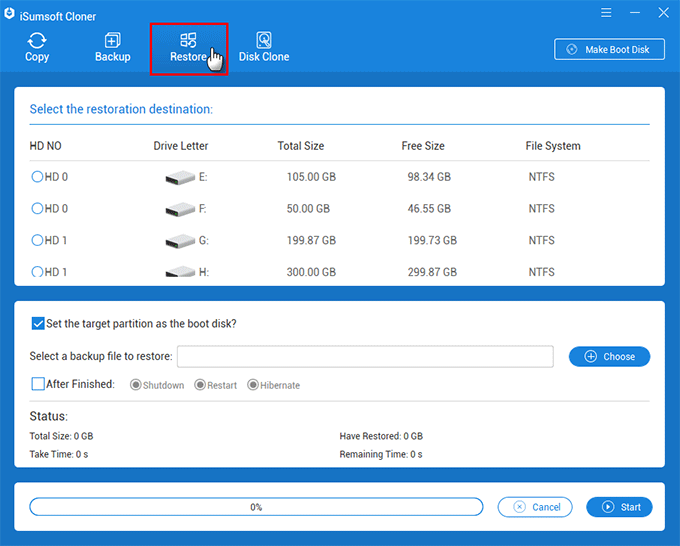
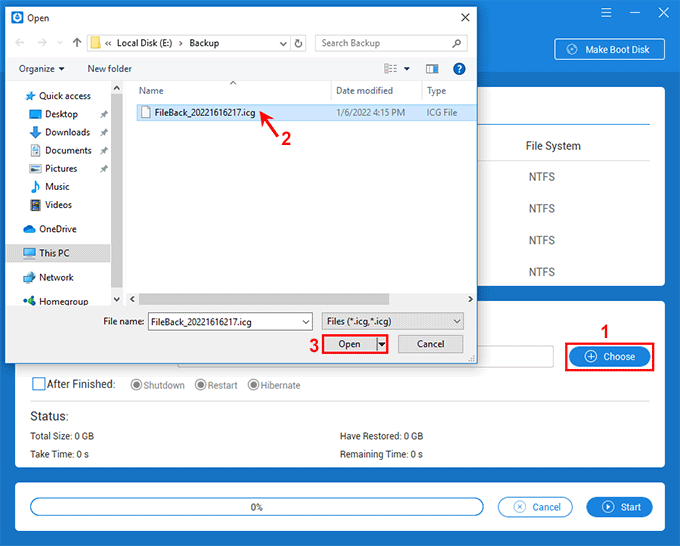
Step 2: Click the Choose button and then choose the backup file you need to restore.
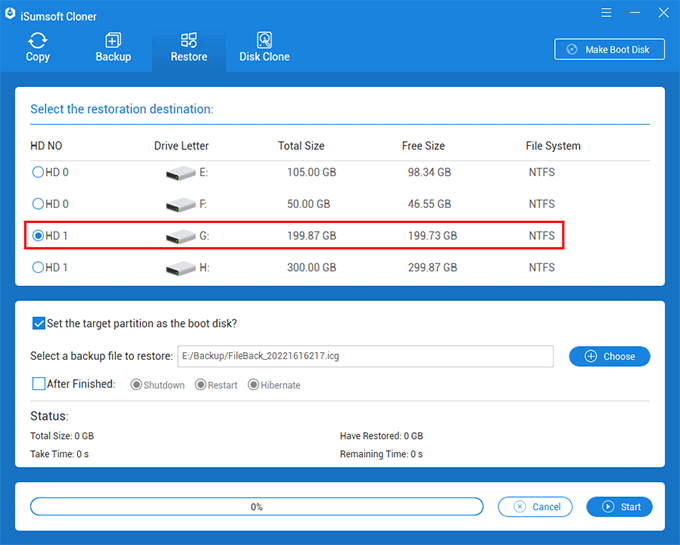
Step 3: Select the destination partition to which you will restore the backup from the volume list.
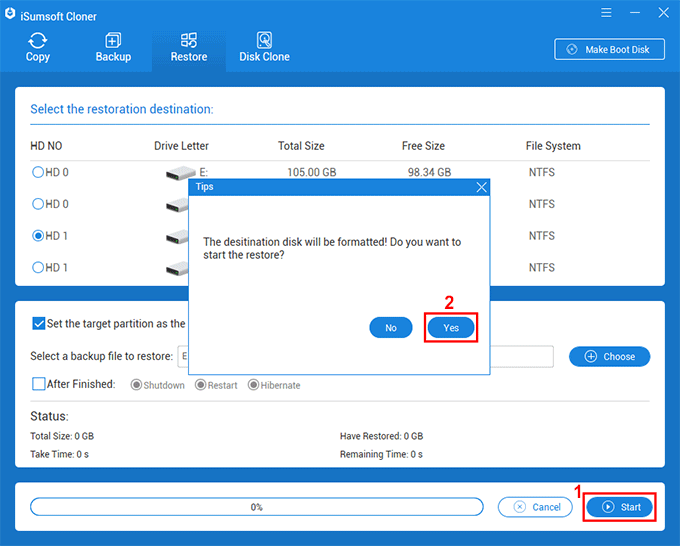
Step 4: Click Start to start restoring the backup file. When a dialog pops up asking if you are sure to start the restore, click Yes to continue. Note that this operation will format the destination partition.
Step 5: When you receive a success prompt on the interface, as shown in the following figure, it means the backup of the Windows OS or partition is restored successfully. Then restart the device and you can access the previous system.

Step 1: Download Windows 11 Disk Image (ISO) from the Internet, with English language and 64-bit Download.

Step 2: Insert USB drive (F) to your computer. Then right-click on it and select Format. In the dialog box, rename Volume label WINRE and choose FAT32 (Default) in the File system dropdown menu. Then select Start button.

Step 4: You will be prompted that all the data will be formatted, click OK to confirm.

Step 5: Navigate to the downloaded ISO file, right-click and select Mount.

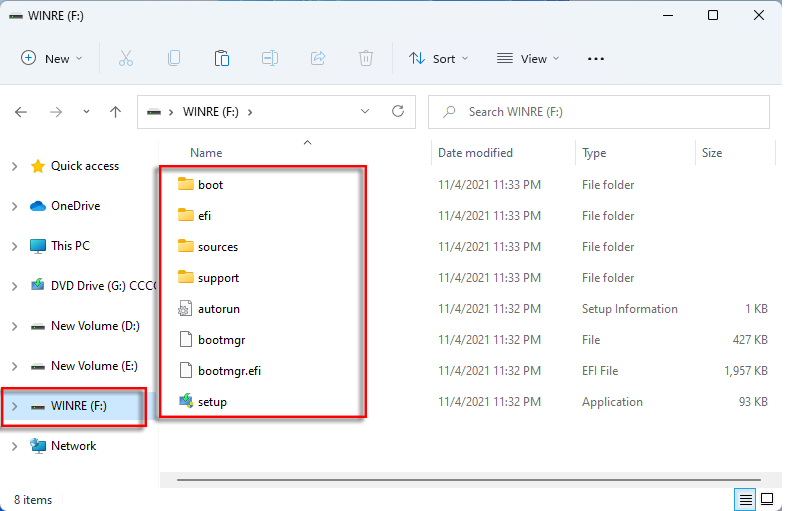
Step 6: Open the mounted folder, select all the files with "Ctrl + A" shortcut, then right-click to choose the Show more options » Send to » WINRE (F), copying to items to the USB drive.

Step 7: Choose Skip when a prompt box pops out.

Step 8: After the operation, you will find that the copied files are available in the F disk.
Step 9: Click Start » Settings » Recovery » Restart now in sequence.
Step 10: Click Restart now to proceed.
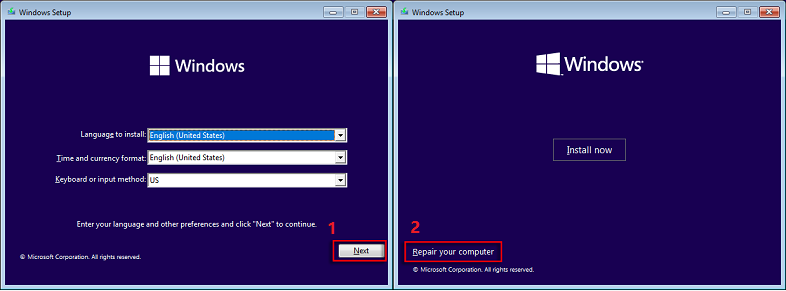
Step 11: Select Use a device » USB drive, then you will enter the Windows Setup interface.

Step 12: Choose Next » Repair your computer to enter Winre.
Step 13: Enter Troubleshoot » System Image Recovery » Windows 11.

Step 14: Select Use the latest available system image » Next » Next » Finish » Yes.
Step 15: Windows is restoring your computer from the system image. After the operation, click Restart now and you can access your previous system.
 Easily
Migrate Windows 11 to New m.2 SSD without Reinstalling
Easily
Migrate Windows 11 to New m.2 SSD without Reinstalling
 How to
Create an Administrator Account in Windows 8/8.1
How to
Create an Administrator Account in Windows 8/8.1
 Cannot
Sign into Microsoft Account on Windows 10
Cannot
Sign into Microsoft Account on Windows 10
 Fix:
Windows 10 Won't Let Me Enter Password at Login Screen
Fix:
Windows 10 Won't Let Me Enter Password at Login Screen
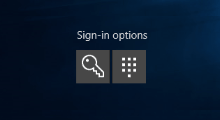 How
to Add Sign-in Options for User Account on Windows 10
How
to Add Sign-in Options for User Account on Windows 10
