This article will show you how to install Windows 10 directly onto a USB external hard drive or flash drive. The installed Windows 10 is a full version of Windows 10 that can be started. When you boot from the USB drive on any computer, Windows 10 runs directly from the USB drive.

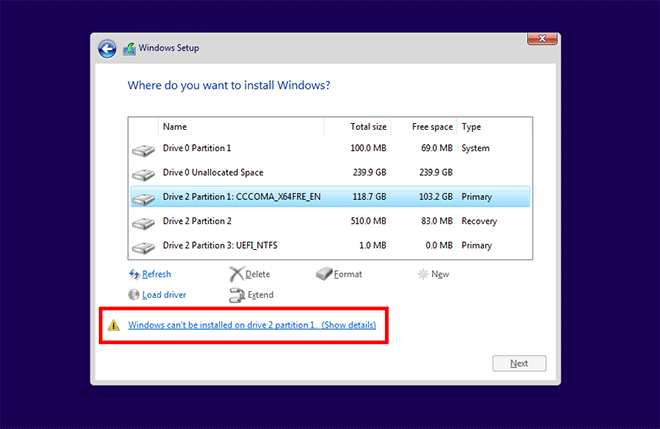
If you try to install Windows 10 onto your USB drive in the typical way, that is, boot your computer from a Windows 10 installation media and then select your USB drive as the installation destination, you will end up with failure. Windows Setup will display the warning message "Windows can't be installed on drive", as shown in the figure below.
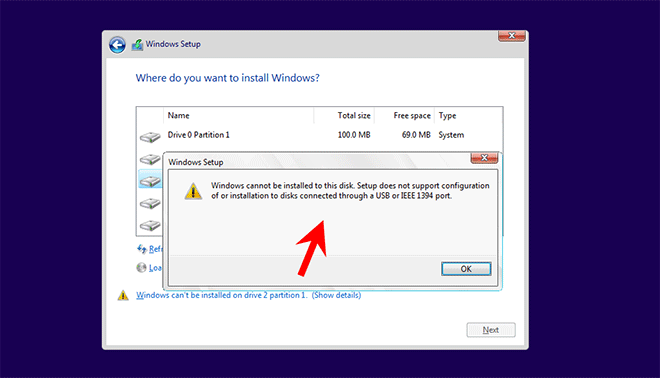
When you click on that warning message, it says "Windows cannot be installed to the disk. Setup does not support configuration of or installation to disks connected through a USB or IEEE 1394 port."
Obviously, you can't install Windows 10 to a USB flash drive or external hard drive using the Windows Setup wizard. But don't worry. The following methods will help you easily install Windows 10 directly onto a USB external hard drive or flash drive.
Rufus is a utility that can help you install Windows 10 directly to a USB flash drive or external hard drive and make it bootable.
Step 1: Download a Windows 10 ISO file onto your computer, and insert a USB flash drive or external hard drive into one of USB ports of your computer.
Step 2: Download the Rufus program onto your computer. After downloading, launch Rufus directly without installation.
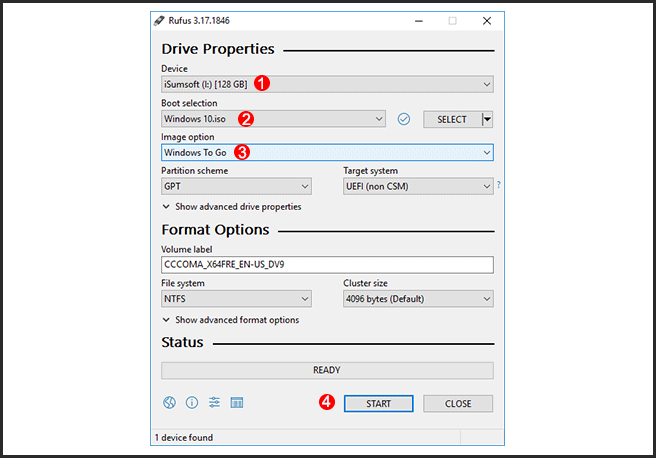
Step 3: On Rufus, select the USB drive to which you want to install Windows 10 from the Device drop-down menu at the top. If the USB drive you've inserted is not displayed in the Device drop-down menu, you need to expand the "Hide advanced drive properties" section and check the "List USB Hard Drivers" checkbox under that section.
Step 4: Click the SELECT button, locate the Windows 10 ISO file saved on your computer, and then add it to Rufus. The added Windows ISO file will be displayed under "Boot selection".
Step 5: Select the Windows To Go option from the "Image option" drop-down menu, then click the START button at the bottom.
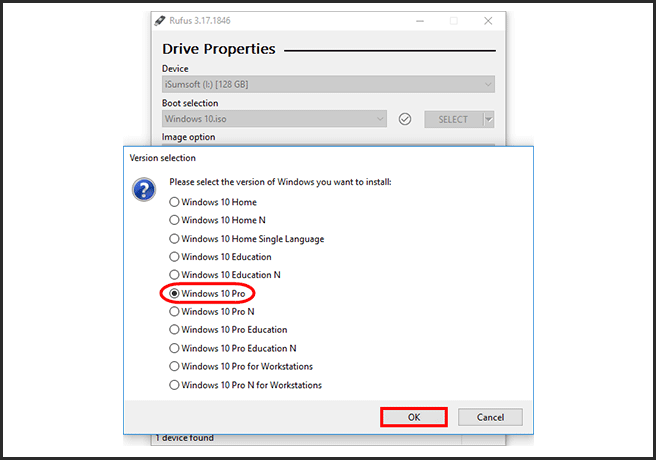
Step 6: If the added ISO file contains multiple Windows 10 versions, you will need to select the Windows 10 version you want to install to your USB drive and click OK.
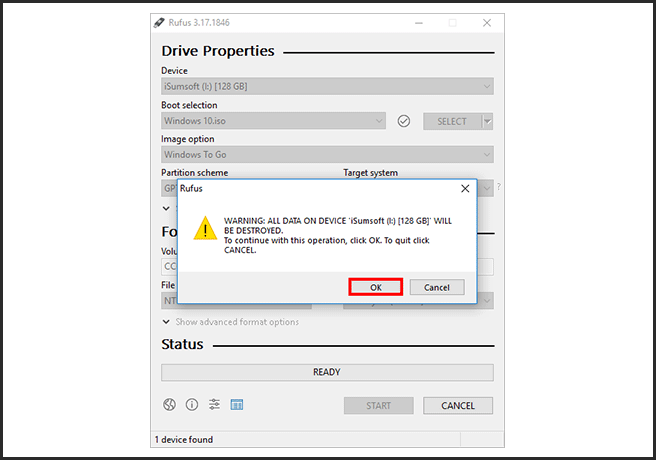
Step 7: Rufus will pop up a warning dialog box to remind you that the USB drive will be erased. Click OK and Rufus will immediately start installing Windows 10 onto your USB drive.
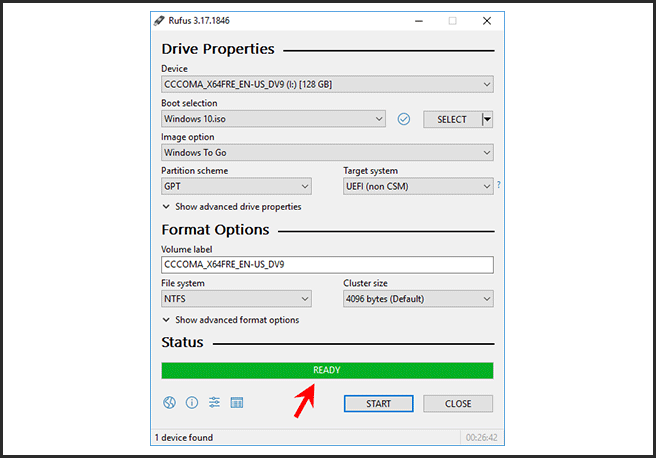
Step 8: Keep your USB drive connected and wait for the installation process to complete. When the Status bar at the bottom shows Ready, it means that Windows 10 has been successfully installed to your USB drive.
![]()
iSumsoft SYSOnUSB is another powerful and yet easy-to-use tool that helps you effortlessly install Windows 10 directly onto a USB external hard drive or flash drive.
Step 1: Similarly, you need to download the Windows 10 ISO file to your computer, and insert a USB flash drive or external hard drive into one of USB ports of your computer.
Step 2: Download and install iSumsoft SYSOnUSB onto your computer. After installation, launch this tool.
Step 3: On iSumsoft SYSOnUSB, select the USB drive to which you want to install Windows 10 from the Select drop-down menu in the top right corner.
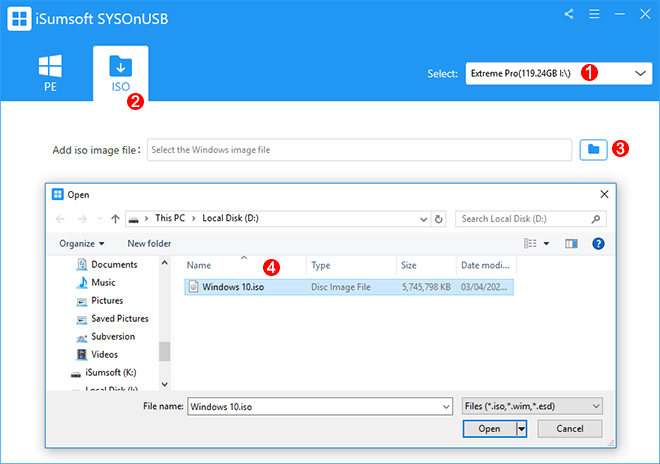
Step 4: Select the ISO option in the upper left, and then click the file icon under this option to add the Windows 10 ISO file to the software.
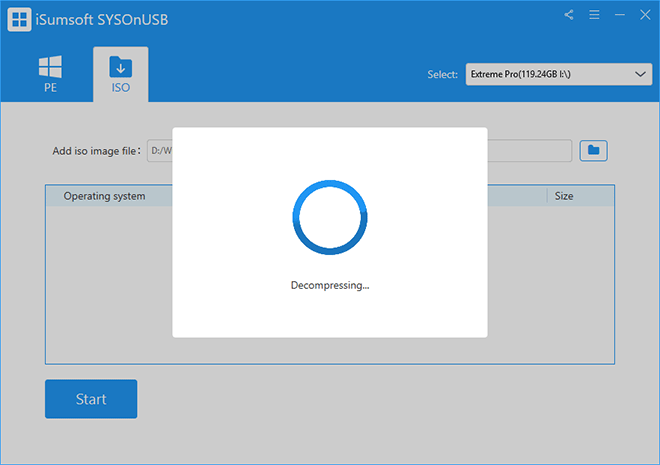
Step 5: After adding the ISO file, the software will automatically extract Windows 10 operating systems from the ISO file, and then display them on the screen.
Step 6: Select the Windows 10 version you want to install to your USB drive, and then click the Start button. The software will immediately start installing Windows 10 onto your USB external drive.

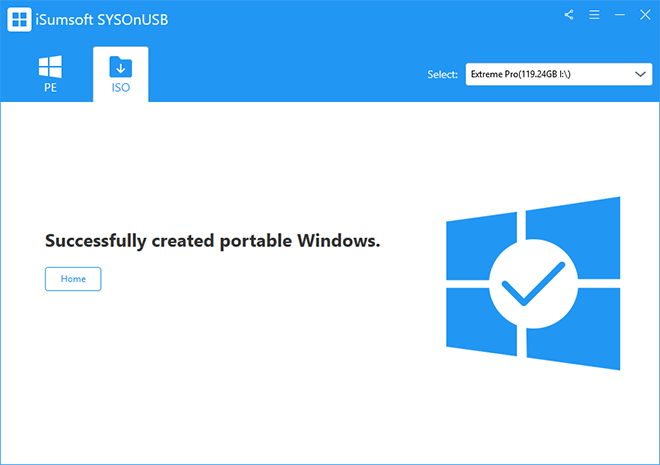
Step 7: Wait for the installation to complete. This takes about 20 minutes, depending on the write speed of the USB drive. When the software page displays a success message, as shown in the figure below, it means Windows 10 has been successfully installed to your USB external drive.
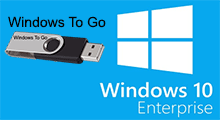
In fact, earlier versions of Windows 10 enterprise and Windows 10 Education come with Windows To Go wizard that helps you install Windows 10 onto certain USB flash drives or external hard drives. However, this feature has some limitations. It requires the use of Microsoft certified USB drives and it is no longer available in Windows 10, version 2004 (Windows 10 May 2020 Update) and later. So that's why we put this method last.
If you happen to be running Windows 10 Enterprise/Education prior to version 2004 and have a Microsoft-certified USB drive, follow the steps below.
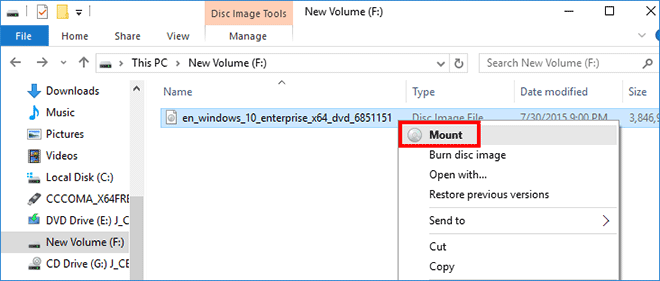
Step 1: Download the Windows 10 Enterprise ISO file or Windows 10 Education ISO file onto your computer, depending on the Windows 10 version running on your current computer. Once the download is complete, right-click the ISO file and select Mount from the context menu to mount the ISO on your computer.
Step 2: Insert a Microsoft-certified USB flash drive or external hard drive into one of USB ports of your computer.
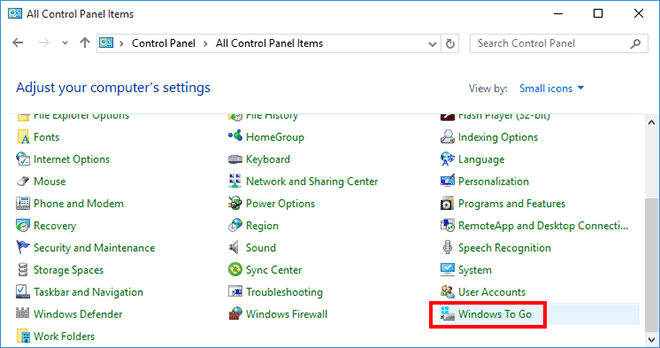
Step 3: Open Control Panel, select View by small icons, and then click the Windows To Go option.
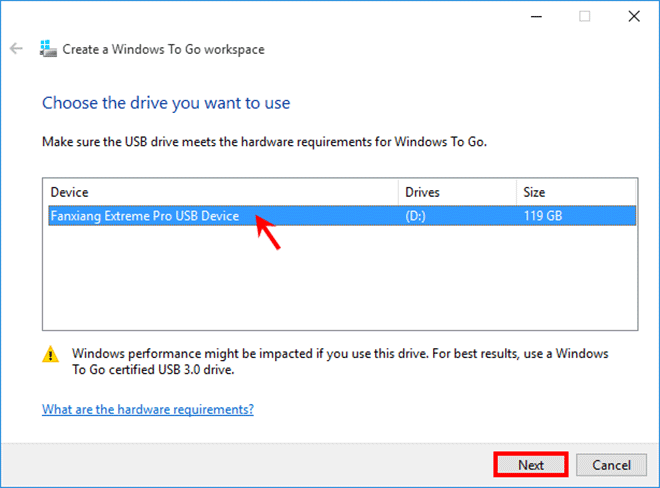
Step 4: The Windows To Go wizard opens and it automatically searches for the USB drive connected to your computer. Select the USB drive and then click Next.
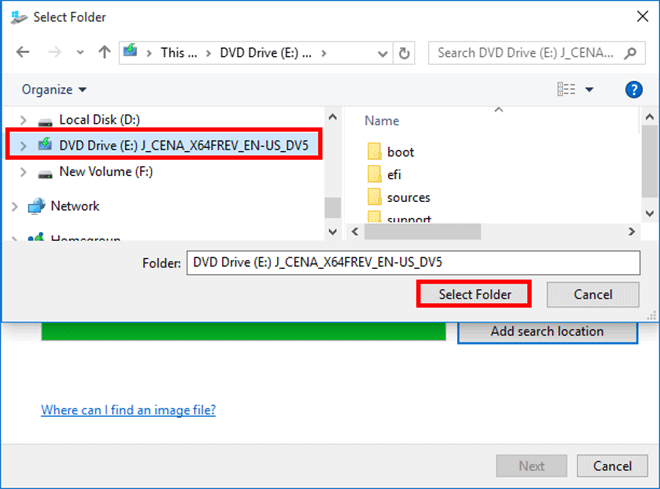
Step 5: On the "Choose a Windows image" page, click the Add search location, then select the DVD drive of the Windows 10 ISO file you've mounted on your computer. After selection, click Select Folder to confirm.
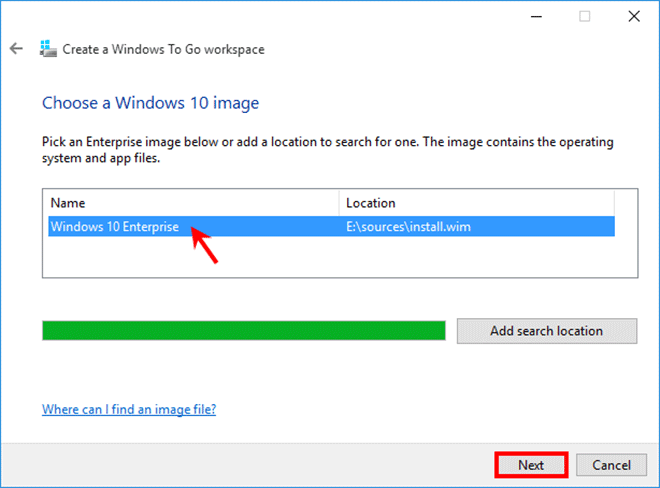
Step 6: When you get back to the "Choose a Windows 10 image" page, select the Windows 10 install.wim file and click Next.
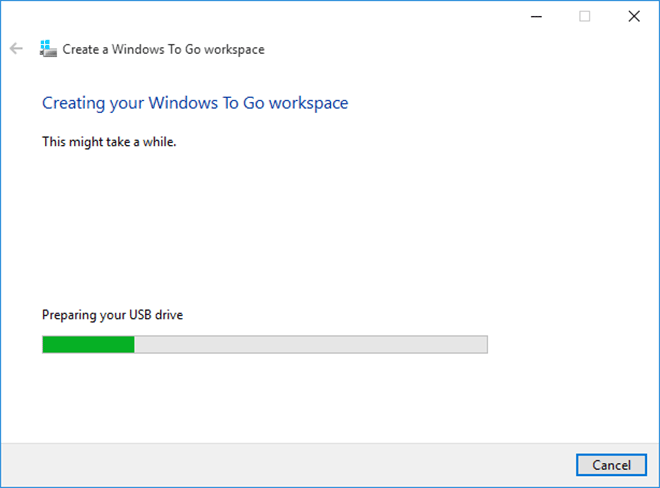
Step 7: Click Skip > Create, and the wizard will start installing Windows 10 Enterprise/Education onto your USB external drive. Then just wait for the installation to complete.
You may also be interested in How to Copy Existing Windows 10 to USB and Make It Bootable.