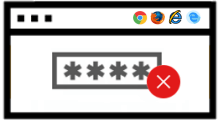
Quick answer: Chrome autofill usually stops working because autofill is disabled, sync is off, saved data is missing, the website blocks autofill, an extension conflicts with Chrome, or the Chrome profile is corrupted.
Chrome can fill passwords, payment methods, addresses, contact info, and other saved form data when the right settings are enabled. If Google Chrome autofill is not working on your Windows PC, Mac, Android phone, or iPhone, use the checks below in order. The steps are written for current Chrome settings and include notes for older screenshots where the menu name may still appear as Autofill instead of Autofill and passwords.
Reviewed against Google Chrome Help on June 10, 2026. Google notes that Chrome may fail to suggest saved info when the website is not secure enough or when Chrome cannot detect the fields in the form.
Before you clear data or create a new profile, identify what is failing. This prevents unnecessary data loss and points you to the fastest fix.
| What is not working | Most likely cause | Try first |
|---|---|---|
| Passwords do not fill | Password saving is off, the site is in the declined list, or the wrong Google account is signed in | Check Google Password Manager and remove the site from declined saves |
| Payment cards do not appear | Payment autofill is off, the card is only in Google Wallet, or the site is not secure enough | Check Payment methods and Google Wallet |
| Address or contact info does not fill | Saved address/contact info is missing or the wrong Chrome profile is active | Check Addresses and more, Contact info, and Chrome sync |
| Autofill fails on one website only | The website blocks autofill, uses unsupported form fields, or is not secure enough | Try another secure site and update the form manually |
| Autofill works in a new profile | The old Chrome profile, extension setup, or local cache is corrupted | Disable extensions, reset Chrome settings, or migrate to a clean profile |
Chrome autofill changes over time, especially around Google Password Manager, passkeys, Google Wallet, and enhanced autofill. Updating Chrome should be the first fix if the settings page looks different from screenshots or if autofill recently stopped after a browser crash.
Step 1 On a desktop or laptop, open the Chrome menu, point to Help, and click About Google Chrome.
Step 2 Chrome will check for updates automatically. If an update is installed, click Relaunch.
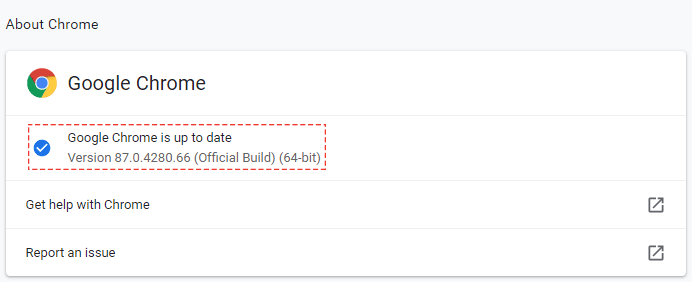
On Android and iOS, just search for "Chrome" in the Play Store or App Store and click "Update" to apply the latest Chrome update (if available).
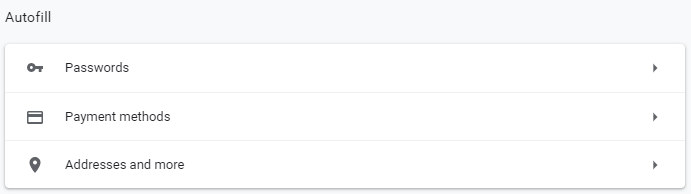
If Chrome does not fill passwords, cards, addresses, or contact details, first confirm the relevant autofill category is turned on. In current Chrome, open Settings > Autofill and passwords. In older Chrome builds, the same area may appear as Autofill.
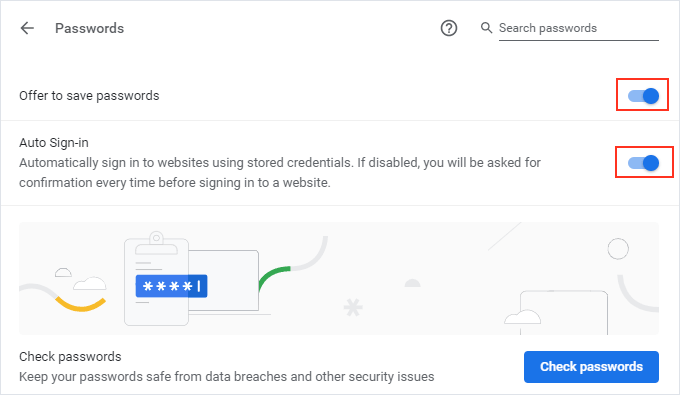
Step 1 Open the Chrome menu and click Settings. Select Autofill and passwords on the left side.
Step 2 Open Google Password Manager. In Settings, turn on Offer to save passwords and passkeys. If you want Chrome to submit saved sign-in info without asking every time, also check the automatic sign-in setting.
If Chrome does not offer to save or fill passwords on one website, you may have previously selected Never when Chrome asked to save the password. In current Google Password Manager, these sites appear under declined sites and apps.
Step 1 Go to Settings > Autofill and passwords > Google Password Manager.
Step 2 Open Settings and find the declined sites list. Remove the site where you want Chrome to start saving and filling passwords again.
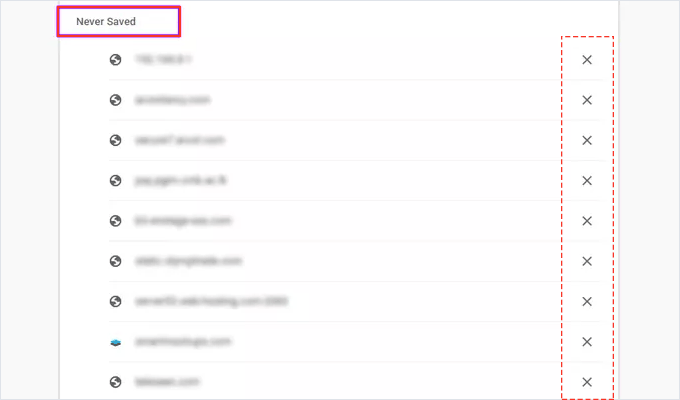
Step 3 Return to the website, sign in manually once, and choose Save when Chrome asks to save the password.
Password autofill and form autofill are managed in different areas. If passwords work but cards, names, phone numbers, addresses, or other form details do not, check each saved-info category.
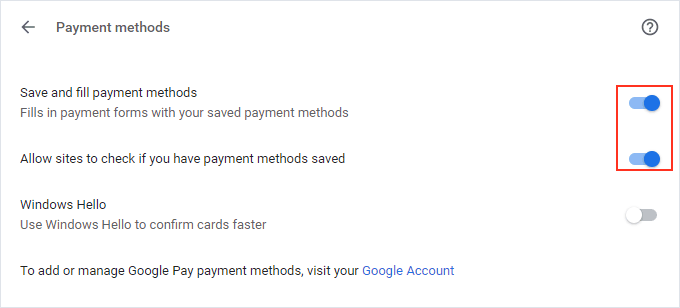
Step 1 Go to Settings > Autofill and passwords > Payment methods. Turn on Save and fill payment methods.
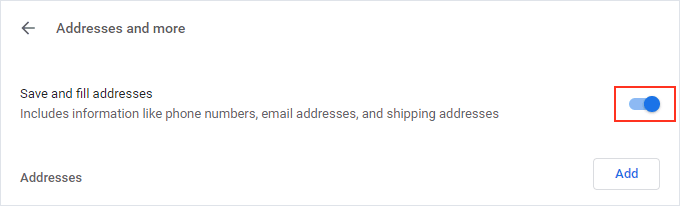
Step 2 Go to Addresses and more, then turn on Save and fill addresses. Edit or delete outdated entries if Chrome is filling the wrong address.
Step 3 If Chrome shows Contact info, Identity docs, Travel, or Enhanced autofill, open those sections and confirm the data is saved and allowed. Google says enhanced autofill is off unless you choose to turn it on, and it works only with limited websites and forms.
Note: Payment methods stored in Google Pay or Google Wallet may need to be edited from the Google payment or wallet page rather than only inside local Chrome settings.
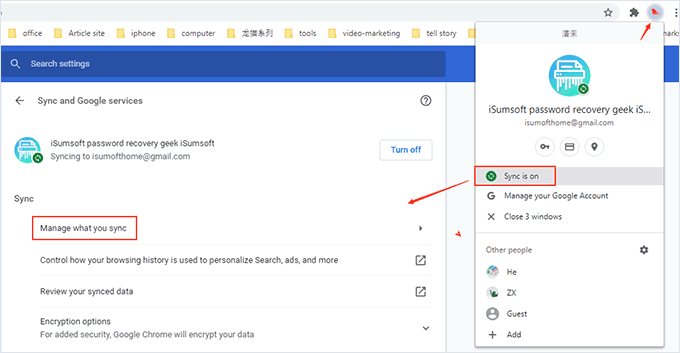
If autofill works on one device but not another, Chrome sync is often the cause. Sync can carry passwords, addresses, payment methods, and related Google services between signed-in devices.
Step 1 Click the profile icon in the top right corner of Chrome. If sync is off, click Turn on sync and sign in to the correct Google account.
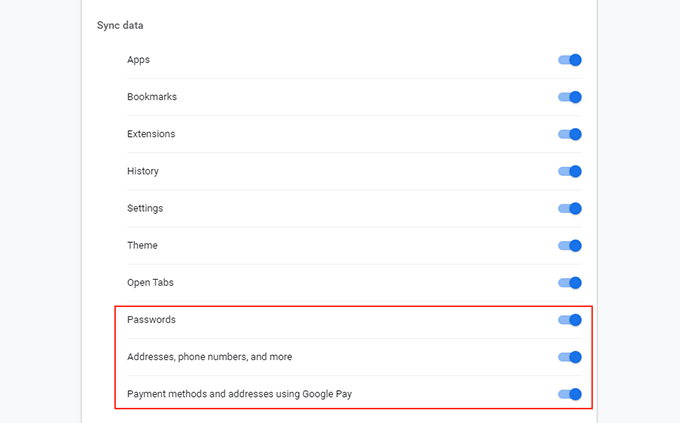
Step 2 Click Manage what you sync.
Step 3 Make sure the switches for passwords, addresses, phone numbers, and payment methods are enabled. If you use multiple Google accounts, confirm that Chrome is signed in to the account that actually stores the autofill data.
Sometimes Chrome is working correctly, but a particular website is not a good match for autofill. Google Chrome Help notes two common reasons: the website may not be secure enough, or Chrome may not detect the fields in the form.
Password managers, privacy extensions, coupon extensions, ad blockers, script blockers, and form helper extensions can conflict with Chrome autofill. Use Incognito mode and extension testing to isolate the conflict.
Step 1 Open a new Incognito window with Ctrl + Shift + N on Windows or Command + Shift + N on Mac.
Step 2 Try the same form. If autofill works in Incognito after you allow the needed password manager access, an extension in the normal profile is likely interfering.
Step 3 Open chrome://extensions/, disable extensions one by one, and test autofill again. Start with extensions that modify forms, block scripts, or manage passwords.
Cached files and cookies can break a form after a website update, but clearing data can also sign you out of websites. Use this step after checking autofill settings, sync, and extensions.
The fastest way to open the clearing tool in Google Chrome is to press Ctrl + Shift + Delete on Windows, or Command + Shift + Delete on Mac.
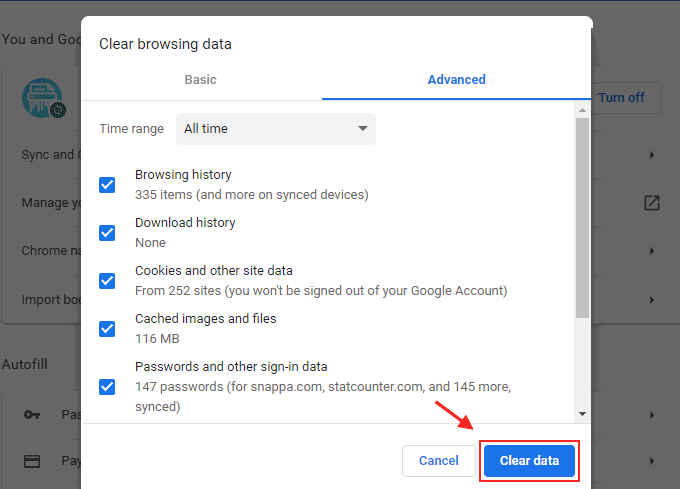
In the Advanced tab, choose a time range. To fix a single website, start with a shorter range or clear that site's cookies first. To remove saved form entries, select Autofill form data. Google notes that this does not delete payment info and addresses stored in Google Pay.
Tip: If the problem affects only one site, clearing that site's cookies is usually safer than deleting all cookies and cache from every website.
A corrupted Chrome profile can prevent autofill from working even when the settings look correct. Before creating a new profile, try resetting Chrome settings. Resetting Chrome turns off extensions and restores startup pages, search engine, pinned tabs, content settings, cookies, and site data, but it should not remove bookmarks or saved passwords.
You can follow our full guide to reset Chrome without losing saved passwords. If Chrome still does not autofill after a reset, create a clean profile.
Step 1 Open Chrome and click your account icon in the top right corner.
Step 2 From the account menu, select Add.
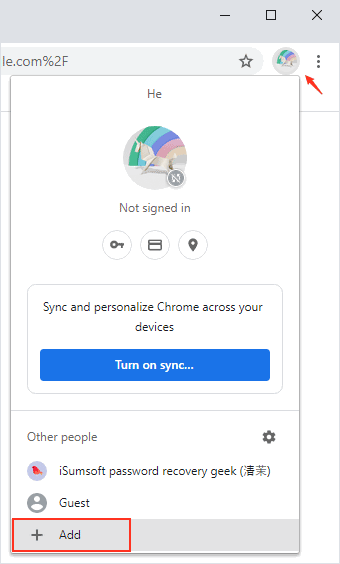
Step 3 A new pop-up window will open. Type a name for your profile and select a profile image from the given list. You can edit both of them later. Click on Add at the bottom.

Step 4 You will be taken to the newly created Chrome profile. Sign in with the Google account that stores your passwords and autofill data, then test the same website again.
If Chrome autofill is not working on Android or iPhone, check both Chrome and the phone's autofill settings. The browser may be updated, but the device may still be using a different autofill service for apps and forms.
For current Google instructions, check these official pages: Fill out forms automatically in Chrome, Manage passwords in Chrome, and Sign in to Chrome.
Chrome may not fill passwords if password saving is turned off, the site is in the declined list, the saved password belongs to another Google account, the page uses unsupported sign-in fields, or an extension is blocking the form.
Open Google Password Manager and make sure Offer to save passwords and passkeys is turned on. Then remove the site from declined password saves and sign in again.
The website may block browser autofill, use form fields that Chrome cannot detect, or load the form inside a third-party frame. Test another secure site to confirm whether Chrome or the website is the cause.
No. Clearing local autofill form data in Chrome does not delete payment methods and addresses stored in Google Pay or Google Wallet. Manage those entries from the Google payment or wallet page.
Create a new profile only after you have updated Chrome, checked autofill settings, tested extensions, and reset Chrome settings. A new profile is useful when the old profile is corrupted, but it also requires you to sign in and sync your data again.