To maintain the system security of your computer or bring new features to your Windows, Windows is updated automatically every month. However, a new version may cause conflict with old programs or other problems. To avoid this, you can enable or disable automatic updates in Windows. If there is a problem with your computer after Windows update, you are recommended to uninstall a Windows update to go back to previous version of Windows 10 without losing data.
To uninstall a Windows Update, the simplest way is uninstalling it in Control Panel directly.
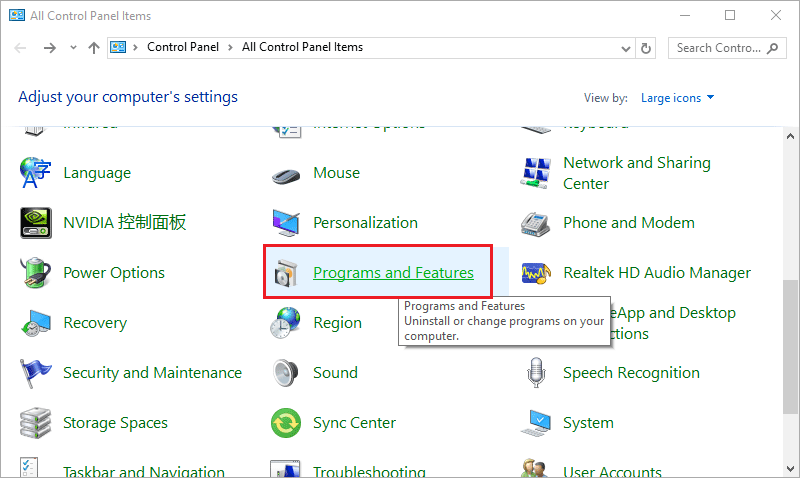
Step 1: Enter control panel on the search bar and double click Control Panel to open it.

Step 2: Find Programs and Features and double click it to open it.
Step 3: Click View installed updates.
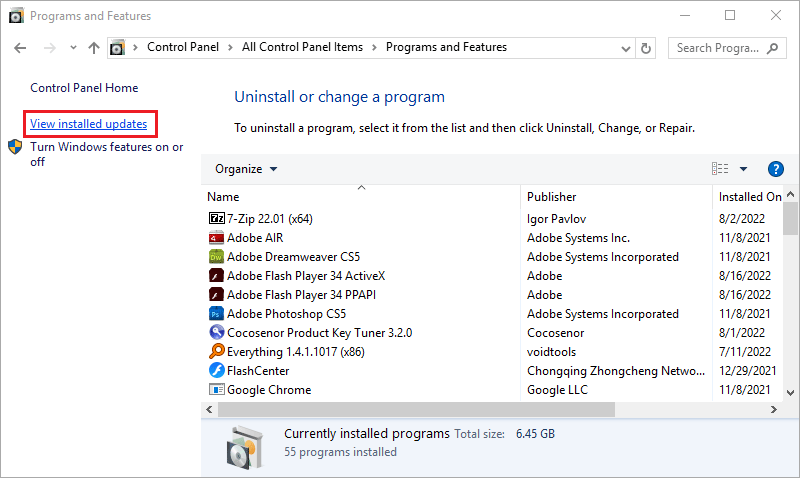
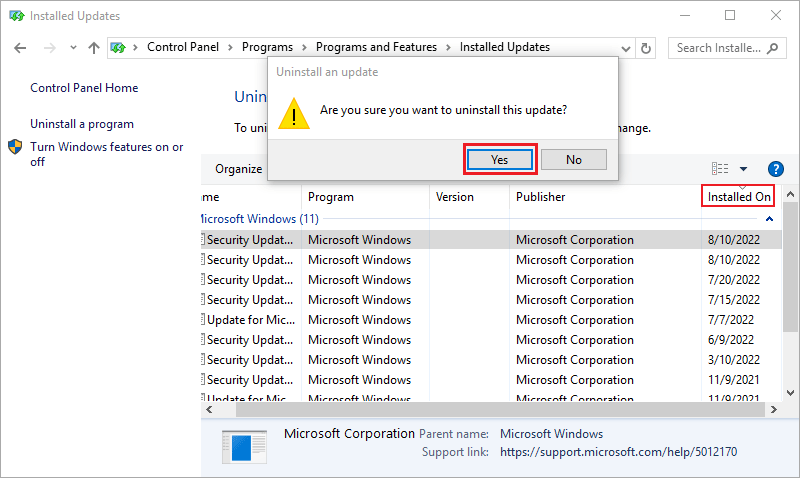
Step 4: Every Windows Update will be displayed on this page. You can right-click a version you want to uninstall and click Yes to uninstall it.
Tips: If you don't know which one is the version you want to uninstall, you can click Installed On to identify them with the installing date.
In this way, you can learn the content of every Windows Update before uninstalling it.
Step 1: Press Win key or click Windows icon and then click Settings icon.

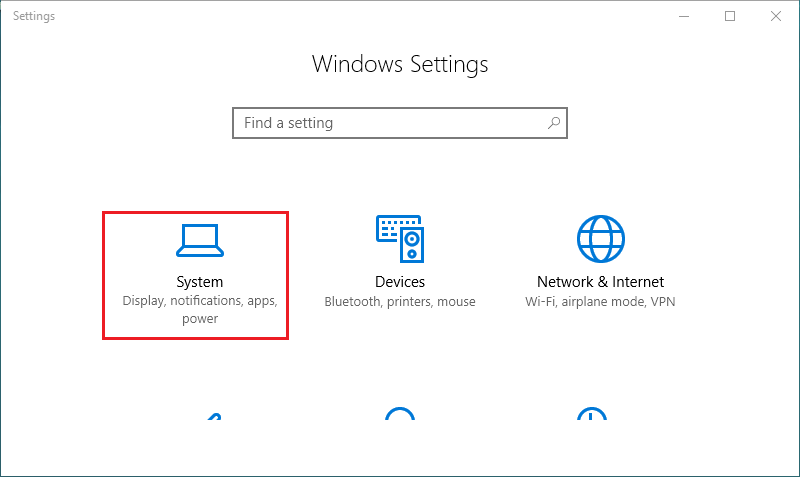
Step 2: Click System.
Step 3: Click Update and Security.

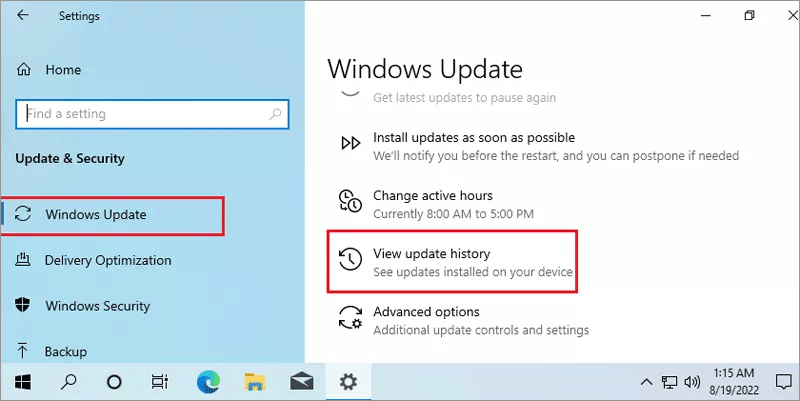
Step 4: In the Windows Update tab, click View update history.
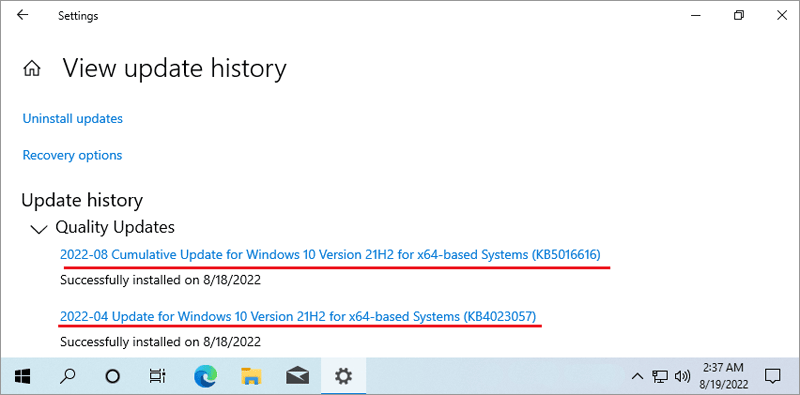
Step 5: Before uninstallation, you can click them to see the features of the version.
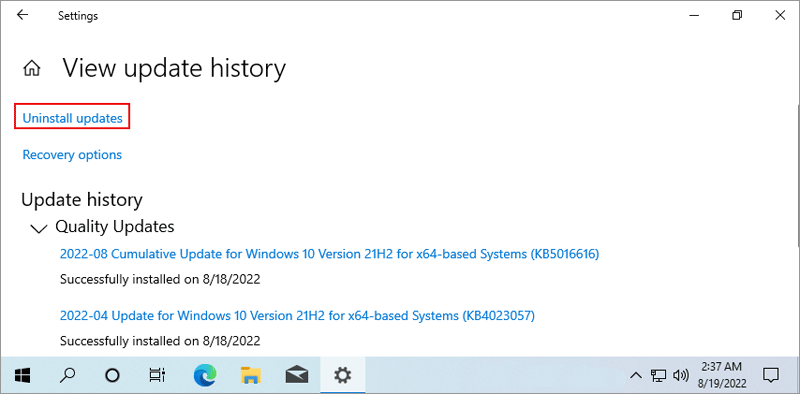
Step 6: Click Uninstall updates.
Step 7: Every Windows Update will be displayed on this page. You can double click a version you want to uninstall and click Yes to uninstall it.
If you just want to uninstall the latest update, this way may be the most appropriate.
Step 1: Press Win key or click Windows icon and then click Settings icon.
Step 2: Click System.
Step 3: Click Update and Security.
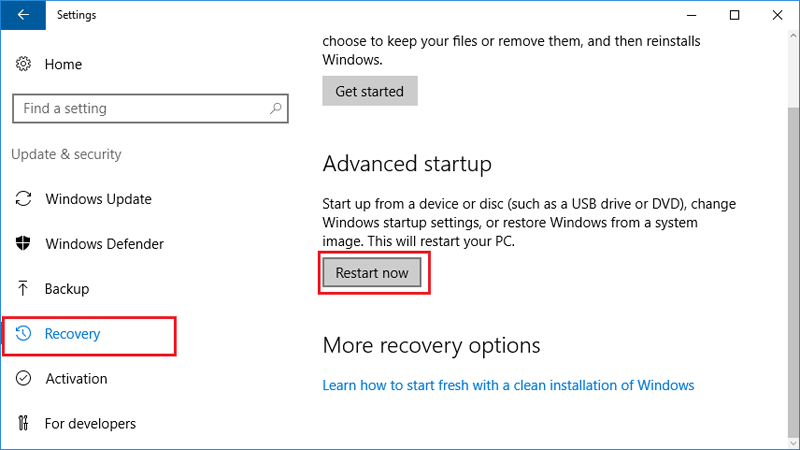
Step 4: Select the Recovery tab and click Restart now below the Advanced startup.
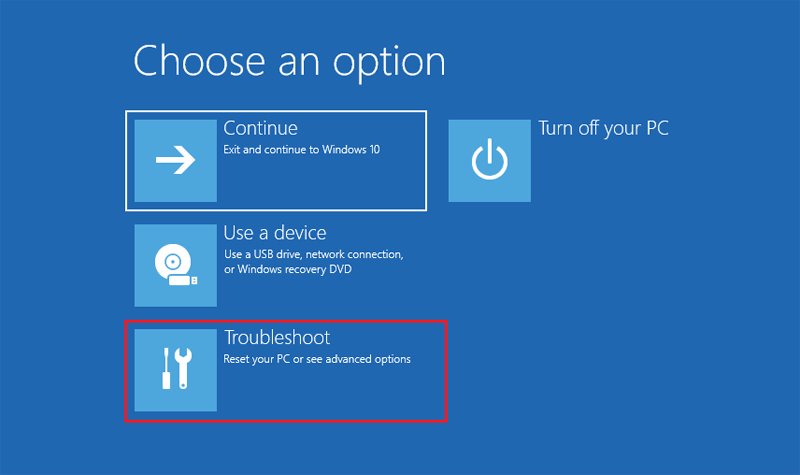
Step 5: After restart, click Troubleshoot.
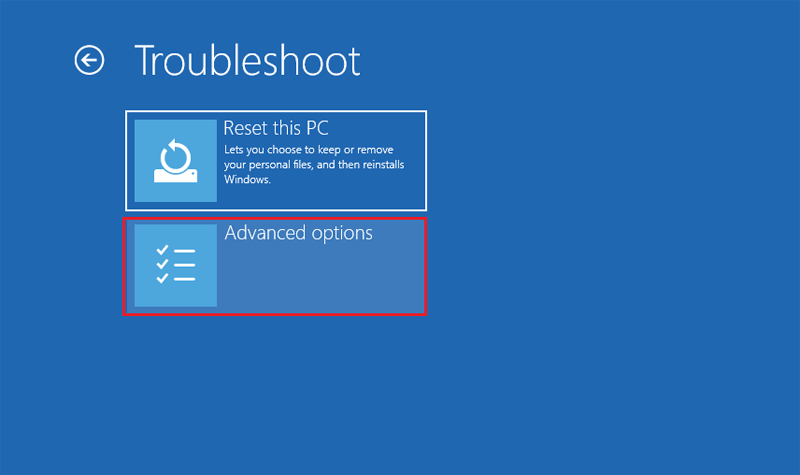
Step 6: Click Advanced options.
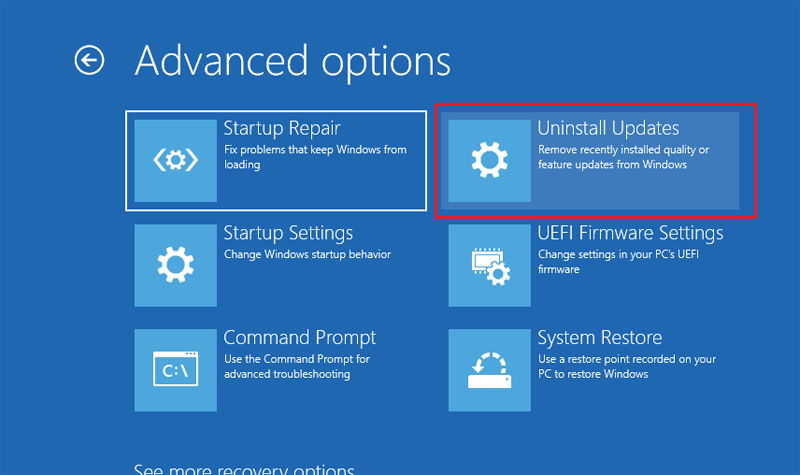
Step 7: Click Uninstall Updates.
Step 8: Select a user and enter the password.
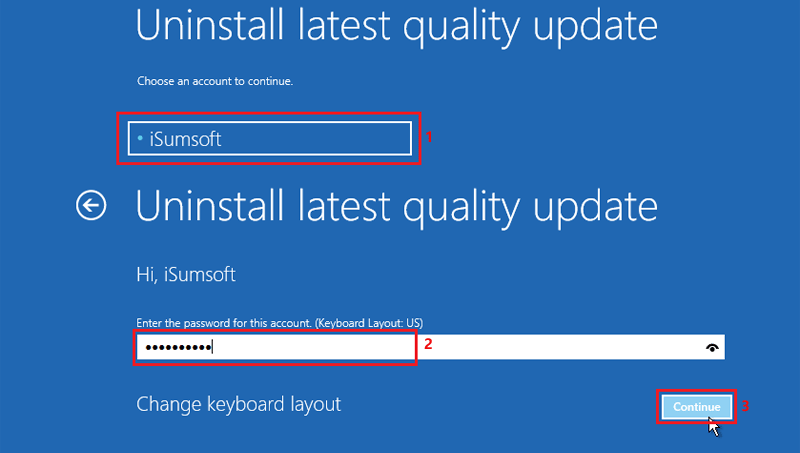
Step 9: There are two options on this page. We choose Uninstall latest quality update and then complete the simple operations according to the prompt.
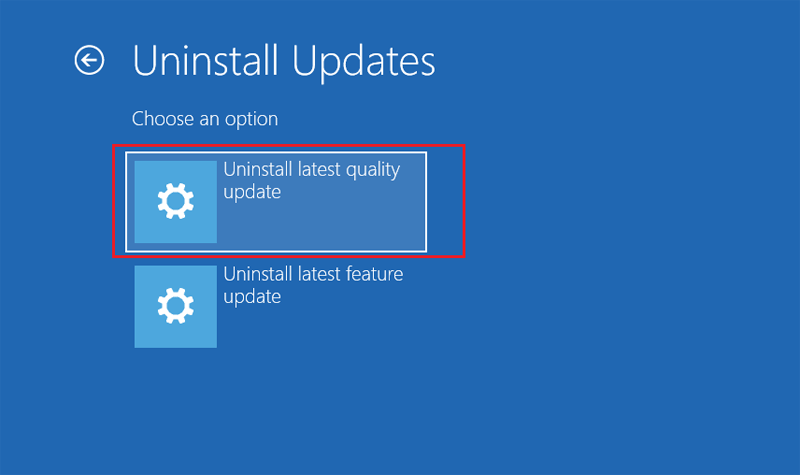
Tips: Quality Update refers to maintaining the system security of the computer, which will be done every month. Feature Update will bring some new functions to your computer, which will occur twice a year. Generally, Quality Update is more likely to cause problems on your computer but not Feature Update.
Is there a stubborn Windows Update that cann't be deleted on your computer? Worry not, this part tells you how to roll back Windows update using cmd.
Step 1: Repeat the Step 1 – Step 3 in Way to show the installed updates. Behind the name of every item, KBxxxx is the id of it. Find the version you want to delete and write down the id which will be used next.

Step 2: Enter cmd in the search bar, right-click Command Prompt, and then click Run as administrator to open it.

Step 3: Enter the command wusa /uninstall /kb:xxxxxxx, press the Enter key, and then click Yes to close the confirmation dialog.

Tips: Replace xxxxxxx with the id you wrote down in Step 1.
If you are lucky, you will uninstall the update successfully. But it may prompts that it can't be uninstalled.
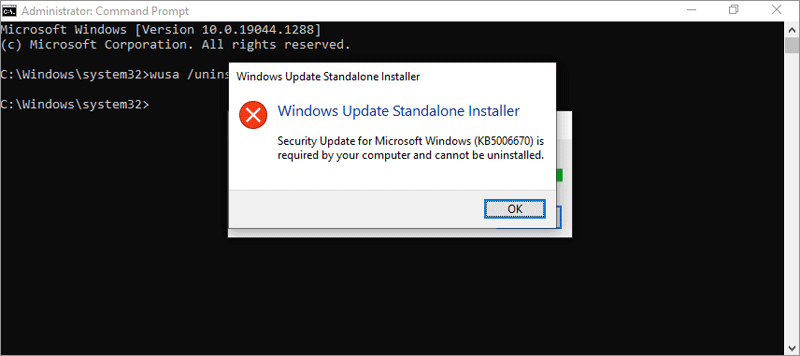
So, how do I force a Windows Update to uninstall? Pease follow the steps below.
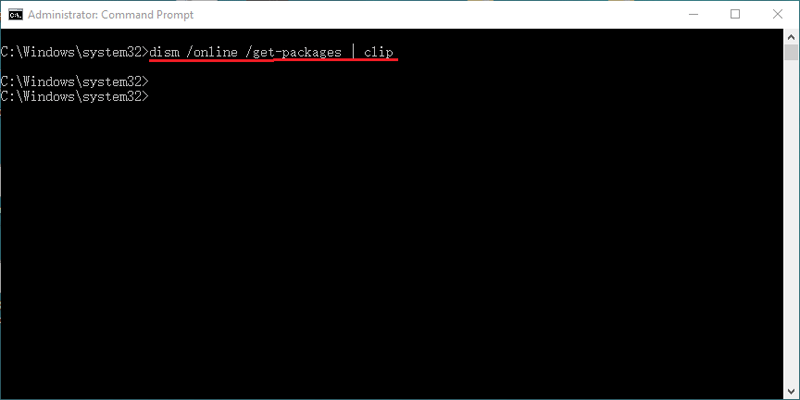
Step 4: Enter the command dism /online /get-packages | clip and press the Enter key. After that, the information of the Windows updates will be copied.
Step 5: Create a Text Document and press Ctrl + V to paste the content.
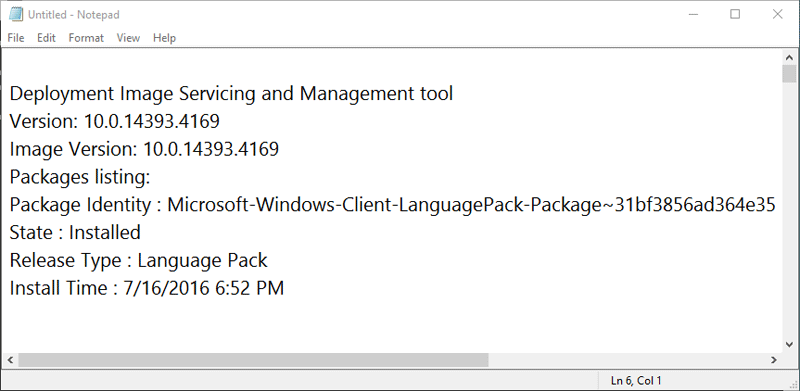
Step 6: Find the version you want to delete in the Text Document. You can press Ctrl + F and enter the date to find it quickly.
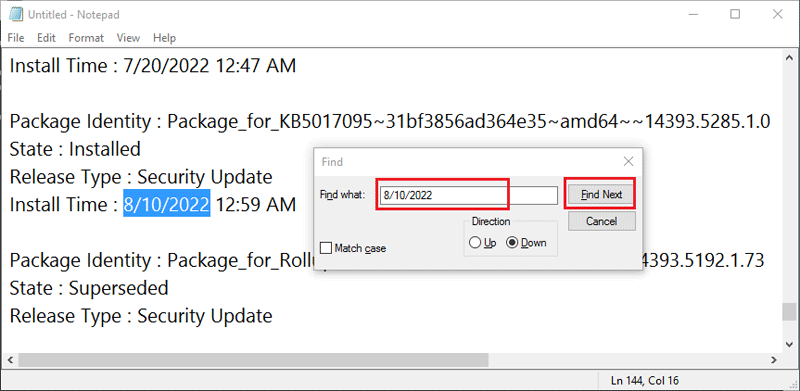
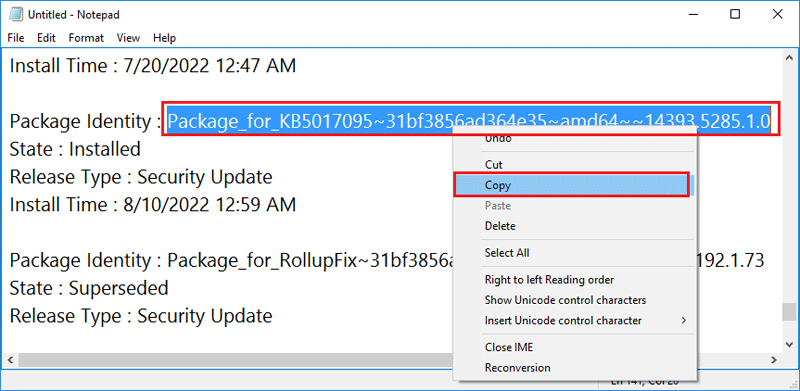
Step 7: After finding the update, select the content behind the Package Identity and copy it.
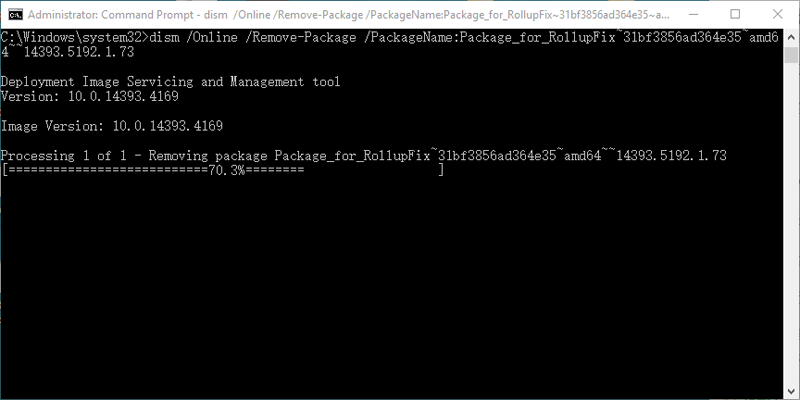
Step 8: Back to command Prompt, enter dism /Online /Remove-Package /PackageName:xxxxxxxx.
Tips: Replace xxxxxxx with the Package Identity you just copied.
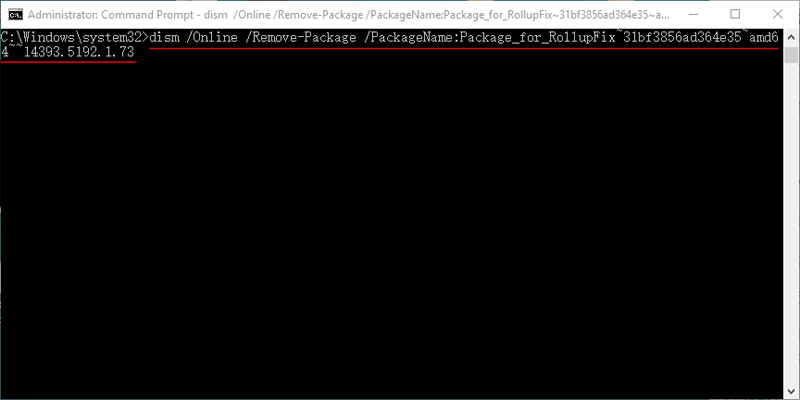
Step 9: After entering the command correctly, the update will be uninstalled.
Step 10: After complete, enter Y to restart the computer. And then you will go back to previous version of Windows 10 without losing data.