Windows 10 includes a built-in Administrator account, providing unrestricted access to the PC. This account is disabled and hidden by default. To log in, you must enable it first. This guide outlines three straightforward methods to enable or disable the built-in Administrator account in Windows 10.
Note: To modify the built-in Administrator account's status, you need to be logged in with an administrator-level account. If you've lost administrator rights or access to Windows 10, refer to enabling the built-in Administrator without logging in.
This method is exclusive to Windows 10 Pro and Enterprise editions. Once enabled, the User Account Control dialog won't appear when running programs as an administrator.
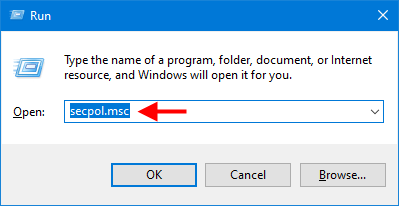
Step 1: Press Win + R to open Run. Type secpol.msc and press Enter to open Local Security Policy.
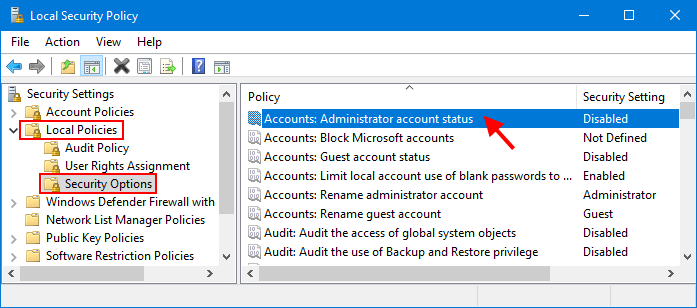
Step 2: Navigate to Local Policies > Security Options. Double-click Accounts: Administrator account status.
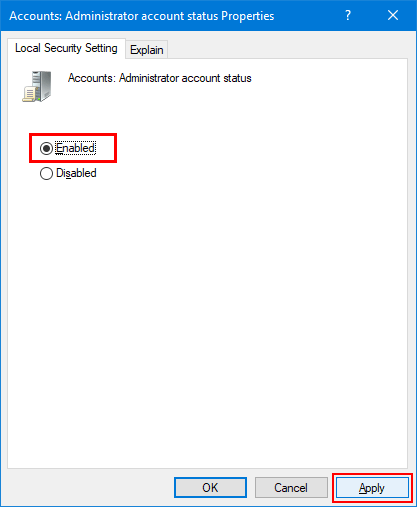
Step 3: In the Properties dialog, select Enabled or Disabled to toggle the built-in Administrator account. Click Apply to save changes.
This option is also limited to Windows 10 Pro and Enterprise editions.
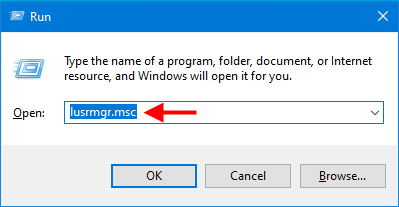
Step 1: Open Run with Win + R, type lusrmgr.msc, and press Enter to open Local Users and Groups.
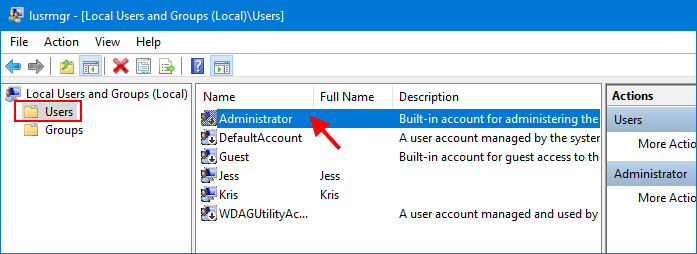
Step 2: Select Users and double-click the Administrator account.
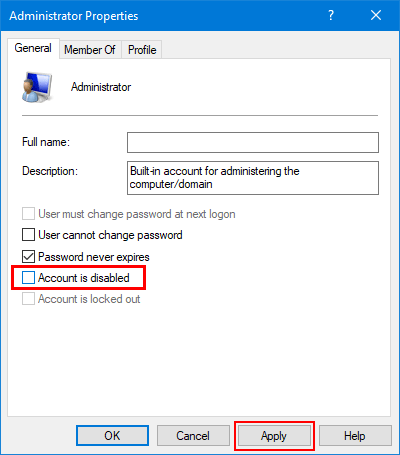
Step 3: Uncheck Account is disabled to enable the account. Click Apply.
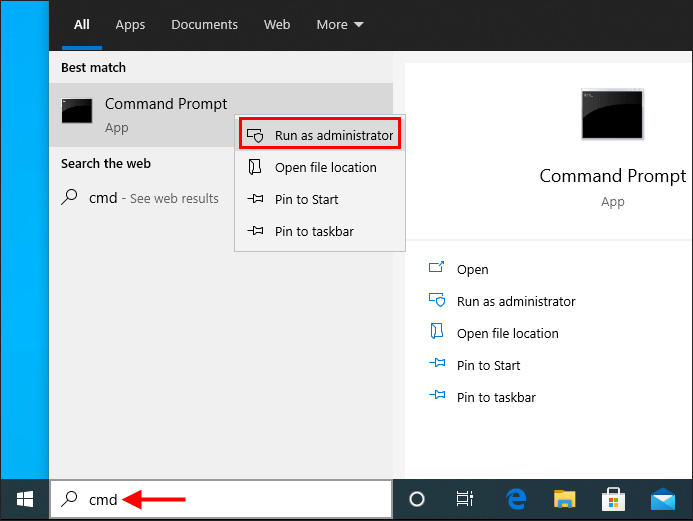
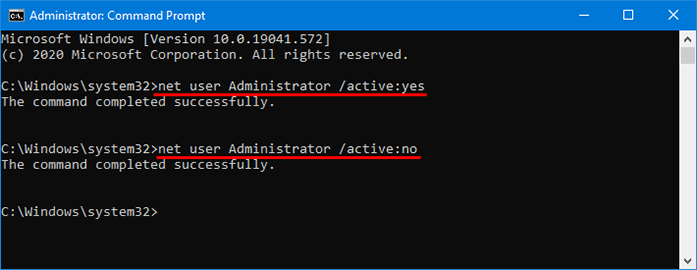
Step 1: Search for cmd, right-click Command Prompt, and select Run as administrator to open an elevated Command Prompt.
Step 2: Type net user Administrator /active:yes to enable or net user Administrator /active:no to disable the built-in Administrator. Press Enter.
The built-in Administrator account poses a security risk due to its unrestricted access. It's generally not recommended unless necessary. If enabled, consider renaming it and setting a password.
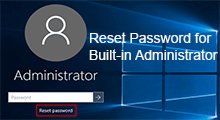
Related: How to Reset the Built-in Administrator Password in Windows 10