You can easily capture a screenshot on Surface table by pressing the Power or Windows logo button + Volume down button at the same time. Screenshots will be automatically saved in Screenshot folder under This PC. You may wonder how to share screenshots on Surface with others, this tutorial will show you how to do.
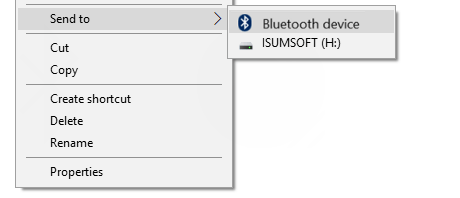
Case 1: When you have no Wi-Fi network connection, you can transfer screenshots via Bluetooth or USB drive.
Select one or more screenshots you want to share, press and hold on the selected files, select the application you'd like to use to send the file.
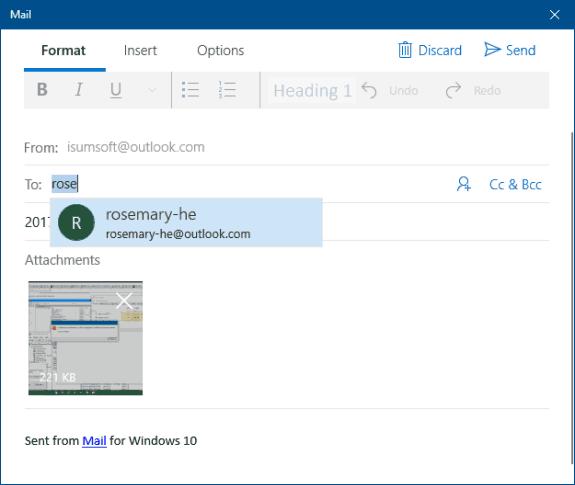
Case 2: When you have Internet access, you can share screenshots via installed UWP (Universal Windows Platform) apps such as Mail, Twitter, Facebook, Onenote, etc...
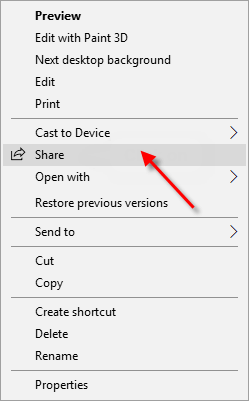
Select one or more screenshots you want to share, press and hold on the selected files, tap on Share in the context menu. Then, go on next.
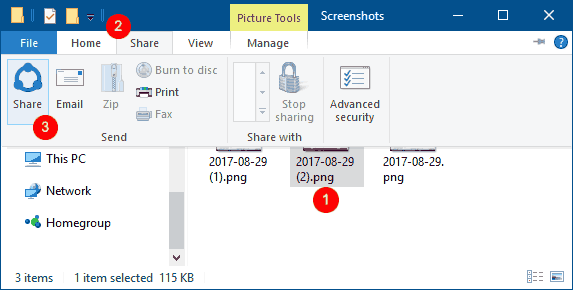
While in File Explorer, select one or more screenshots that you want to share, tap on the Share tab, tap on the Share button in the ribbon. Then, go on next.
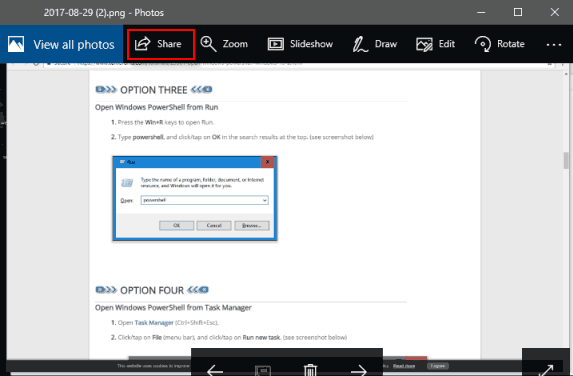
While you have an image opened in the Photos app, tap on the Share button in the Photos app, go on next.
In the Share UI, tap on an app you want to share from.
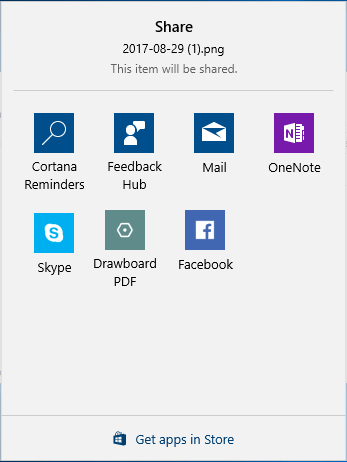
Fill out any additional information and follow steps in the selected app to share the file(s) from.