Using your primary administrator account for daily tasks poses significant security risks. Creating a secondary local account minimizes potential damage from security breaches. Follow this Windows 10 account creation guide to enhance your device protection:
Follow these steps to create a local user account on both Windows 10 Home and Pro editions:
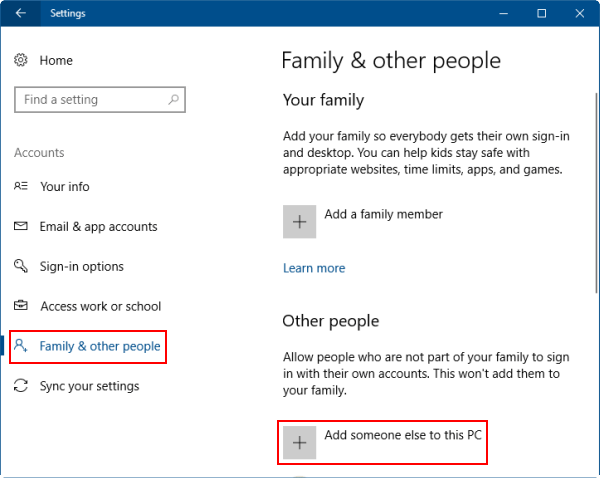
Step 1: Launch the Settings app and select Accounts

Step 2: Navigate to Family & other users and click Add someone else to this PC
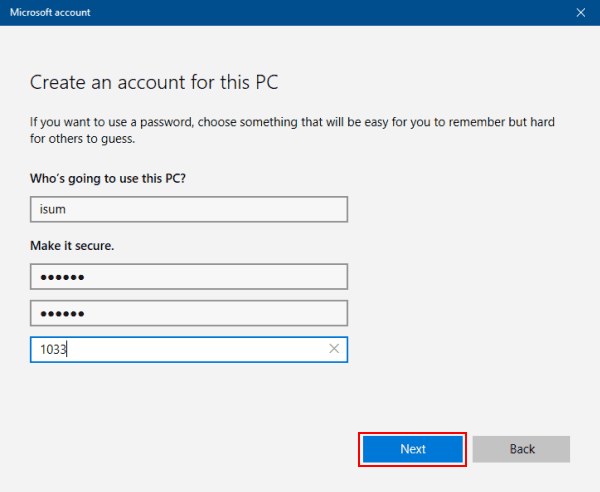
Step 3: Input your preferred username, create a strong password with hint, then click Next
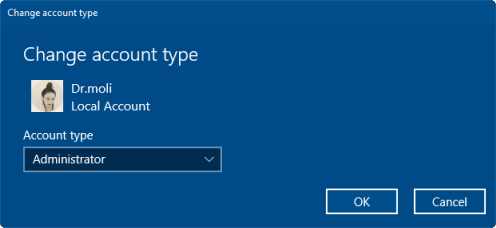
The new standard user account will appear in your Accounts list. To enable administrator privileges, select the account and choose Change account type
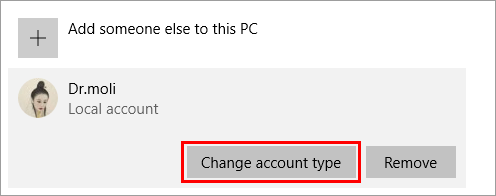
From the dropdown menu, select Administrator and confirm with OK
You can now securely switch between accounts using the new local credentials
iSumsoft Windows Password Refixer provides emergency access solutions for Windows devices. This powerful tool enables administrator account creation without existing login credentials - crucial for password recovery scenarios
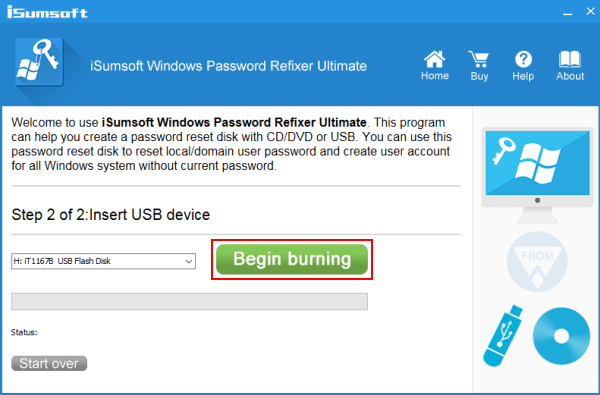
Step 1: Prepare bootable recovery media
1. Download and install Windows Password Refixer on an accessible computer
2. Create bootable media (USB/DVD) following the software's burning wizard
Step 2: Initiate Surface tablet boot sequence
1. Connect prepared media to your powered-off Surface device
2. Hold volume-down while pressing/releasing power
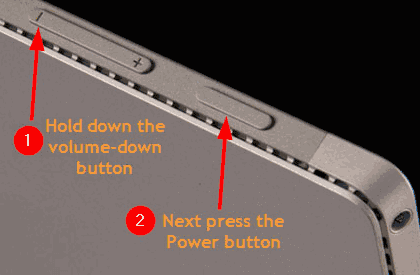
3. Release volume-down at Surface logo to boot from external media

Step 3: Select Add User in the Password Refixer interface
Enter desired username and confirm with OK to create admin account
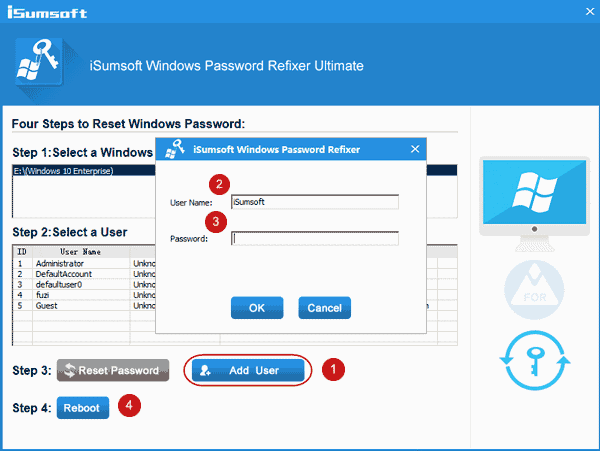
Step 4: Remove recovery media and click Reboot. The new admin account will appear on login screen