
With more and more photos "eating" your iPhone storage, you may find your iPhone space few left and iPhone running speed slowing down. Thus, deleting photos from your iPhone becomes a way to release your iPhone space and speed up your iPhone running speed. To delete your iPhone photos faster, it is better for you to delete them on computer. Here we will show you how to delete photos from iPhone using Windows 10 with 3 tips.

File Explorer on computer can not only help you transfer photos between iPhone and computer, but also assistant you to delete your photos very soon. Before deleting iPhone photos on computer, please have your iPhone connected to computer and ensure that your iPhone trusts your computer first. Then you can follow the steps on how to delete photos using Windows 10 on File Explorer.
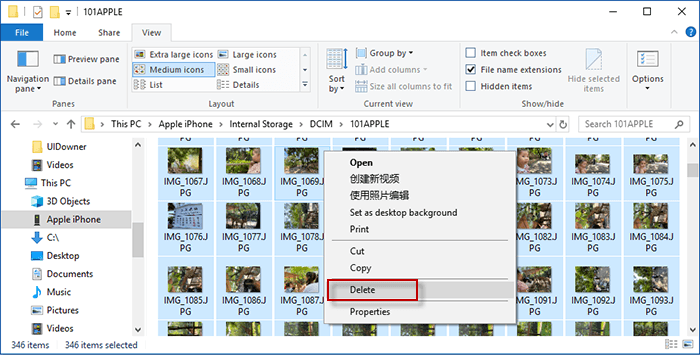
Step 1:Go to This PC/This Computer> Apple iPhone > Internal Storage > DCIM

Step 2: Choose the unwanted photos to delete. Then right-click and click on Delete.
iCloud can help you upload your iPhone photos online and share your iCloud photos on all of your devices. If you turn on iCloud Photos, you can delete photos on one device to remove them from all the other connected devices. On Windows 10, you can also delete photos with iCloud. Here comes the process on how to delete photos from iPhone using Windows 10 via iCloud.
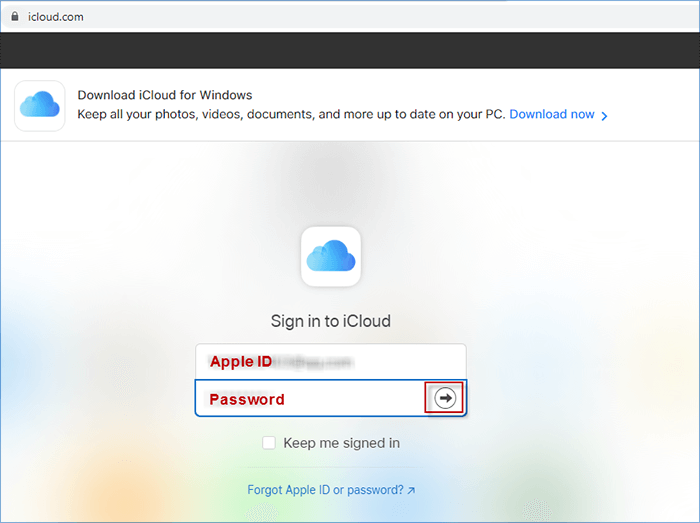
Step 1:Visit iCloud.com. on a web browser and enter your Apple ID and Password to sign in to iCloud account.
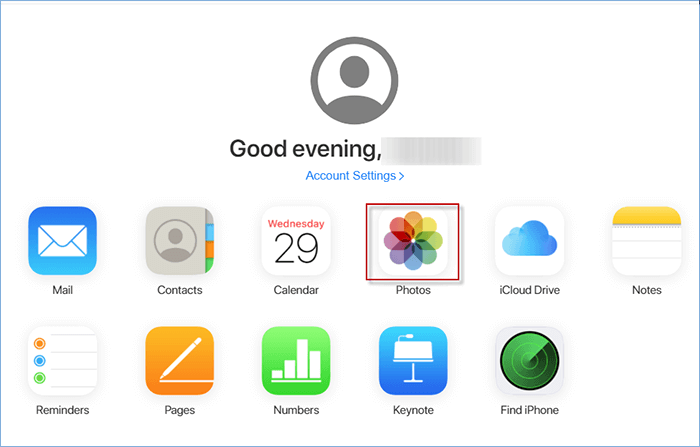
Step 2:Enter Photos, you will view your iCloud photos uploaded automatically from iPhone with iCloud Photos turning on.
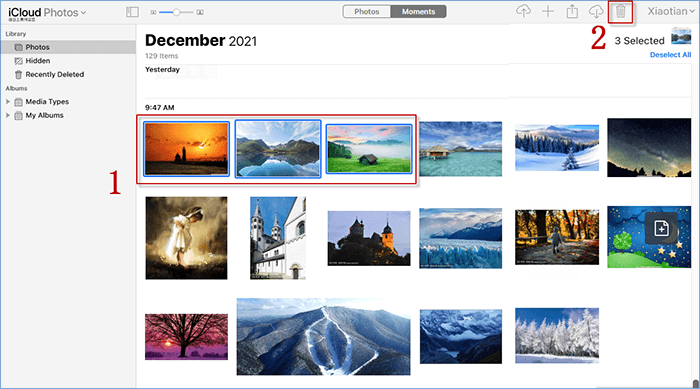
Step 3:On the upper middle, click Photos to view your photos together or click Moment to view them classified by date. Then press Ctrl+ A to choose them all or Press Ctrl to select them one by one. After selection, you can click on delete icon on the top right.
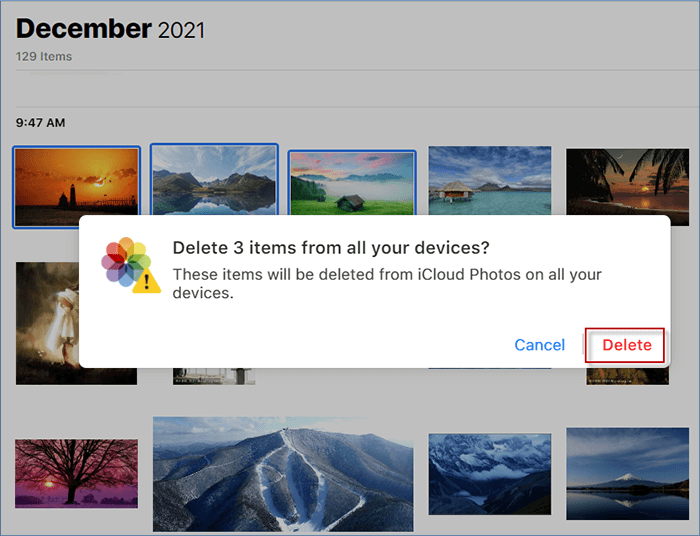
Step 4:Click on Delete when a pop-up window asks for confirmation on deleting selected photos on all of your device.
With File Explorer and iCloud, you can delete your iPhone photos easily on Windows 10. While sometimes you may find your iPhone not showing on File Explorer or your iCloud photos not syncing, and fixing these issues is actually time-consuming for you. To save your time, here you can choose to delete photos with iSumsoft iDevice Cleaner.
iSumsoft iDevice Cleaner is a professional cleanup tool to free up storage and speed up iPhone. With iSumsoft iDevice Cleaner, you can easily delete your photo caches, crash logs, temp files, app caches, download caches, large files, etc. Then how to delete photos from iPhone using Windows 10 with iSumsoft iDevice Cleaner? Here we will walk you through the steps.
Before begin, please install iSumsoft iDevice Cleaner. Next, connect your iPhone to PC and launch iSumsoft iDevice Cleaner.
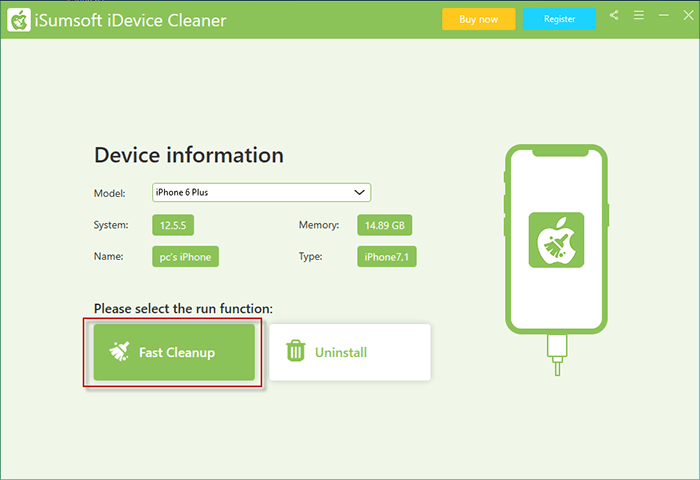
DownloadStep 1:Choose Fast Cleanup to view the classified files you can delete on your iPhone.
Step 2: Click on Scan to automatically find out the useless files taking up your storage more in detail.

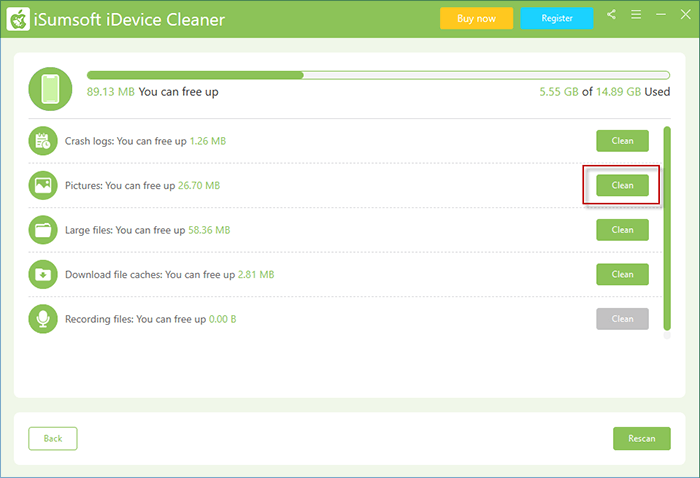
Step 3: Find the Pictures section and click Clean on the right to preview photos you can delete.
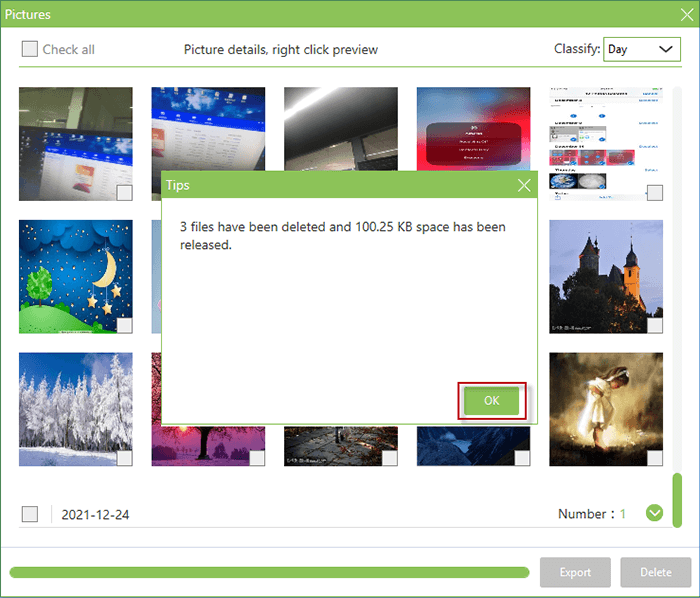
Step 4:Click the sign on the upper right to view photos sorted by Year, Month or Day. To choose all photos, check the box for Check all. To choose specific ones, tick the boxes for photos. (Note: To avoid deleting photos by mistake, double-click the photo to preview. In addition, you can also choose the photos and click Export on the bottom right corner to back them up on PC.)

Step 5:Click on Delete. Then Choose Yes when a small window popping up to finally delete your selected photos.

Step 6:Click on OK after the tips showing that you have deleted your photos and released your storage.
That's all about how to delete photos from iPhone using Windows 10. Hopefully, the tips above can help you delete unwanted photos and free up your iPhone storage faster. Thank you for reading.
 3 Tips to Fix Can't Delete Photos from iPhone on PC
 How to Free Up Space on iPhone without Deleting Apps or Photos
 How to Remove Photos from My Photo Stream
 How to Delete Apps on Your iPhone/iPad
 4 Ways to Transfer Photos from iPhone to PC without iTunes
 5 Ways to Transfer Photos from iPhone to USB Drive
 iCloud Backup Taking Forever? Here're 6 Tips to Fix It
 5 Ways to Fix iPhone Not Showing up in Windows Explorer