Sometimes we want to transfer photos from iPhone to PC for backup or editing purpose. Because whether it's backing up or editing pictures, the computer is a better choice.
Speaking of transferring files from iPhone to PC, the first thing many people think of is to use iTunes. iTunes is indeed a good option for managing iPhone, but it is actually not suitable for transferring iPhone photos to your computer. I'll explain why later. So, in this article, we will show you how to transfer photos from iPhone to Windows 10 PC without iTunes.

You can't. Why? iTunes syncs or backs up your iPhone data like photos, contacts, and settings to your PC. However, because the backup is stored on the computer in an SQLite database format, you can't directly access and extract the photos as well as any other content from it. In addition, though iTunes has a photo sync feature, it's just for copying photos from computer to iPhone.
That is the reason why you can't use iTunes to transfer iPhone photos to PC. Though iTunes allows you to transfer photos from iPhone to iPhone by backup and restore, it doesn't work from iPhone to computer.
Luckily, you don't need to rely on iTunes to transfer photos from iPhone to Windows PC. You don't even need any special software. Windows comes with features that allow you to transfer iPhone photos to PC without iTunes or any other software.
Step 1: Connect your iPhone to your PC using a USB cable. Once connected, unlock your iPhone, and then tap Trust if prompted.

Step 2: Open File Explorer from your Windows taskbar or Start menu.

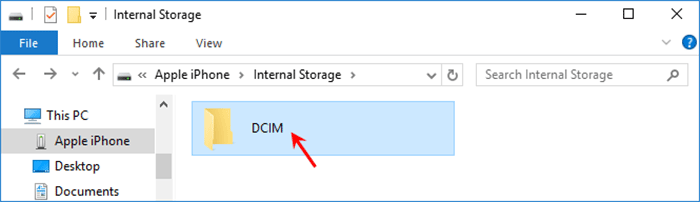
Step 3: On the left of the File Explorer window, click the arrow next to This PC, then select your iPhone name (Apple iPhone by default), and then double-click the Internal Storage on the right.

Tips: You may also be interested in iPhone Not Showing Up in File Explorer Windows 10
Step 4: Double-click the DCIM folder and you will get to all photo folders inside your iPhone.
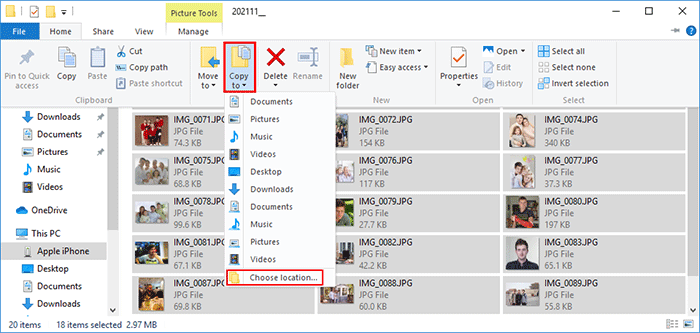
Step 5: Select the photos you want to transfer to your computer. Subsequently, click "Copy to" or "Move to" under the "Home" tab of the File Explorer window, and then choose where you want to copy/move your iPhone photos. That's it. Your iPhone photos will be transferred to your computer.
Step 1: Connect your iPhone to your PC using a USB cable. Once connected, unlock your iPhone and tap Trust if prompted.
Step 2: Open the Photos app on your Windows 10. Assuming you don't know how to open it, just type photos in the Windows search box and press Enter.

Tips: If Photos app is not working on your Windows 10, click that link to learn how to fix it or go to the next method in this article.
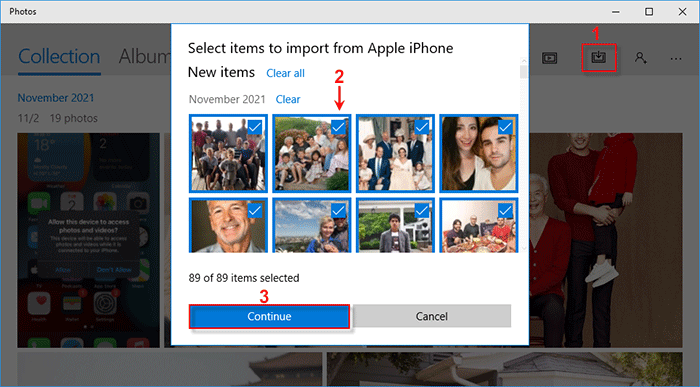
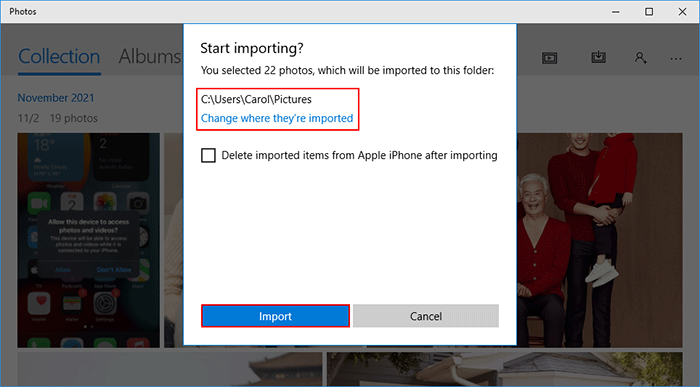
Step 3: In the Photos app, click the Import button in the upper right corner, then select the photos you want to import from your iPhone, and then click Continue.
Step 4: Choose the folder where you want your photos to be imported, and then click Import to start importing the photos to your computer. When the import is complete, you can go to the destination folder to view the imported photos.
The above two methods are really simple and effective, but what if they don't work on your PC? Don't worry. The third way to transfer iPhone photos to your PC without using iTunes is to use iSumsoft BackupTo.
iSumsoft BackupTo is a professional iPhone backup software for Windows/PC. It saves the photos on your iPhone as a backup on your PC and most importantly, you can access the photos directly from the backup. In addition, the software allows you to back up an entire iPhone or selectively back up files, choose where to save the backup on your PC, and more.
Follow these steps to transfer your iPhone photos to your Windows 10 PC without iTunes.
Step 1: Download and install iSumsoft BackupTo on your Windows 10. After installation, start the software.
Free DownloadStep 2: Connect your iPhone to your PC using a USB cable, then unlock your iPhone and tap Trust if prompted.
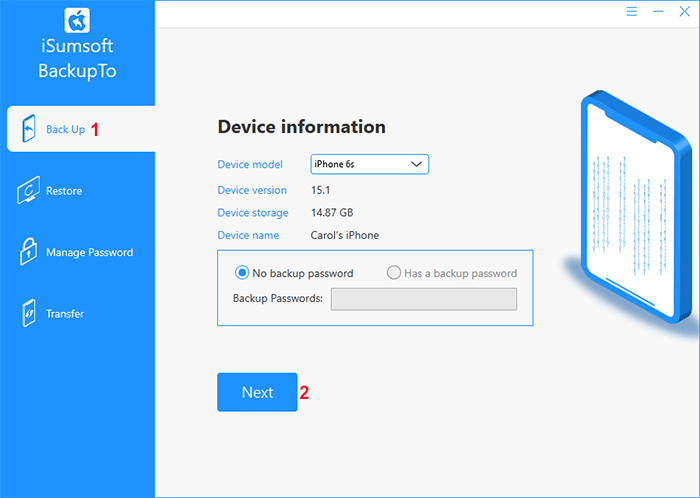
Step 3: Once the software recognizes the connected iPhone, select the "Back Up" option on the left, and then click Next.
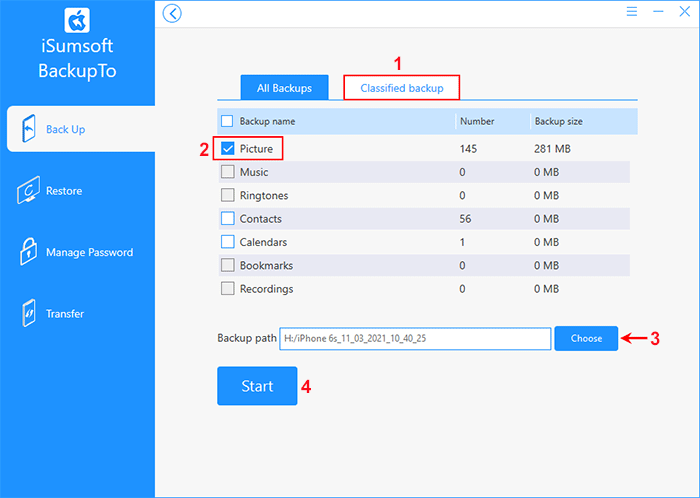
Step 4: When you get to the next page, select the "Classified Backup" tab at the top. Check the Picture check box, then click Choose to choose where to save the backup, and then click Start. The software will immediately start backing up your iPhone photos to your PC.
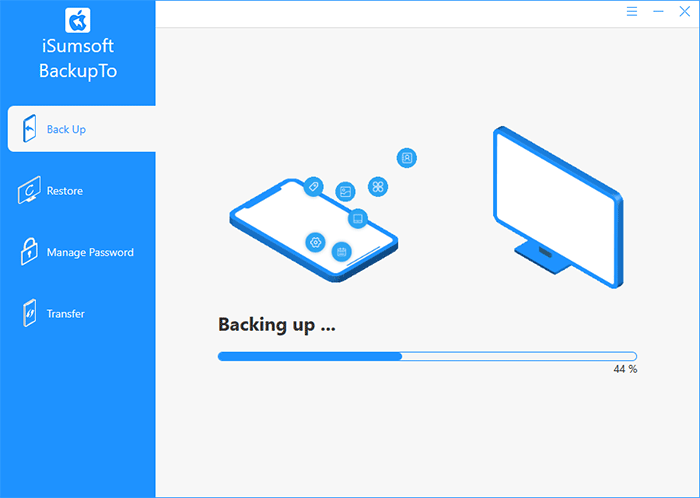
Step 5: Wait for the backup to complete. This will take a few minutes, depending on the number of the photos to transfer.
Step 6: When you get the "Backup Succeeded" message, it means that your iPhone photos have been transferred to your computer. Now you can close the software.
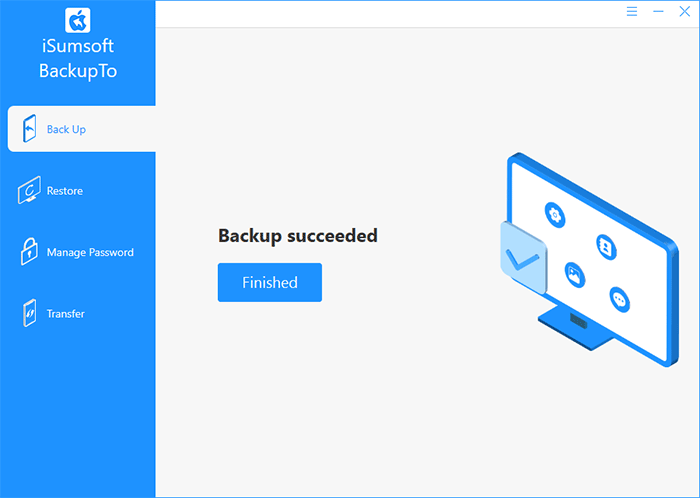
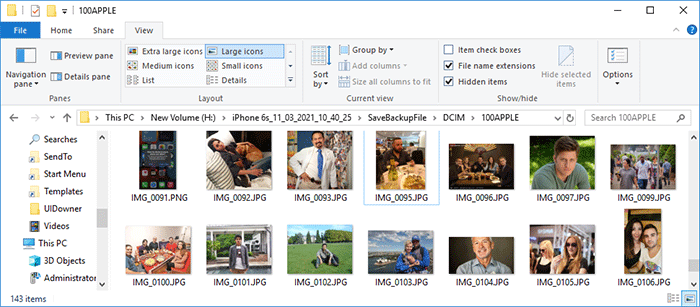
Step 7: You can then go to the destination location on your PC to check the backed-up photos.
If you have backed up your photos to your iCloud account, you can transfer them to your PC through your iCloud account without using iTunes.
Step 1: Open any browser on your PC, and then sign in to iCloud.com with your Apple ID and password that is logged in on your iPhone.

Step 2: After you're signed in, click on the Photos icon to access the iCloud Photos app.

Step 3: Your iPhone photos are displayed here. Select the photos you want to transfer to your computer. You can select multiple photos by holding the Shift key on your keyboard. Then click the "Download selected items" button in the upper right corner.

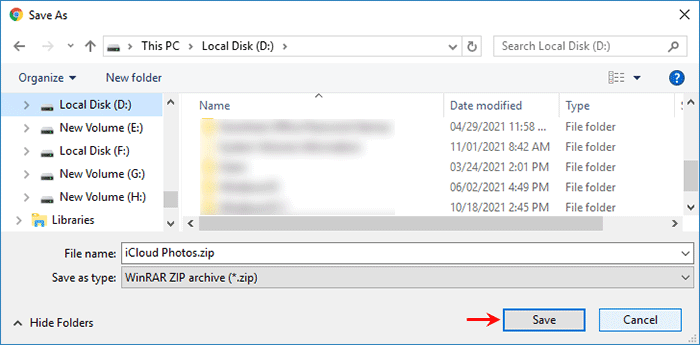
Step 4: The "Save As" dialog opens. Select where you want to save the photos, and then click Save. The photos will be downloaded to your computer as a ZIP file.
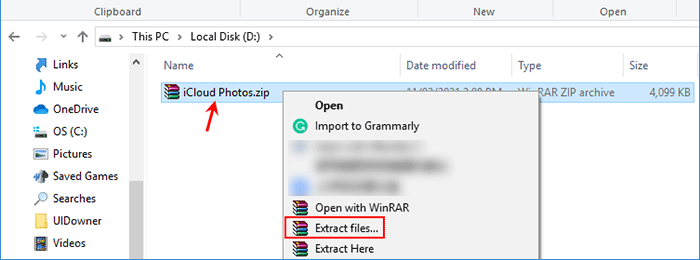
Step 5: You can then go the destination location to extract your photos from the downloaded iCloud Photos.zip file.
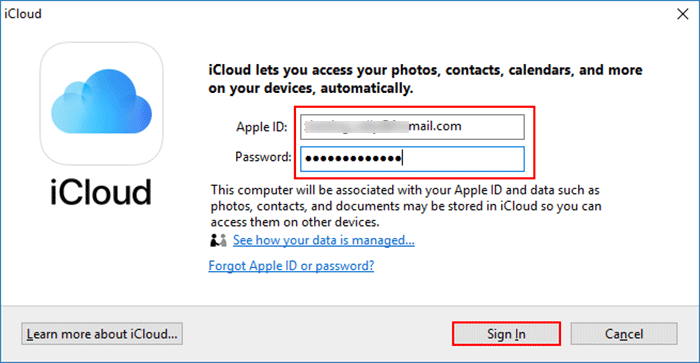
Step 1: Download iCloud for Windows and install it on your PC. After installation, open the iCloud app.
Step 2: Enter your Apple ID and password that is logged in on your iPhone, and then click Sign in to sign in to the iCloud app.
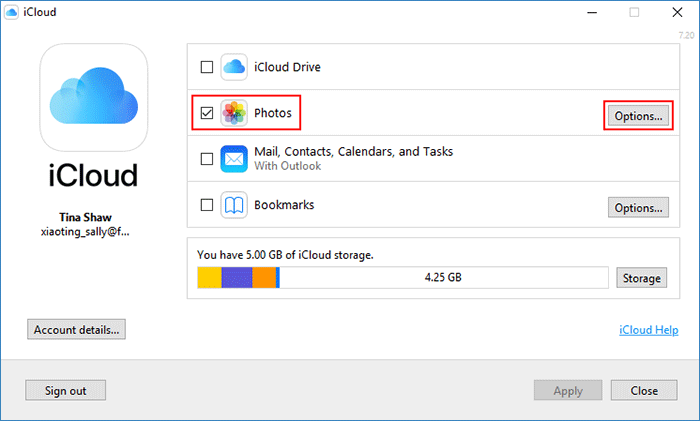
Step 3: After logging in, check the box next to Photos, then click the Options button.
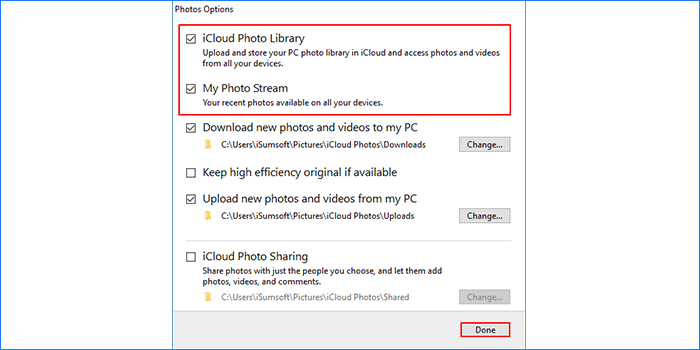
Step 4: In the Photos Options window, make sure the iCloud Photo Library and My Photo Stream are checked, and then click Done. When you get back to the iCloud window, click Apply in the lower right corner. The iCloud app will start downloading photos to your PC.
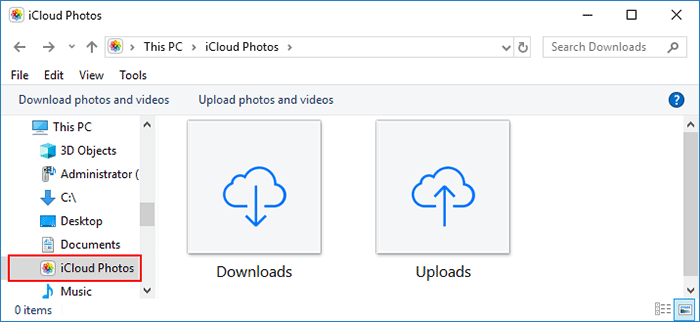
Step 5: You can go to the iCloud Photos folder under This PC to check the photos.