
Windows has a default Downloads folder, which is located on the operating system drive (drive C:) by default. Whenever you download a file in Windows, it is automatically stored in the Downloads folder. This is great because you can find and manage the downloaded files quickly.
But there is one problem: over time, downloaded files pile up in the Downloads folder, taking up a lot of space on the C drive. This is true especially if you don't clean up the Downloads folder regularly. So, to avoid this, it's a good idea to move the Downloads folder from the C drive to another drive. Now in this post, we will show you two simple ways to move the Downloads folder to another drive in Windows 10.
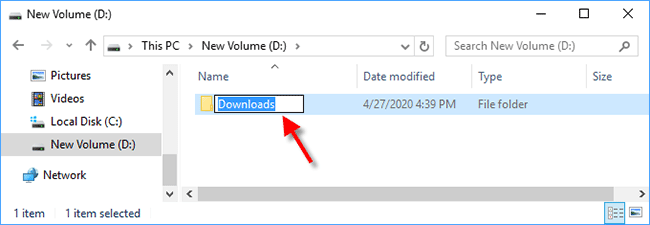
Step 1: Open the destination drive to which you want to move the Downloads folder (for example, drive D:). In the root directory of the drive, right click any blank area and select New > Folder to create a new folder. Rename the newly created folder to Downloads.
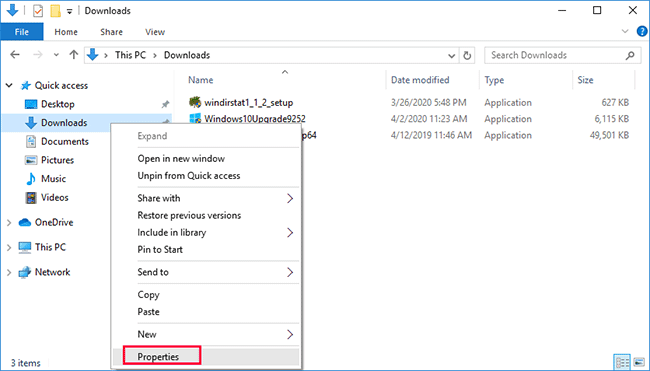
Step 2: Right click the Downloads folder under Quick access on the left side of File Explorer, and then select Properties from the context menu.
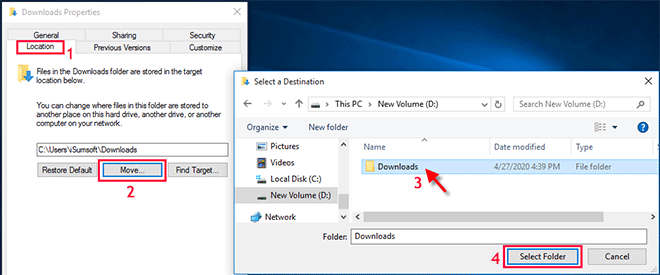
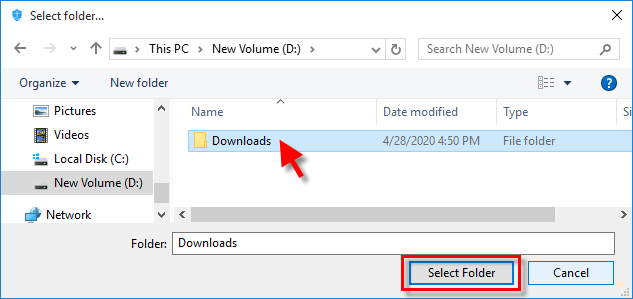
Step 3: After the Downloads Properties dialog opens, select the Location tab, and then click the Move button. When the Select a Destination dialog opens, navigate to the destination drive, select the Downloads folder you created earlier, and then click Select Folder.
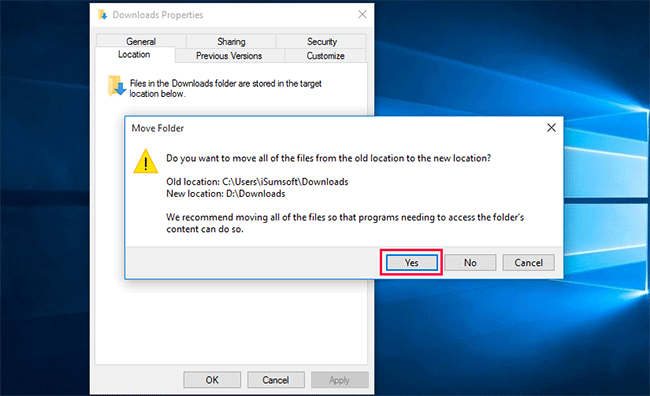
Step 4: When you return to the Downloads Properties dialog, click Apply. A Move Folder dialog pops up asking if you want to move all of the files from the old location to the new location. Click Yes and the Downloads folder as well as all files in it will be moved to the destination drive immediately.
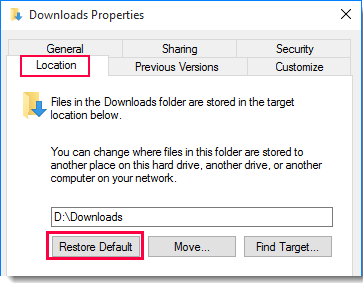
If for some reason you want to restore the Downloads folder to the default system drive (C:), do the following.
Step 1: Right click the Downloads folder and select Properties. In the Downloads Properties dialog, select the Location tab, click Restore Default, and then click Apply.
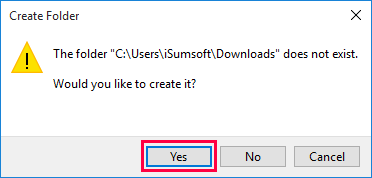
Step 2: Click Yes to re-create the folder C:\Users\Username\Downloads. When the Move Folder dialog opens, click Yes if you want to move all downloaded files to the C drive, or click No if you want to keep the downloaded files on another drive.
You can also use a third-party tool to move the Downloads folder from the C drive to another drive.
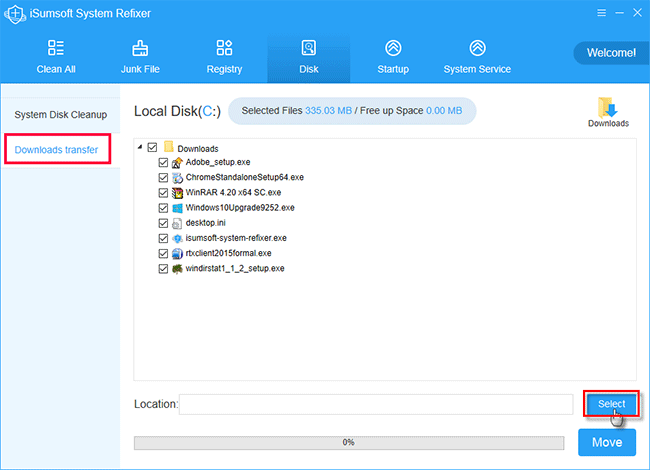
Step 1: Download and install iSumsoft System Refixer on your Windows 10. After installation, launch the tool.
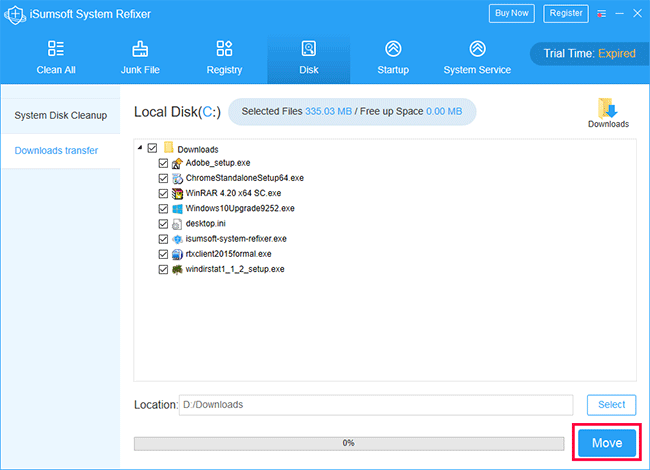
Step 2: Select the Disk tab on the top, and then select the Downloads transfer option on the left side. The Downloads folder and all files in it are displayed on the screen. Click the Select button beside the Location field.
Step 3: When the Select folder dialog opens, navigate to the drive to which you want to move the Downloads folder and then click New folder to create a new folder.
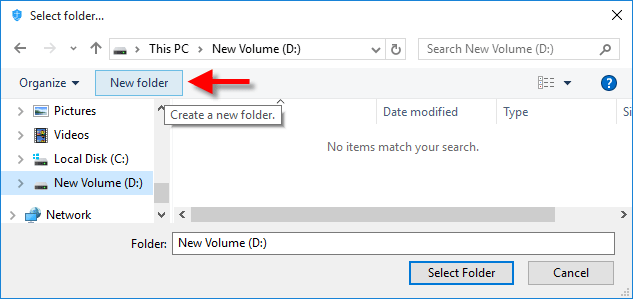
Step 4: Rename the newly created folder to Downloads and then click Select Folder.
Step 5: When you return to iSumsoft System Refixer, click the Move button in the lower right corner and the Downloads folder will be moved to the destination drive.
 How to Change Default Download Location in Microsoft Edge
 How to Change Default Save Location for New Content in Windows 10
 How to Change Location of OneDrive Folder in Windows 10
 How to Change Location of Game DVR Capture Folder
 How to Show Hidden Files and Folders in Windows 10
 Enable Storage Sense to Free up Space