
Losing essential data due to a deleted or lost partition can be frustrating and stressful. Fortunately, various methods and tools can be used to solve this troublesome problem. In this article, I'd like to share with you a free way of recovering deleted or lost partitions with TestDisk, quickly and effectively.
Tips: Regardless of the approach you take, it is important to act quickly and avoid using your computer or rewriting new data to the affected drive, as this can overwrite the lost data and make it difficult or impossible to restore the deleted or lost partitions.

TestDisk, a free and robust data recovery tool, is designed to assist users with recovering lost, deleted, and damaged partitions, working by analyzing disk structure and attempting to locate lost partitions, even repairing the damaged boot sector. Apart from partition recovery, it can also recover files from a formatted USB drive, supporting NTFS, and FAT32, among others.
Step 1: Download TestDisk. Choose Windows 64-bit for the 64-bit system computer, and Windows 32-bit for the 32-bit system device.

Step 2: In the downloaded folder, click Extract all to extract the archive to the current folder.

Step 3: Open the extracted folder, locate and double-click testdisk_win.exe to start it.

Step 4: When you are prompted to allow this app to make changes to your device, click Yes.

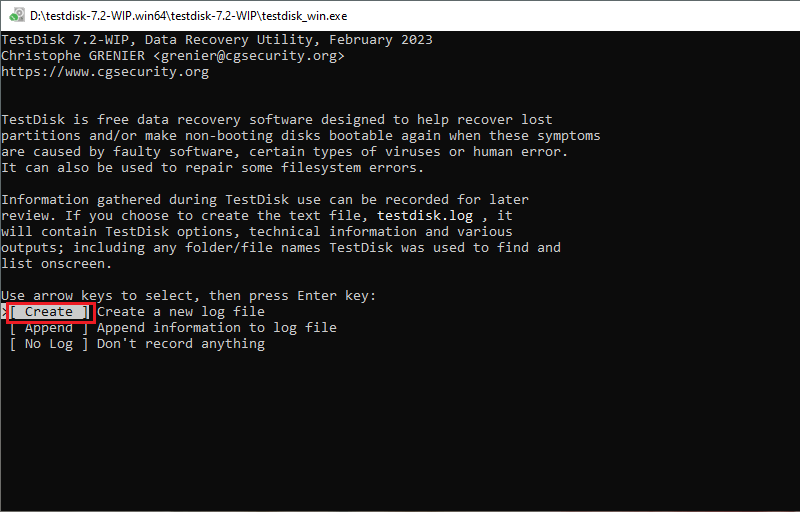
Step 5: Select Create and press Enter.
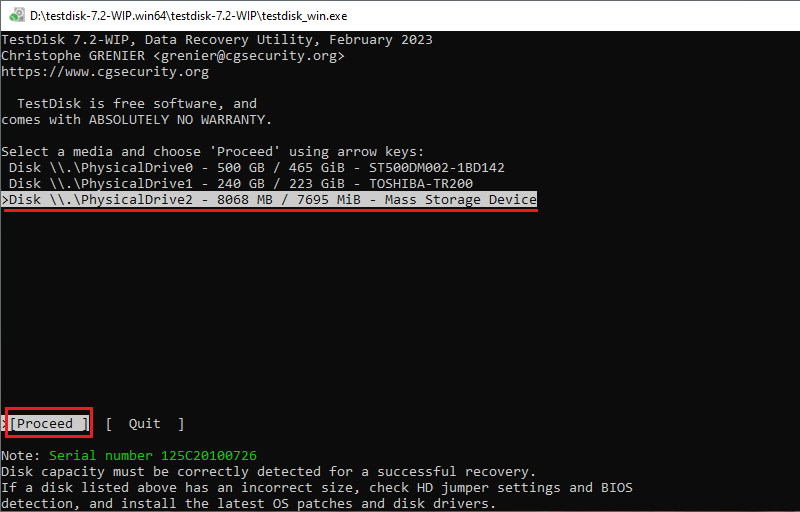
Step 6: All the hard drives will be detected and displayed in the interface. Use the arrow key to choose the disk that lost the partition, then hit Enter to Proceed.
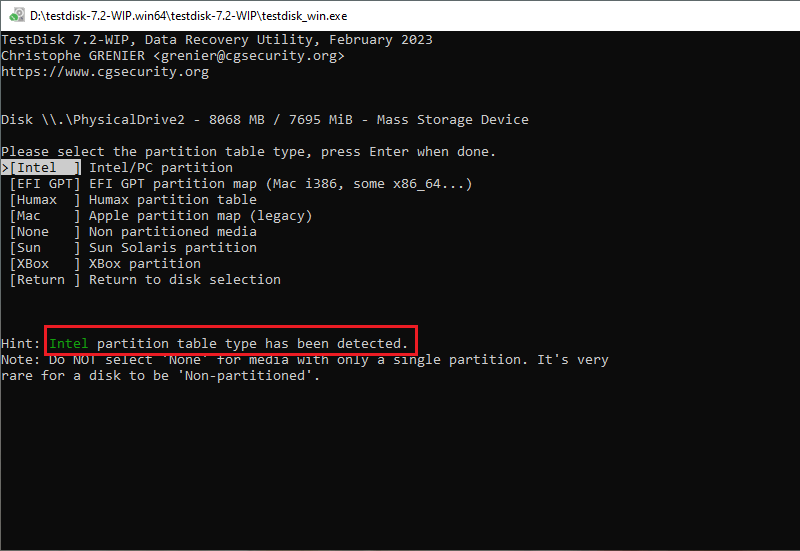
Step 7: Generally, the program will select the correct partition table type for you, showing a hint and a default option. Select the prompted table type and press Enter.
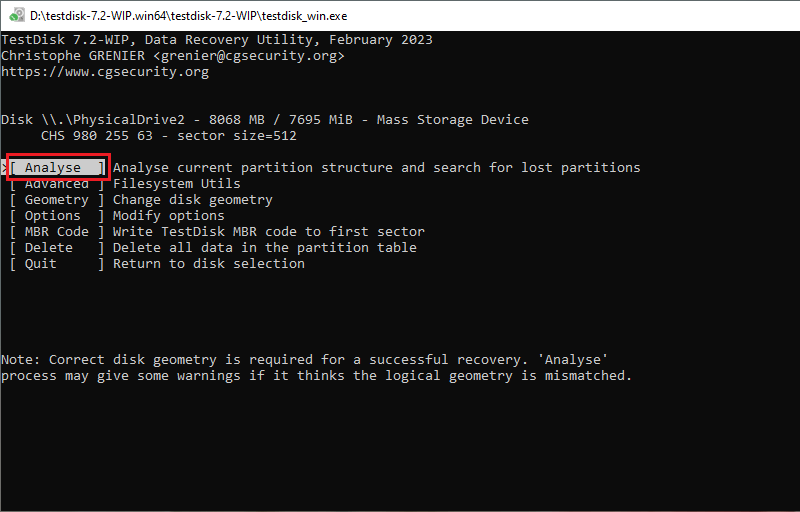
Step 8: Use the Up and Down keys to choose Analyse and hit Enter.
Step 9: The information shows you the current partition structure. Choose Quick Search and hit Enter.
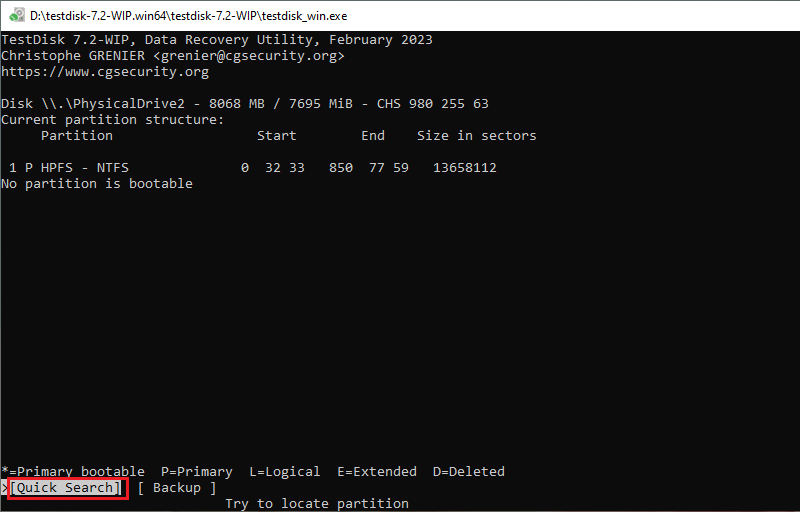
Step 10: Use the arrow keys to choose the deleted/lost partition, then hit Enter.
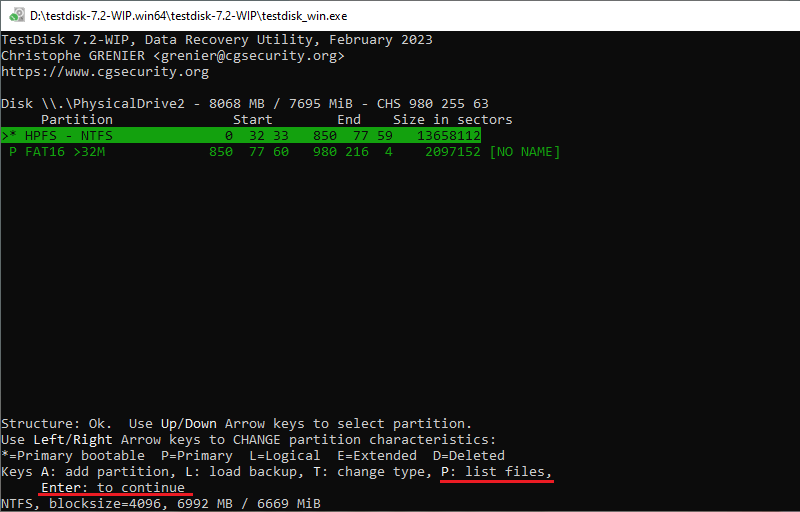
Before entering the partition, you can press uppercase P to list the files stored in the
selected partition (press q to return to the previous page).
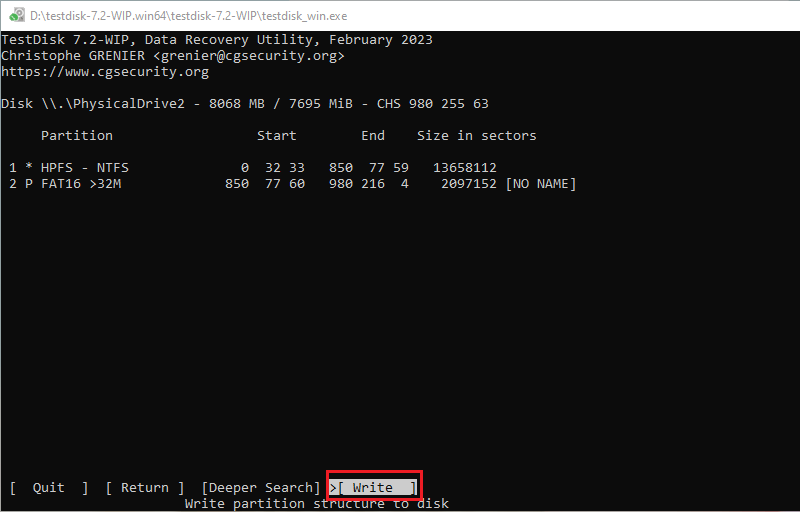
Step 11: Assuring all the data is available, you can select Write to restore the partition. (Note: You can enter Deeper Search to rescan if there is still a partition that cannot be found, then repeat the previous step.)
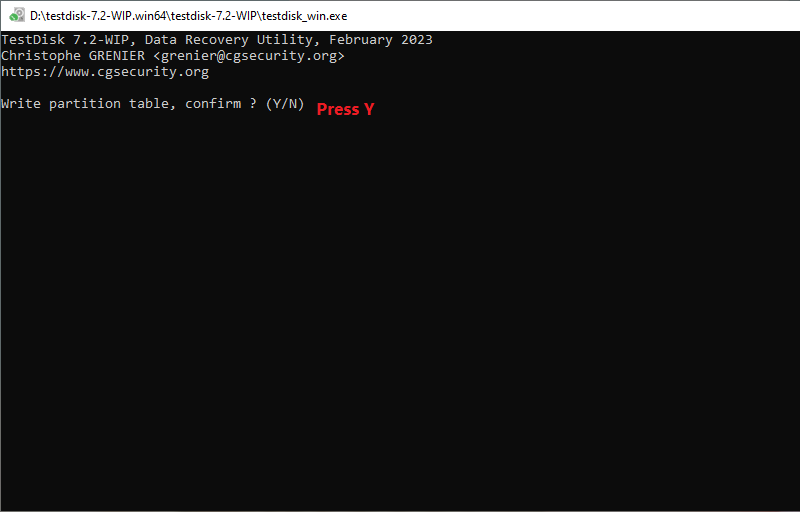
Step 12: Press Y to write partition.
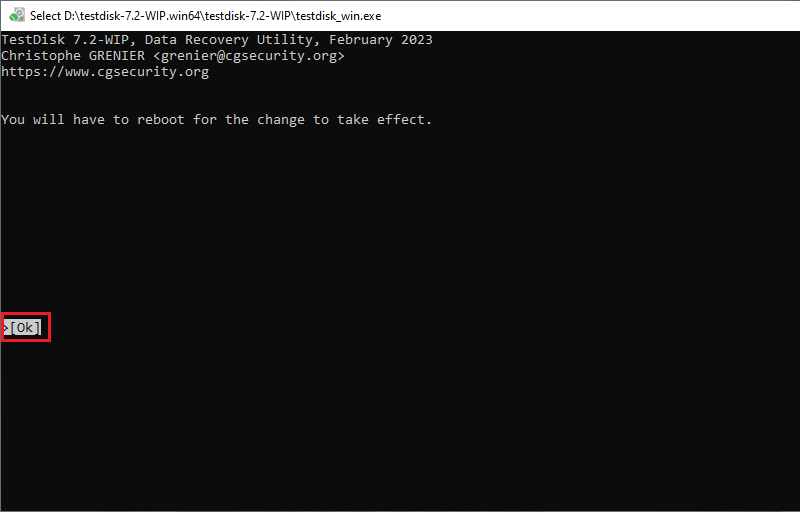
Step 13: Enter OK to exit and then reboot your computer for the change to take effect.
 Solutions for
Recovering an Unsaved Word Document
Solutions for
Recovering an Unsaved Word Document
 How
to Clone Windows System Drive to a New Hard Drive
How
to Clone Windows System Drive to a New Hard Drive
 What
is the BCD File? Backup, Restore, and Rebuild BCD File
What
is the BCD File? Backup, Restore, and Rebuild BCD File
 How to Initialize
and Partition a Hard Disk in Windows 10/8/7
How to Initialize
and Partition a Hard Disk in Windows 10/8/7
 How
to Do a System Restore if PC Fails to Boot up
How
to Do a System Restore if PC Fails to Boot up
 Windows Cannot be
Installed to This Disk GPT
Windows Cannot be
Installed to This Disk GPT