
You may encounter the M.2 SSD not showing up when installed on your motherboard. There are three common situations: M.2 SSD not showing up in BIOS; M.2 drive not showing up in Disk Management; M.2 not showing up in File Explorer. If you have encountered one of these situations, you can try the methods mentioned in this article to fix the M.2 SSD not showing up.

Different situations have different causes, you can check the reasons listed below:
For motherboard and SSD model: Incorrect SSD interface connection and supported protocols may cause M.2 SSD not detected.
For BIOS: Misconfigured BIOS settings and outdated BIOS will result in the M.2 SSD not showing up.
For Disk Management or File Explorer: A corrupted or outdated drive, an unformatted or unassigned SSD, and so on will cause the M.2 SSD not to show up.
As you have known the reasons, you can try the following methods to troubleshoot the issue.
Generally, not all M.2 slots support the same protocol, some slots support both SATA and NVMe protocols while some only support M.2 NVMe SSD or M.2 SATA SSD, it may not be detected if you put a wrong one. So, you’d better figure out your SSD and motherboard models, you can google online to get detailed information.
CSM is a compatible support module that allows the new UEFI BIOS to be compatible with the older legacy + MBR boot mode. If you want to boot from the M.2 SSD, you should enable the CSM due to most computer brands have set the CSM option as disabled.
Steps: Boot into BIOS > Choose Boot tab (or Advanced tab) > Find and enable CSM.

An outdated BIOS version may not support a new SSD. To avoid this problem, update the latest BIOS version promptly.
Step 1: Determine the mainboard model and CPU model > Google the model to find the official websites > Download the latest BIOS program to a USB’s root directory with FAT32 form.
Step 2: Re-enter the BIOS page, look for the BIOS update option, and update BIOS with the file you have downloaded in the USB flash drive directory.
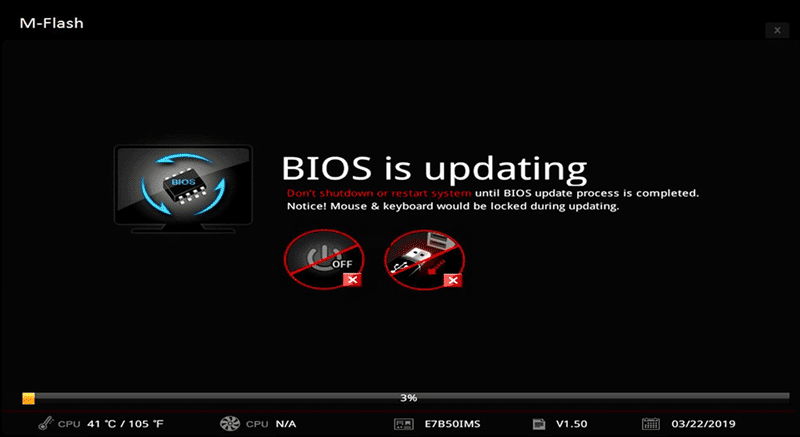
Once updated, enter the BIOS interface again to check if the BIOS can recognize the M.2 drive.
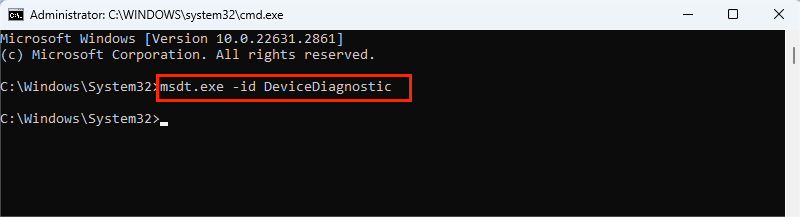
With Hardware and Devices troubleshooter, the Windows system will scan and troubleshoot the problem automatically.
Step 1: Press Win + R > Type "cmd" > Hit the "Ctrl + Shift + Enter" button to run with administrative privilege, then enter "msdt.exe -id DeviceDiagnostic" to open Hardware and Devices troubleshooter.
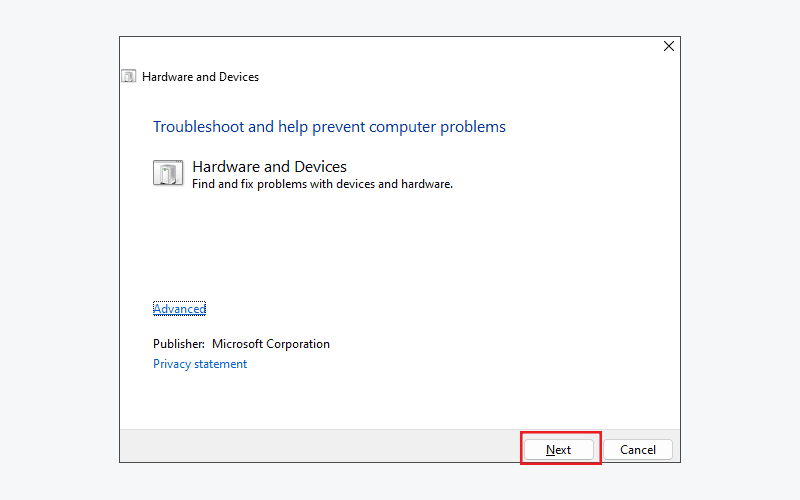
Step 2: Click Next to scan.
An outdated M.2 driver may result in the M.2 SSD not showing up. Here are the steps to update the M.2 SSD Driver.
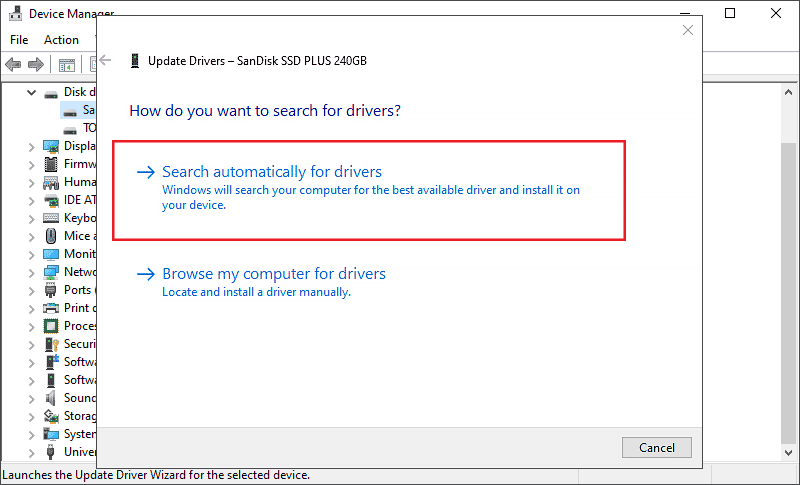
Step 1: Right-click the Start menu > Click Device Manager > Extend Disk drives > Find and right-click the M.2 SSD > Select Update driver.
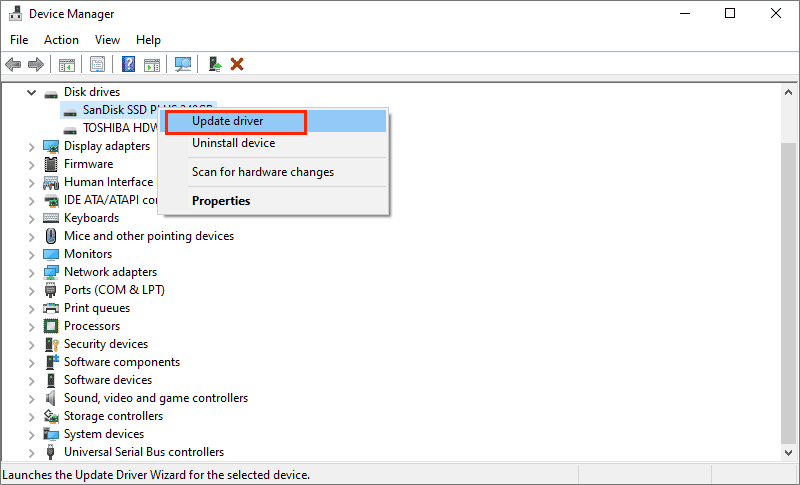
Step 2: Select "Search automatically for drivers".
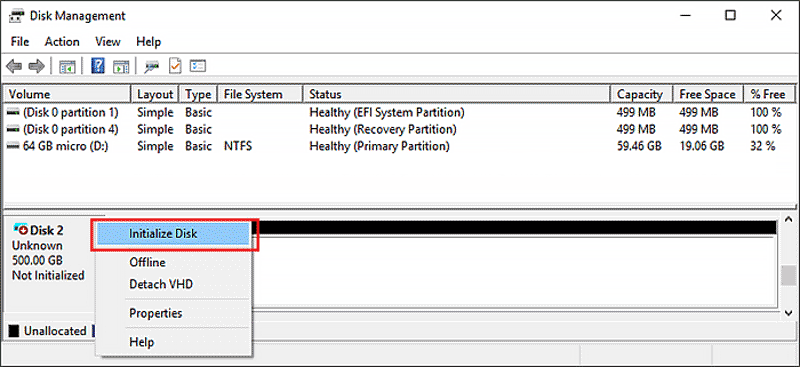
If you add a new M.2 SSD on your computer, you need to initialize it before normal use.
Step 1: Right-click the Start menu > Click Disk Management.
Step 2: Right-click the newly added M.2 SSD > Click Initialize Disk.
Step 3: In the Initialize Disk dialogue, tick GPT (GUID Partition Table) and click OK.
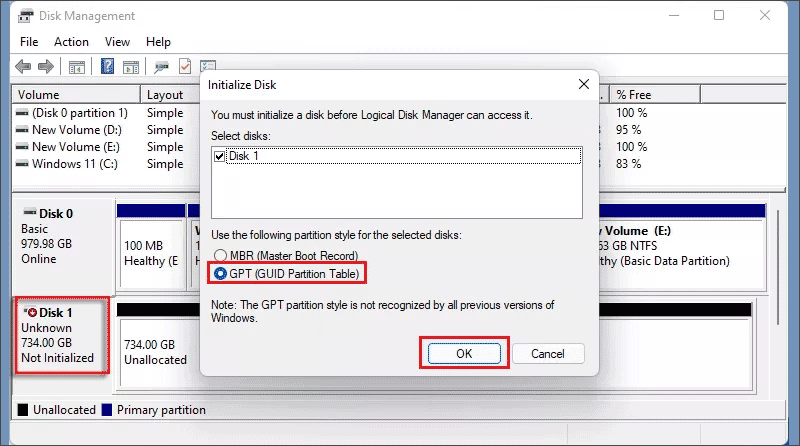
Step 4: Right-click on the new M.2 SSD and select New Volume Type, then follow the New Simple Volume Wizard instructions to create.

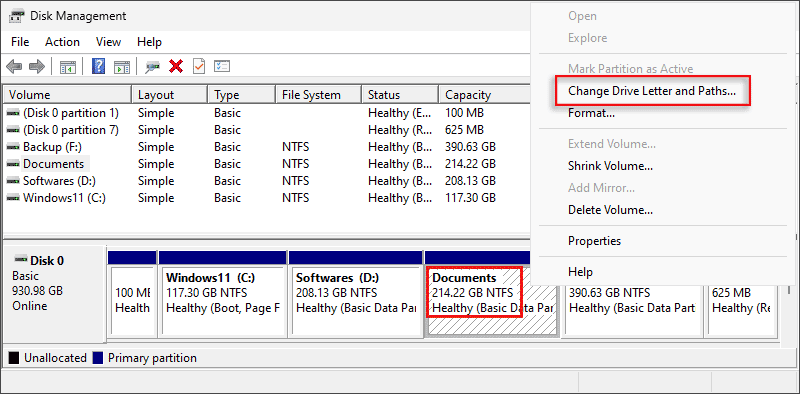
If the M.2 SSD has correctly connected to your computer but still has not been recognized, the lack of drive letter is to blame. Here are the steps on how to assign a drive letter for M.2 SSD.
Step 1: Right-click the Start menu > Click Disk Management.
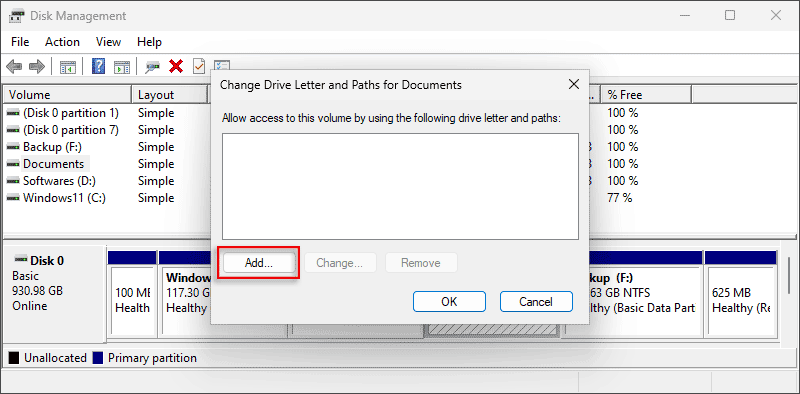
Step 2: Right-click on the M.2 SSD > Click "Change Drive Letter and Paths".
Step 3: Click Add.
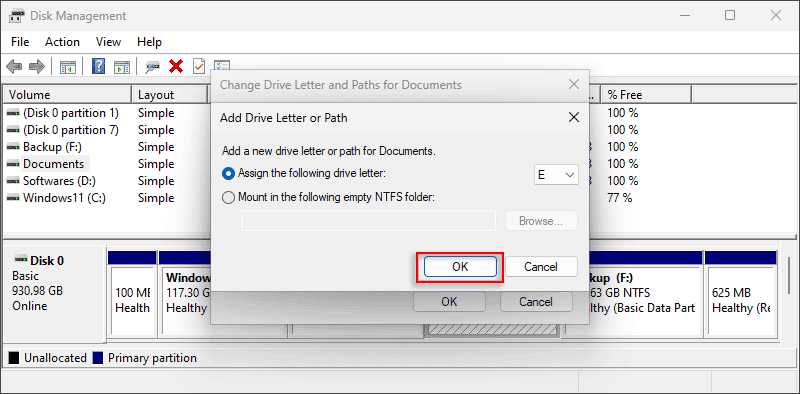
Step 4: The unassigned M.2 SSD will be assigned a drive letter automatically, then click OK. After that, see if the M.2 SSD can be recognized.
If you haven’t backed up the M.2 SSD before formatting and lost data with some mistaking operations, it is possible to recover data from an M.2 SSD with safe third-party software like iSumsoft Data Refixer.
Here are the steps to recover deleted data from SSD with iSumsoft Data Refixer:
Step 1: Download and run the iSumsoft Data Refixer.
Step 2: Select the M.2 SSD and click Start to begin deep scanning. It will take a few minutes depending on how much data your M.2 SSD contains.

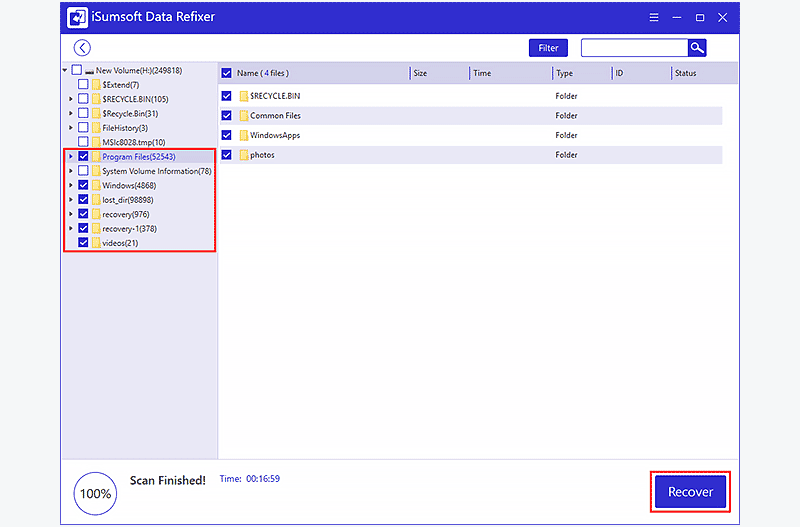
Step 3: After the scan is finished, you will see all the data in the M.2 SSD. Select the files you want to recover and then click the Recover button.
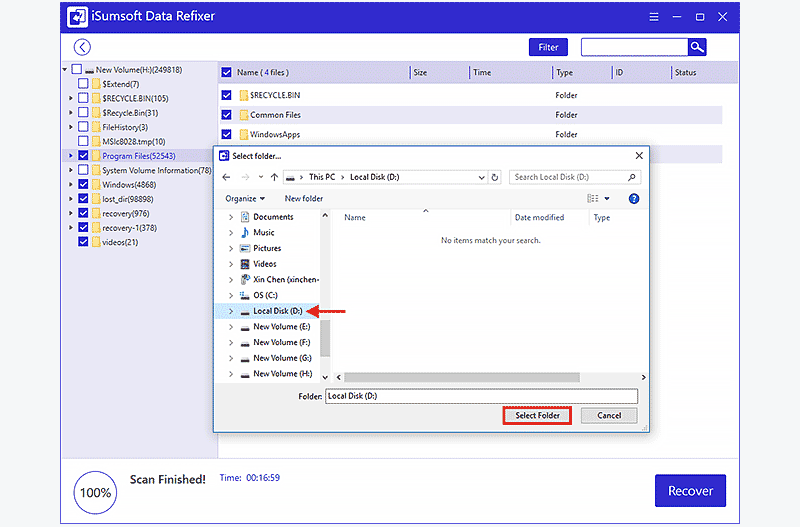
Step 4: Select a suitable drive location (except the original corrupted M.2 SSD) for the recovered files. When the recovery process is finished, open the location to check if the data has come back.
 How to Clone SATA SSD to M.2 NVMe SSD in Windows 10
![How to Install Windows 11 on a New SSD without USB or DVD [Step-by-step]](../images/windows-11/how-to-install-windows-11-on-a-new-ssd-without-usb/how-to-install-windows-11-on-a-new-ssd-without-usb-s.webp) How to Install Windows 11 on a New SSD without USB or DVD [Step-by-step]
How to Install Windows 11 on a New SSD without USB or DVD [Step-by-step] How to Transfer C Drive to a New SSD in Windows 11?
![[2 Ways] Easily Migrate Windows 11 to New m.2 SSD without Reinstalling](../images/windows-11/migrate-windows-11-to-new-m-2-ssd-without-reinstalling/migrate-windows-11-to-new-m-2-ssd-without-reinstalling.webp) [2 Ways] Easily Migrate Windows 11 to New m.2 SSD without Reinstalling
[2 Ways] Easily Migrate Windows 11 to New m.2 SSD without Reinstalling Solved SSD Not Showing Up in Windows 11
 How to Transfer Data from One SSD to Another