
"My C drive, the system drive, is out of space and I want to upgrade my laptop to a larger SSD instead of reinstalling my operating system. How can I transfer my C drive to a new SSD in Windows 11?"
Patience, this article will show you step-by-step tutorials to resolve this problem.

This method is based on the command prompt and you may take some time to complete. If you would like a simple and effective way, you can try Method 2.
Step 1: After installing a new SSD to your computer, reboot your computer, then click on Start icon and select Disk Management.

Step 2: A dialog box will pop up once you access Disk Management and the new SSD is labeled as Disk 1. Check Disk 1, select GPT and then click OK.

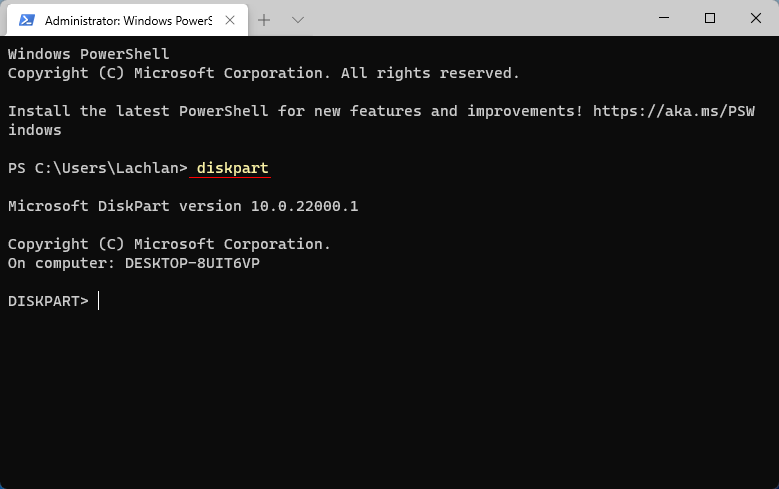
Step 3: Back to the desktop, click Start on the dock, then select Windows Terminal (Admin).

Step 4: Enter Yes.

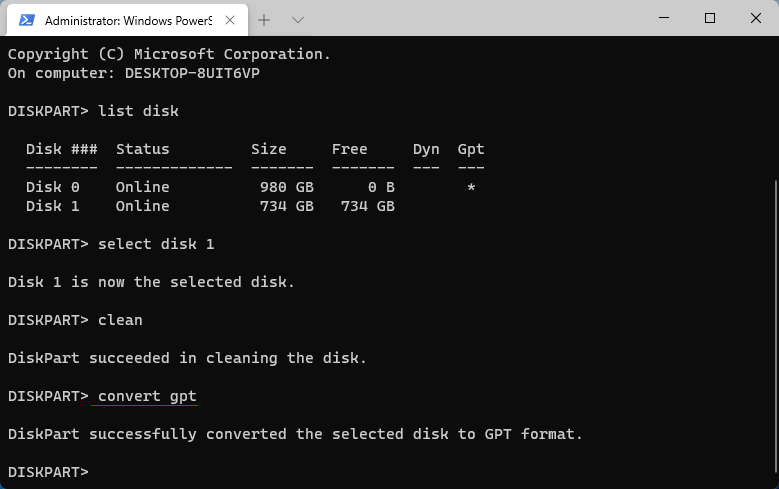
Step 5: Type diskpart and press Enter.
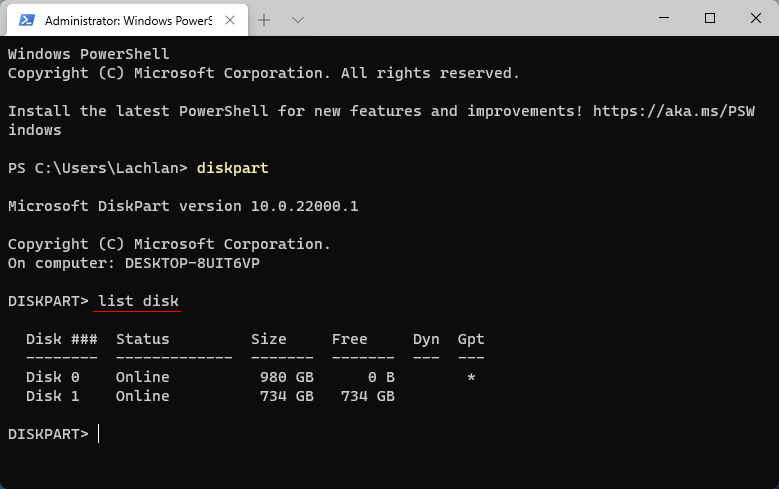
Step 6: Type list disk and press Enter to list the information of all the disks.
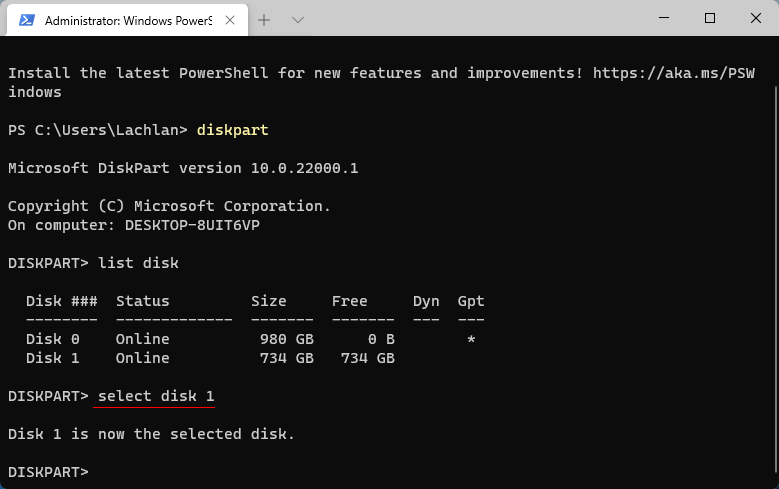
Step 7: Type select disk 1 and press Enter.
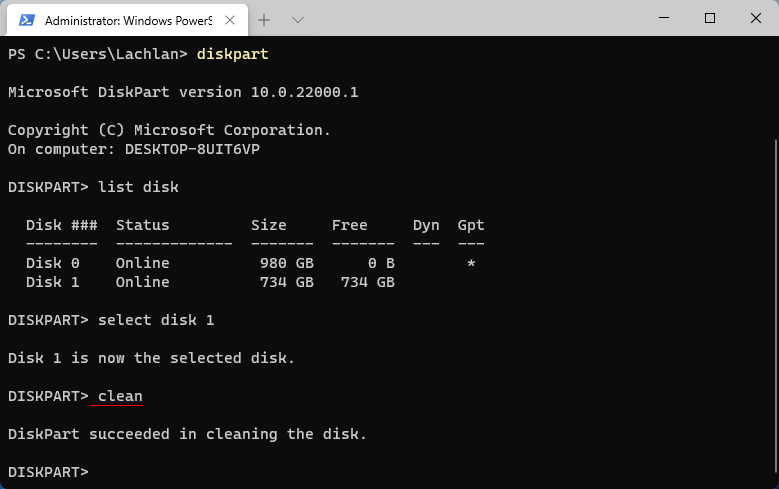
Step 8: Type clean and press Enter, which will erase all the data on the selected drive.
Step 9: Type convert gpt and hit Enter.
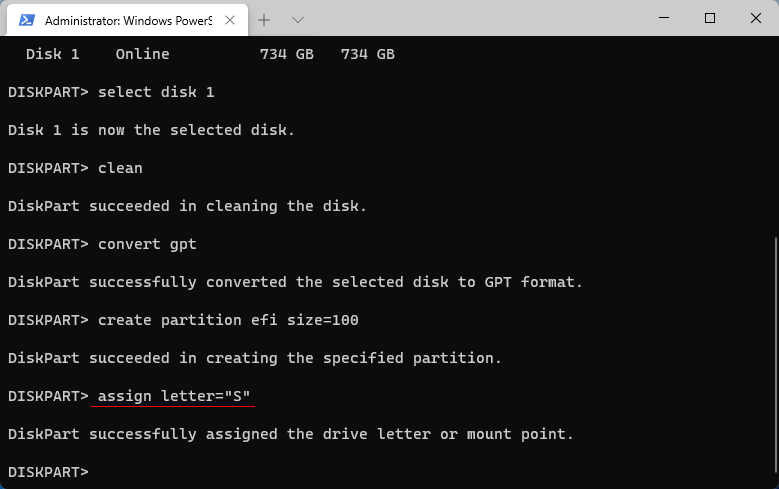
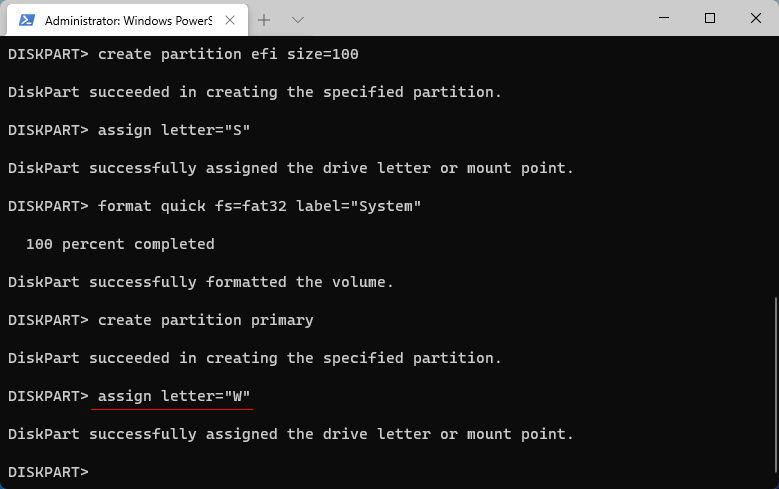
Step 10: Type create partition efi size=100 and hit Enter.

Step 11: Type assign letter="S" and press Enter.
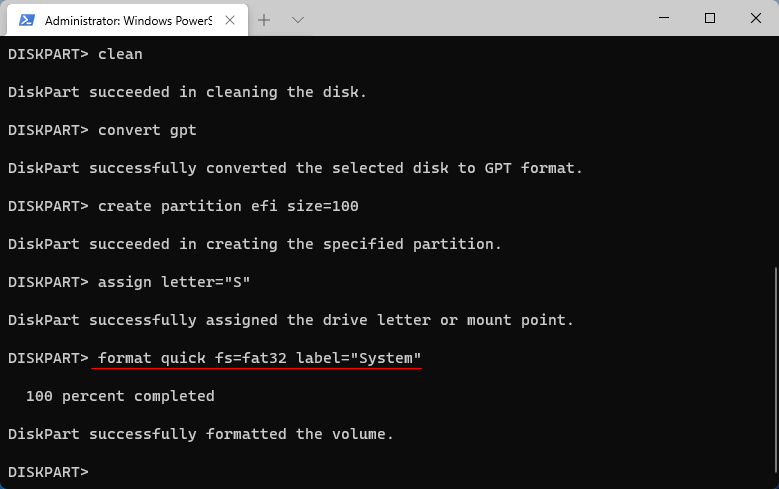
Step 12: Type format quick fs=fat32 label="System" and press Enter to format disk 1.
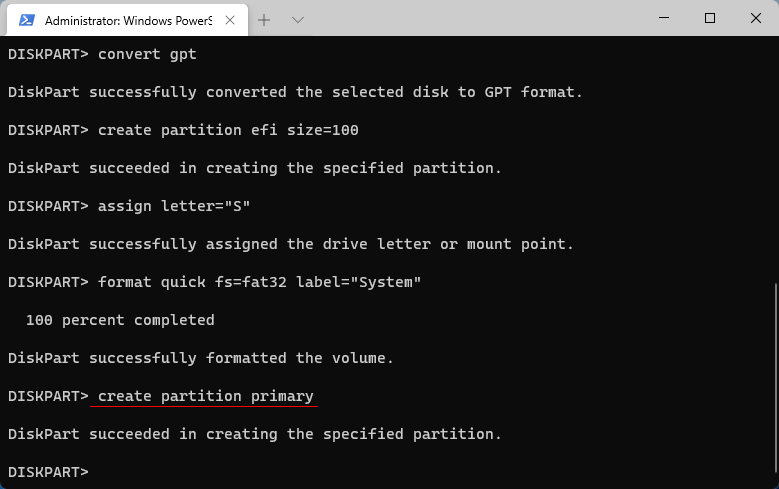
Step 13: Type create partition primary and press Enter.
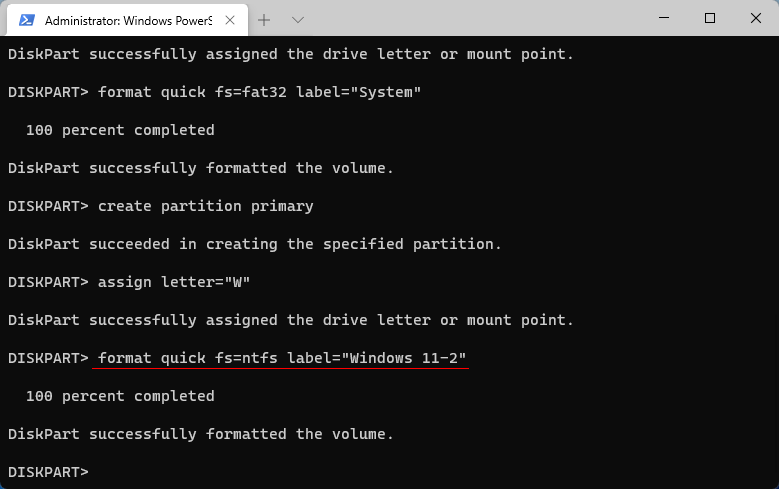
Step 14: Type assign letter="W" and press Enter
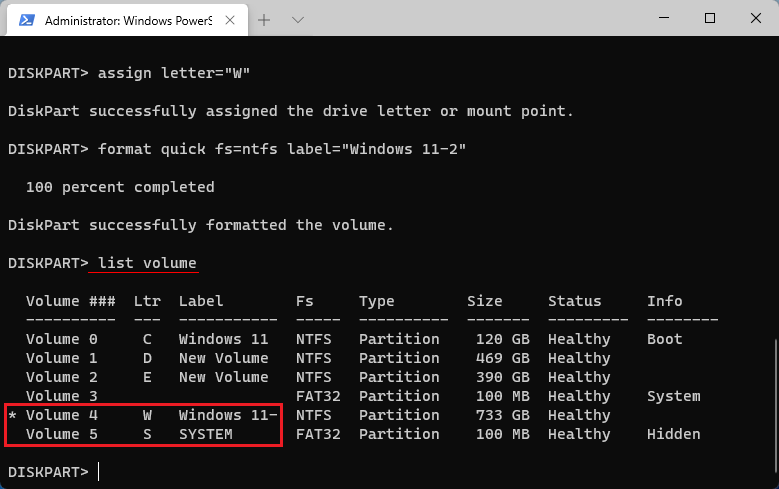
Step 15: Type format quick fs=ntfs label="Windows 11-2" and press Enter.
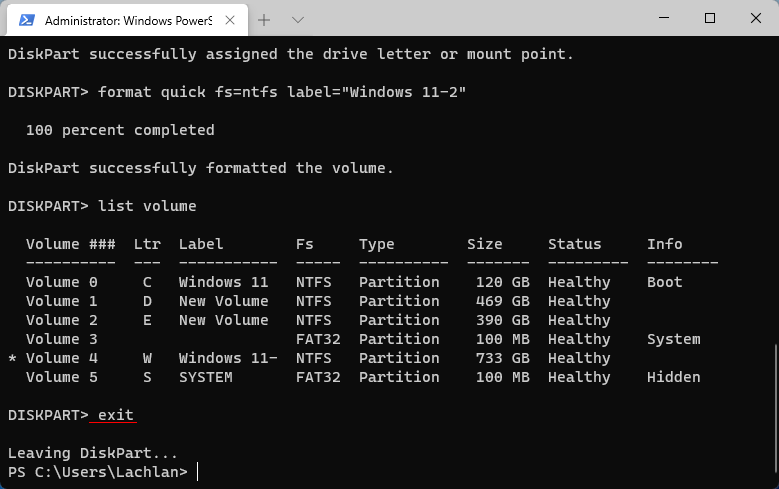
Step 16: Type list volume and press Enter. As shown in the panel, two partitions have been created successfully.
Step 17: Type exit and press Enter to exit diskpart.
Step 18: Download Shadow Copy and install it on your computer.

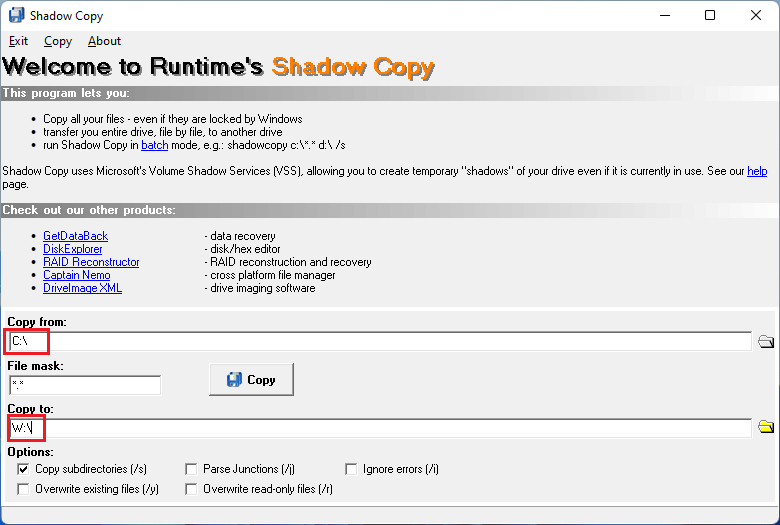
Step 19: Launch the software. Then change the path to C:\ in the Copy from option and change the location to W:\ in the Copy to option.
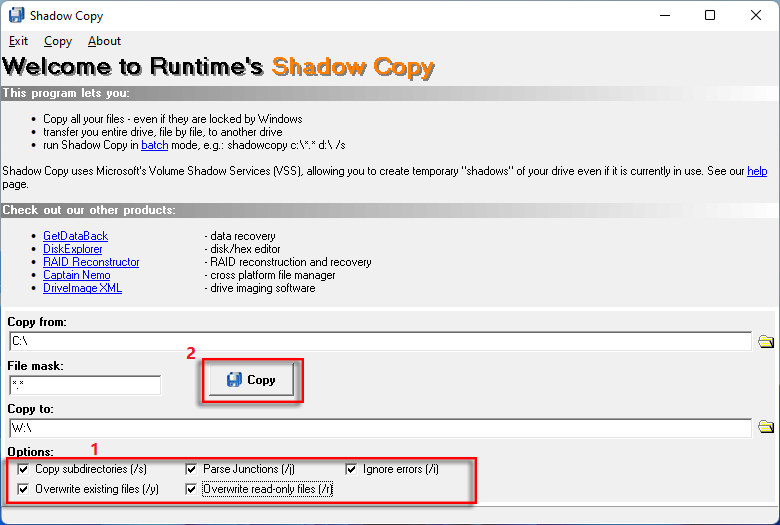
Step 20: Check all the options in the Options list, then click on Copy to start copying C drive.
Step 21: Click OK on the pop-up window when finish copying.

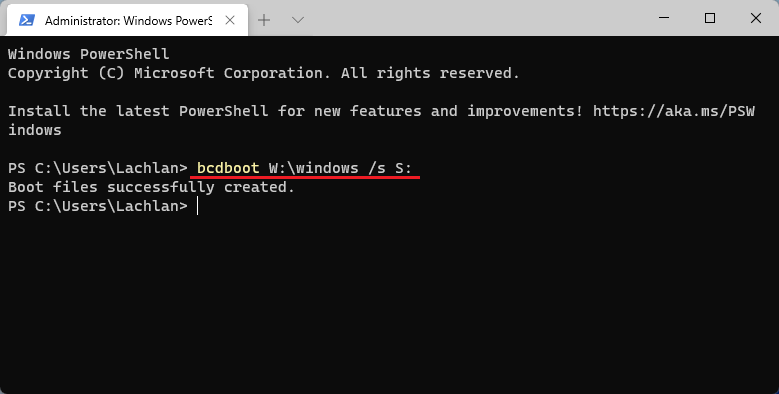
Step 22: Run Windows PowerShell (Step 3), type bcdboot W:\windows /s S: and hit Enter, which sets the W drive as the boot drive and adds boot files to the S drive.
Step 23: Click on Search, then enter "regedit" and select Registry Editor.

Step 24: Click Yes.

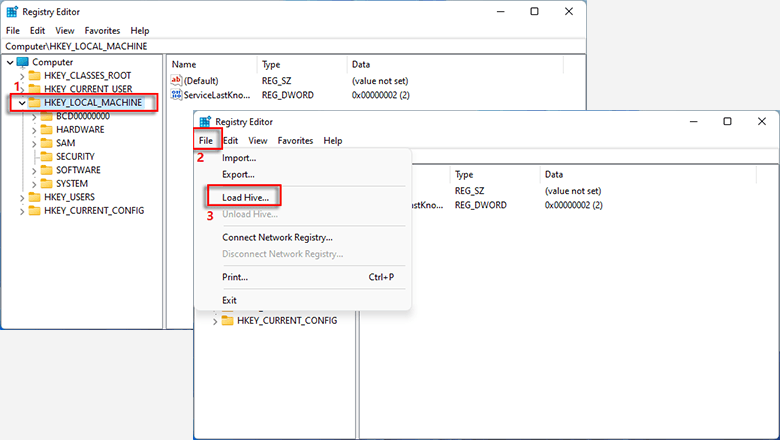
Step 25: Click HKEY_LOCAL_MACHINE. Then click on File and select Load Hive.
Step 27: On the pop-up window, locate the W disk > Windows > System32 > config > SYSTEM, then click Open.

Step 28: Rename it TEST, then enter OK.

Step 29: Navigate TEST > MountedDevices > \DosDevices\C:, then right-click on it and select Rename to name it \DosDevices\P:.

Step 30: Similarly, choose \DosDevices\W: and rename it \DosDevices\C:.

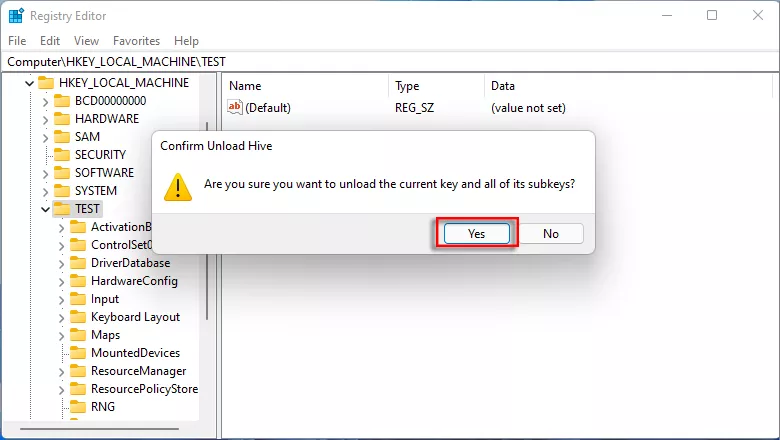
Step 31: Select TEST, then click on File and choose Unload Hive.

Step 32:Click Yes on the dialog box.
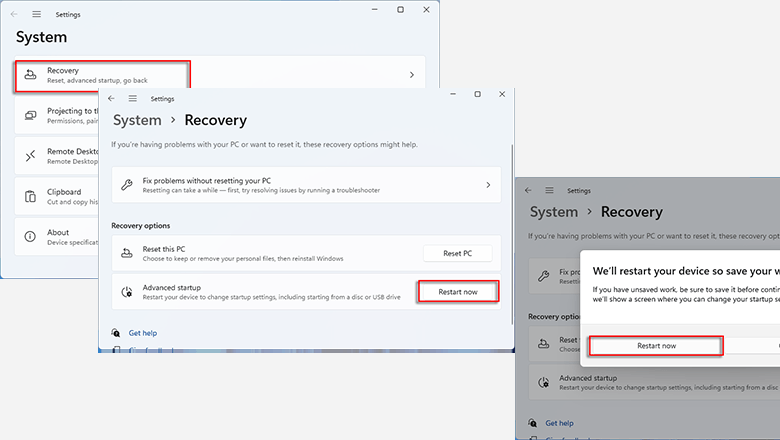
Step 33: Right-click on the Start and select Settings.

Step 34: Select Recovery > Restart now > Restart now, and your computer will start restarting.
Step 35: Select Troubleshoot > Advanced options > UEFI Firmware Settings > Restart.

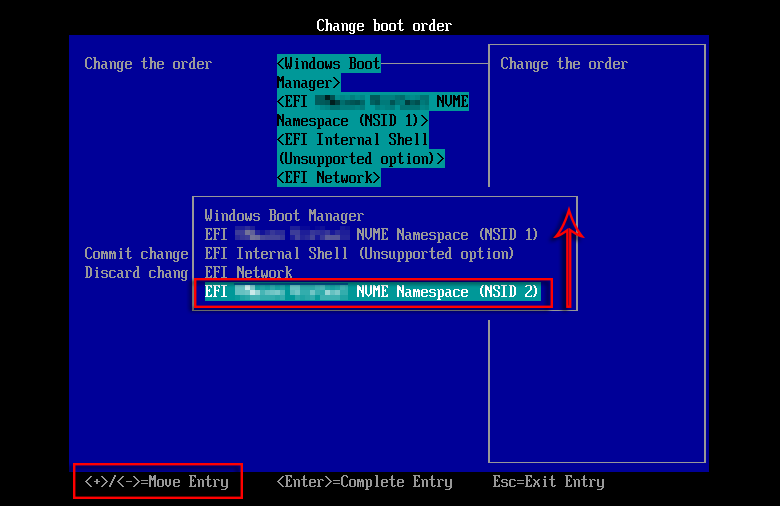
Step 36: After rebooting, enter Change boot order and move the new added SSD to the first option using Up or Down key. Then save the setting and exit to reboot the computer. (How to change the boot order is different for each computer. You can check Hot Keys for Boot Menu and BIOS Settings.)

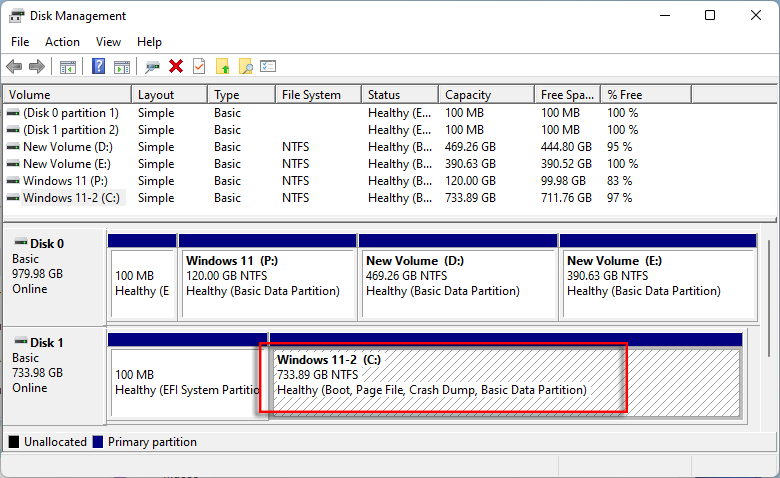
Step 37: Entering Disk Management, and you have successfully transferred the C drive to a new SSD.
With just a few clicks, you can transfer C drive to a new SSD with iSumsoft Cloner, which is simple and effective. Give it a try.
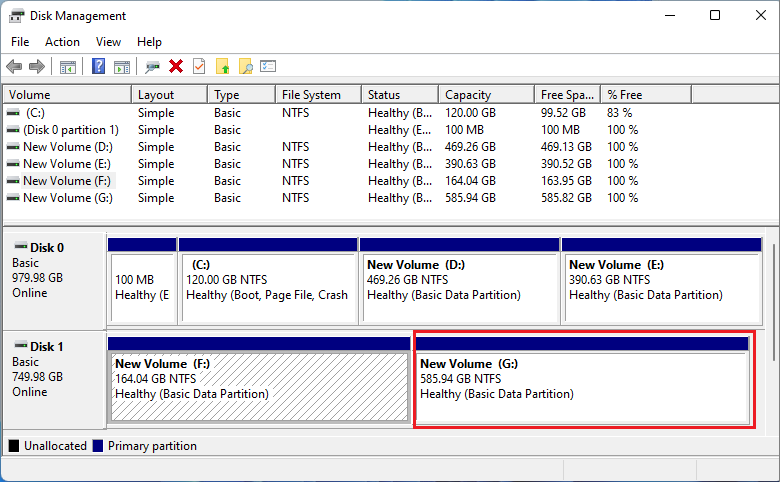
Step 1: Install the new SSD on your computer, then access Disk Management to check the installed drive, which is labeled as G.
Step 2: Download and install iSumsoft Cloner, then launch it.

Step 3: Select Copy on the interface.

Step 4: Check Set the target partition as the boot disk. On Select Source Partition, select "Disk C" from the drop-down menu, and on Select Destination Partition, select "Disk G" from the drop-down menu.

Step 5: Click on Start. When you are prompted the drive will be overwritten, click Yes to proceed.

Step 7: Click OK if the copy has completed successfully.

Step 8: Reboot your computer, during which you need to press ESC or Delete quickly to enter the Boot Menu or BIOS/UEFI Setup to change the boot order. And you need to use the Up or Down key to choose the new drive as the first boot option.
Step 9: Save the setting and exit the program. Then reboot your computer. Navigate the Disk management and the C drive has been transferred to the SSD successfully.