
"My laptop has two M.2 slots, and comes with a 512GB SATA SSD. Now I'd like to add a 1TB NVMe SSD to my laptop. Is there any way to clone everything on my SATA SSD, including the operating system, to the NVMe SSD? My operating system is Windows 10, version 1903."
If you are wondering how to clone a SATA SSD to a M.2 NVMe SSD in Windows 10, now you are in the right place. This page will show you simple and effective steps.
M.2 SSDs based on NVMe interface protocol make use of four PCI express lanes for data transfer, allowing speeds up to 4000 MB/s making it six times faster than SSDs based on standard SATA interface (about 560MB/s). The efficient read-write speed is particularly noticeable in large file transmission, photo editing, video transcoding and real-time editing. That's the main reason you want to clone your SATA SSD to an NVMe SSD. In addition, NVMe SSDs have the advantages of low latency, low power consumption and wide driver compatibility.
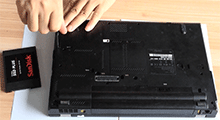
1. Disassemble the computer to install the new NVMe SSD properly into the M.2 slot on the motherboard.

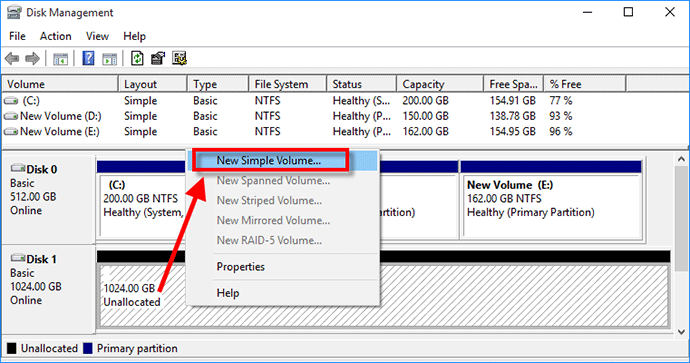
2. Sign in to Windows 10 and make sure the added M.2 NVMe SSD show up with a new drive letter. If not, go to Disk Management to initialize the NVME SSD and create a new volume on it.
Now that you have your M.2 NVMe SSD ready, the next step is to clone your SATA SSD onto it. To make sure you don't lose any data, you need a professional and reliable disk cloning tool. iSumsoft Cloner is one such tool, which allows you to clone one hard drive perfectly to another without losing any data. It works for all brands and forms of hard drives and SSDs. The clone result preserves the bootability of the Windows operating system and the integrity of all data partitions. Download iSumsoft Cloner and install it in your Windows 10. After installation, launch the software.
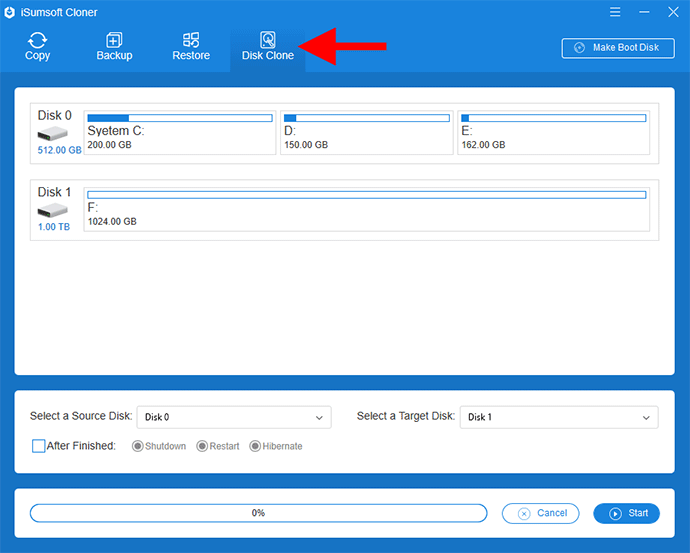
1. Select the Disk Clone tab on the software interface.
Tips: Currently, most disk cloning software only supports cloning smaller SSD to larger SSD, so make sure the total capacity of the NVMe SSD is larger than that of your SATA SSD. In case the NVMe SSD doesn't have enough storage space to hold the SATA SSD, it's recommended that you clone only the Windows OS instead of the whole SATA SSD to the NVMe SSD.
2. Select Disk 0 (the current primary hard drive of the computer, i.e. the SATA SSD) as the source disk, and then select Disk 1 (the newly added disk, i.e. the M.2 NVMe SSD) as the destination disk.
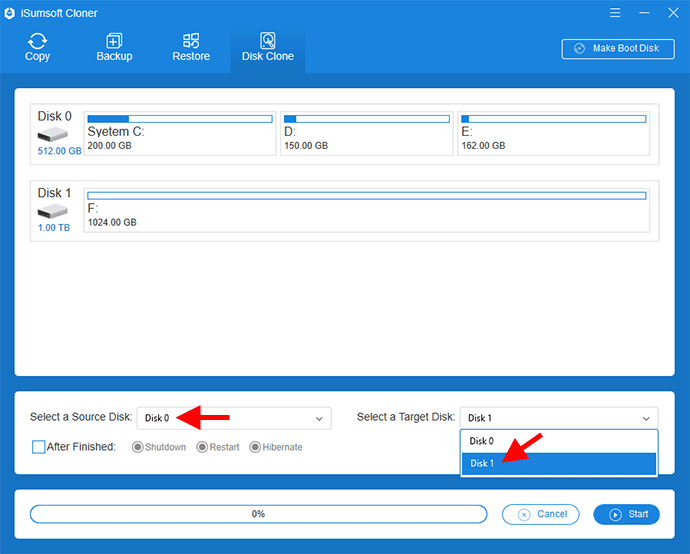
3. Now click on Start in the lower right corner to start cloning.
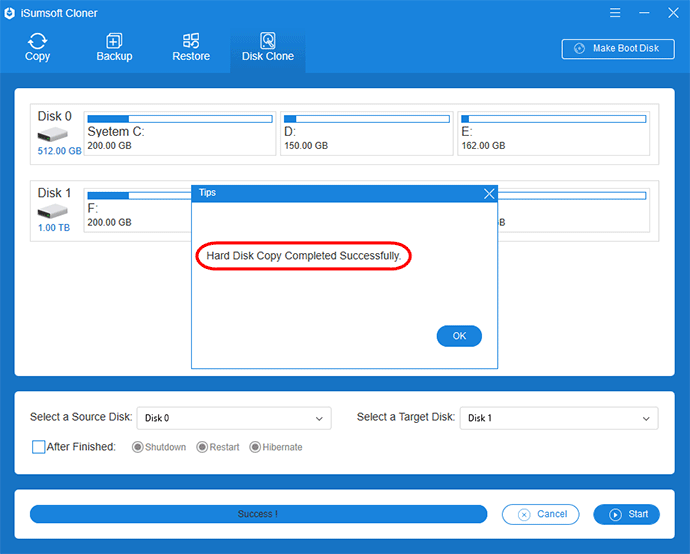
4. Wait for the cloning process to complete. This takes about 20 minutes, depending on the size of the content to be cloned. When a success prompt dialog box pops up, the cloning is done.
After cloning, you may want to change the cloned NVMe SSD to your computer's primary or boot drive. If you remove the old SATA SSD and keep only the NVMe SSD, your computer will use the NVMe SSD as the primary drive by default and boot from it automatically. However, if you keep both SSDs, wanting to use the NVMe SSD as the primary drive and the SATA SSD as the data storage drive, then you have to access the UEFI/BIOS firmware menus to set or change the first boot drive.
1. Turn off your computer and then turn it on again. When the first screen appears, continuously press the function key (generally Esc, Delete, F1, F2, F10, depending on your manufacturer) to access the UEFI or BIOS screen.
2. Go to the Boot option and select the NVMe SSD as the first boot drive.
3. Save the changes and exit the UEFI/BIOS, so your computer will boot from the cloned NVMe M.2 SSD.
 How to Clone Windows
10 OS from HDD to M.2 SSD
How to Clone Windows
10 OS from HDD to M.2 SSD
 How to Clone an SSD to a Larger
SSD in Windows 10 Laptop
How to Clone an SSD to a Larger
SSD in Windows 10 Laptop
 2 Ways to Clone HDD to
Samsung 860 EVO SSD in Windows 10
2 Ways to Clone HDD to
Samsung 860 EVO SSD in Windows 10
 How
to Upgrade Laptop Hard Drive to SSD without Reinstalling Windows
How
to Upgrade Laptop Hard Drive to SSD without Reinstalling Windows
 How
to Clone Windows 10 System Boot Drive from HDD to a New SSD
How
to Clone Windows 10 System Boot Drive from HDD to a New SSD
 How to
Transfer Windows 10 from HDD to SSD without Data Loss
How to
Transfer Windows 10 from HDD to SSD without Data Loss
