
Some users have found that internal hard drives have disappeared after updating the Windows 10 version or upgrading the system to Windows 11 as the hard drive doesn't show up in File Explorer. So why is this happening? This article will illustrate to you how to fix the problem that the hard drive disappeared in Windows 10/11 after updating.

There are two common reasons for a missing hard disk. The first is caused by the dual-boot system. When the current system is running, the hard disk where the other system is installed is hidden. Another situation is caused by viruses that change the system settings.
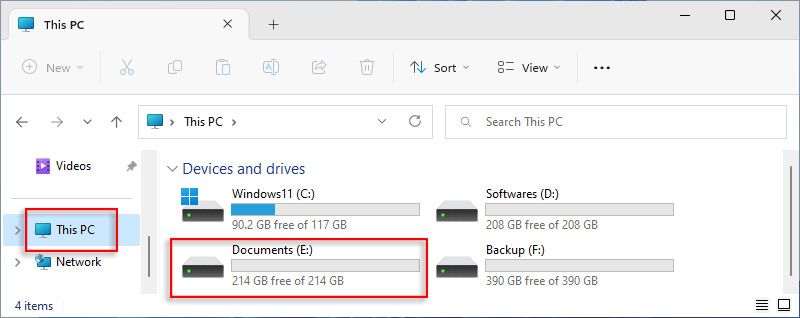
The following picture shows a missing E drive in File Explorer.

Step 1: Right-click on the Windows icon and select Disk Management.

Step 2: In Disk Management, locate the partition with the missing drive letter.
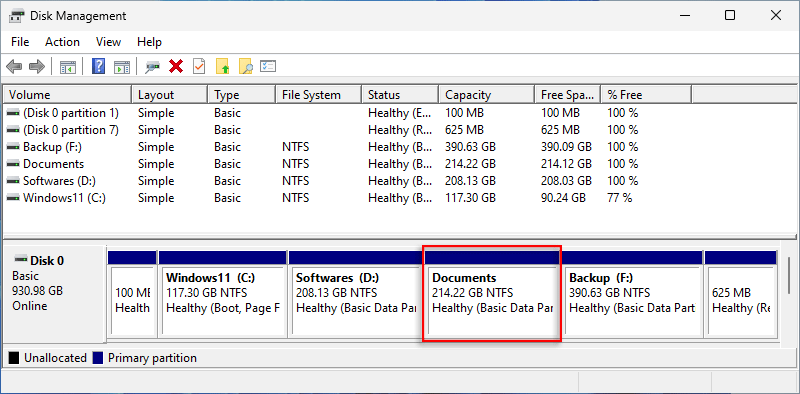
Step 3: Right-click on it and choose Change Drive Letter and Paths... option.
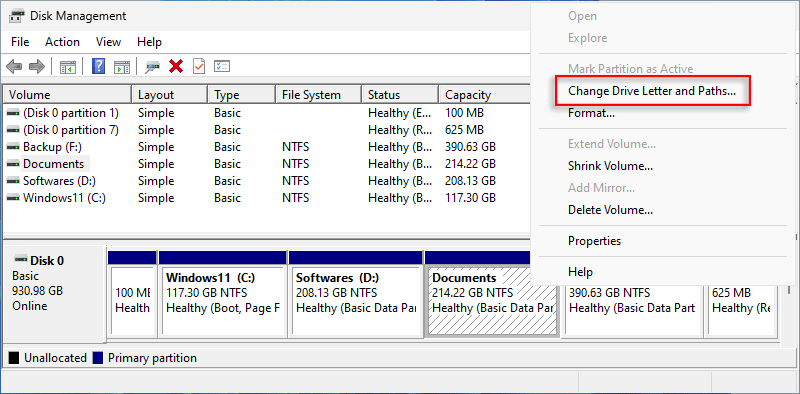
Step 4: Click Add in the dialog box.
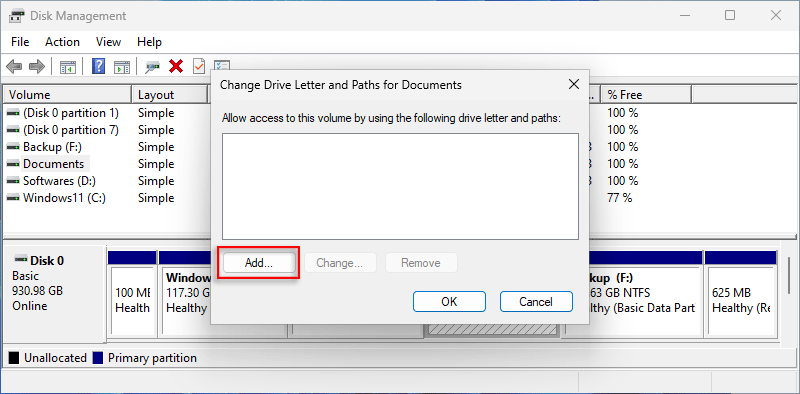
Step 5: The System will automatically assign a letter to the partition. Click Ok.
Step 6: A new label has been assigned to the partition successfully.

Step 7: Open File Explorer, E drive has been recovered.
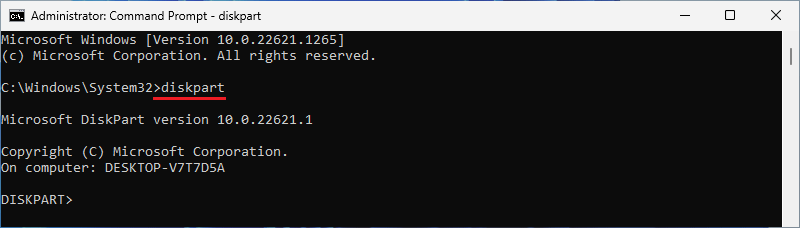
Step 1: Click Search icon in the taskbar. Then type "cmd" in the search box and select Run as administrator.

Step 2: Enter Yes.

Step 3: In the command prompt, type diskpart and hit Enter.
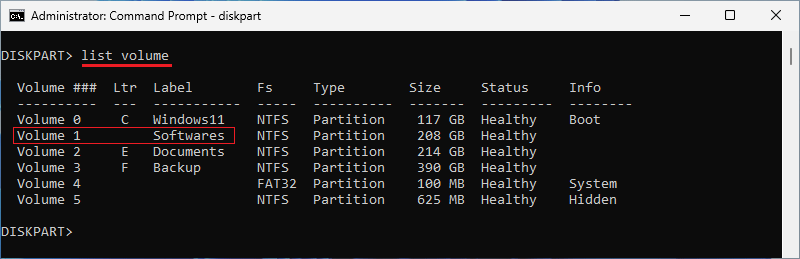
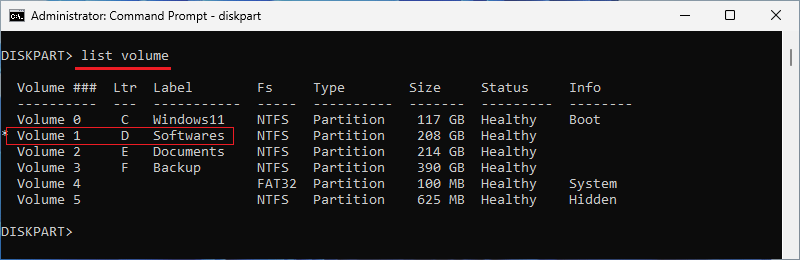
Step 4: Type list volume and press Enter to list all the volumes of the disk. As shown in the panel, the letter of Volume 1 was removed.
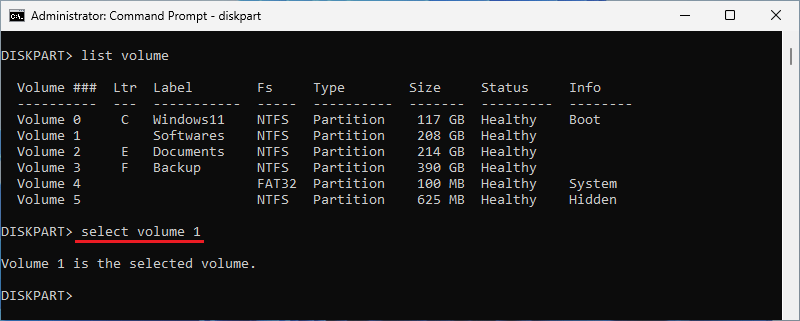
Step 5: Type select volume 1 and hit Enter to choose volume 1.
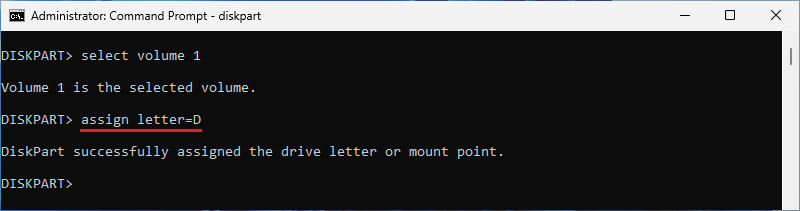
Step 6: Input assign letter = D and hit Enter, setting its label as D.
Step 7: Type list volume and hit Enter again. Now a letter has been assigned to volume 1.
Step 8: Type exit and hit Enter to end diskpart.

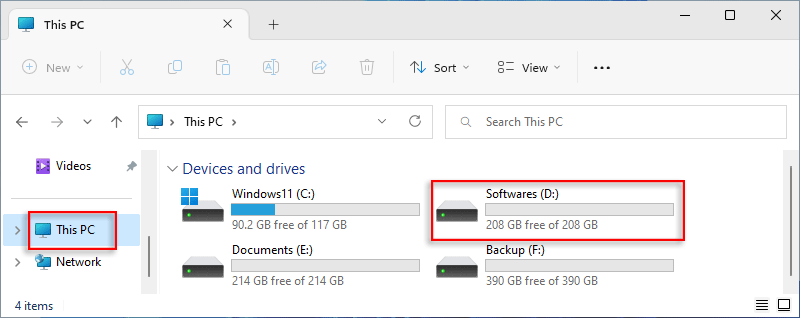
Step 9: D drive has been recovered successfully.
 How to Recover
Hidden Files from a Virus-attacked USB Drive
How to Recover
Hidden Files from a Virus-attacked USB Drive How to
Initialize Partition a Hard Drive in Window 10
How to
Initialize Partition a Hard Drive in Window 10![[Free] Recover Deleted/Lost Partitions with TestDisk](../images/computer/free-recover-deleted-or-lost-partitions-with-testdisk/free-recover-deleted-or-lost-partitions-with-testdisk-s.webp) [Free]
Recover Deleted/Lost Partitions with TestDisk
[Free]
Recover Deleted/Lost Partitions with TestDisk How
to Clone Windows System Drive to a New Hard Drive
How
to Clone Windows System Drive to a New Hard Drive
 What
is the BCD File? Backup, Restore, and Rebuild BCD File
What
is the BCD File? Backup, Restore, and Rebuild BCD File
 How to Create Bootable USB for Windows Password Reset