
Computer viruses can infect any storage drives without giving prior warning. If your USB drive is caught a virus infection, the virus may hide all of files and folders by changing everything into a shortcut that calls Documents.vbe. This post provides instructions for removing viruses from a USB drive, recover the hidden files and folders for a virus-attacked USB drive and offers suggestions for preventing future infections.
Viruses can infect your USB drive if it is connected to an infected computer. However, you can scan and delete viruses present in your removable USB drive using Windows "Command Prompt" utility. Here is an example of using CMD to remove virus from D drive in Windows 10. You can follow and give a try on your USB drive.
Step 1: Insert the USB drive. Click on "Cancel" button if auto run Window appears.
Step 2: In the Search box in the taskbar, type in cmd, then press Enter key to open the Command Prompt.
Step 3: Check a USB drive for virus.
In the CMD windows, type the corresponding "drive letter" of your USB and then press "Enter".
Now, type "dir/w/a D:\*.*" (replace D: with the drive letter for your USB device) into the Command Prompt and again press "Enter". It will display a list of the files on the drive.
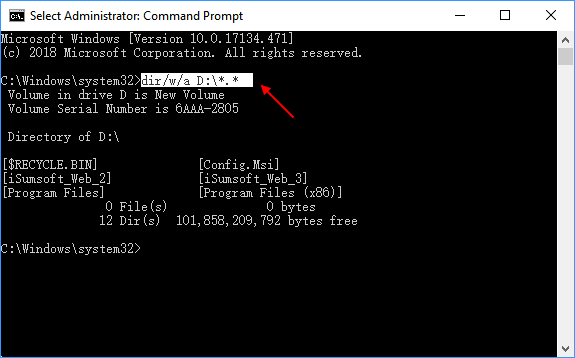
Look to see if any of the following is listed in the directory list: "Autorun.inf", "Ravirtual machineon.exe", "New Folder.exe", "svchost.exe" or "Heap41a". If any of these are present, the USB drive is more than likely infected and the virus will need to be removed from the USB drive.
Step 4: Remove virus from USB drive.
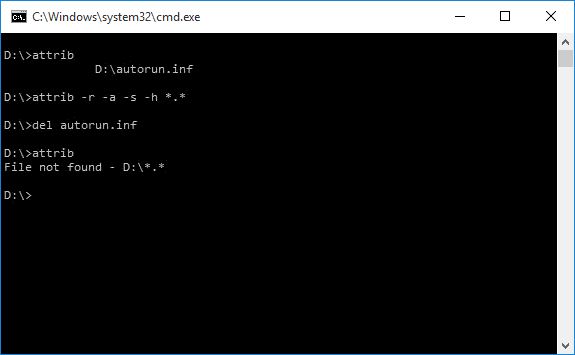
To remove the virus using CMD, type into your command prompt: attrib -r -a -s -h D:\*.* and press "Enter".
This will remove the Read Only, Archive, System and hidden file attribute from all the files. (*.* for all the files with all different types of file extensions). You can even delete individual malicious files by typing "del filename" from and then "Enter".
For example, type: del autorun.inf and hit enter to delete the files. If you are infected with other viruses, replace autorun.inf with other virus extensions such as *.ink or *.exe so to respectively delete those suspicious files.
Step 5: Use the attrib command to recover hidden files.
Enter attrib -h -r -s /s /d D:\*.* (replace D: with the drive letter for your device).
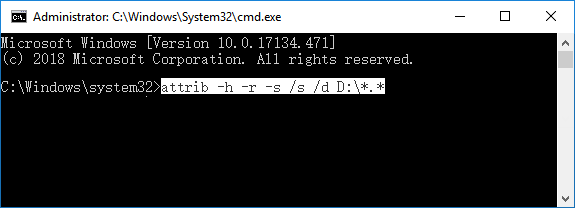
Attrib is a command in Microsoft Windows that allows the user to change various characteristics, or "attributes" of a file or directory. *.* indicates that command apply to all files and folders on the drive.
The symbols "–" are used to set and clear the attrib respectively.
r – Remove Read-Only flag.
h – Remove hidden file attributes.
s - Remove system file attribute.
s – Apply the above attribute modifications to all files in this folder and all subfolders.
d – Apply the above attribute modifications to the folders themselves too.
Sometimes people will hide a folder and then any files inside will not be visible. To execute this command will make all the folders and subfolders visible.
Steps to perform a scan for removable media are very simple, here is how to run the Avast scan for removable media.
1. Run the Avast Free Antivirus program. ( You can download the Avast program to your computer if it hasn't been installed. )
2. Insert the USB Flash Drive into the Computer.
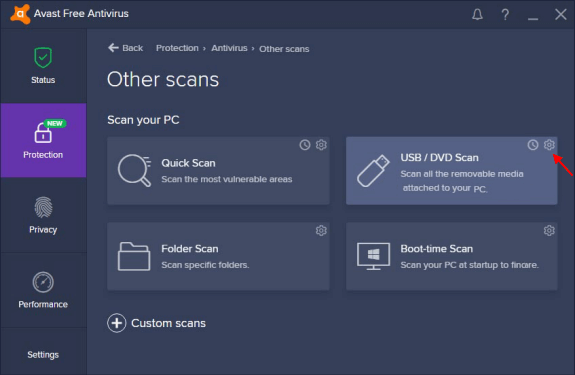
3. In Avast interface, go to "Protection" in the left menu, and select Antivirus. On the Antivirus screen select "Other scans", then select "USB/DVD Scan". Before you start the actual scan, you can adjust its settings a bit, so no virus or malware on the USB is missed.
4. Tweak the USB Scan Settings.
Click on the Setting icon, in the Scan tab and scroll down to check option "All files".
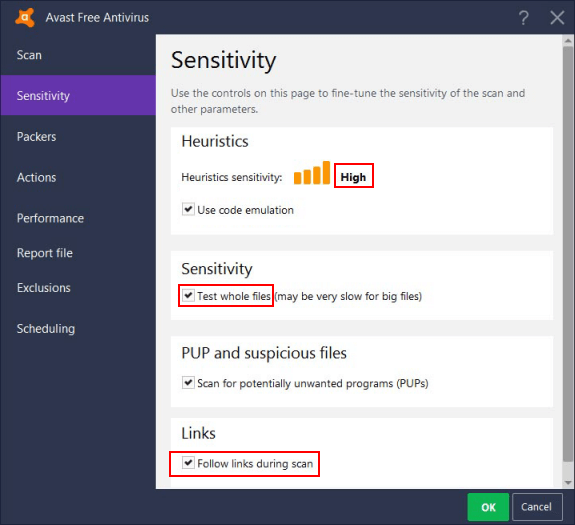
Move to the Sensitivity tab and set Heuristics level to "High" and check the options "Test whole files" and "Follow links during scan". Then move to the Packers tab and check the option "All packers" to include all archive types in the scan. Confirm by clicking on the "OK" button.
5. Start running Removable Media scan.
Now everything is set, just click on "USB/DVD Scan" and wait until the scan is finished. Since we have set a strict setting, it may take a while. After the scan is complete, you will see the results. If there is no danger, you will see a green message saying "Great! No issues found!". Then you can go ahead and start using the scanned USB flash drive.
There are some preventive measures you could take to keep your devices safe.
1. Set write permissions.
2. Control virus running.
3. Be Careful while using Public Cafes.
4. Maintain a Routine Scanning of Devices.
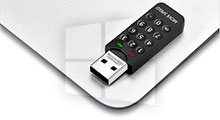
5. Using Encrypted Drives.
 Resolved: Delete File or Folder Access Denied
 How to Hide Files and Folders of USB Flash Drive
 How to Format a Write Protected USB Drive Using CMD
 Encrypt USB Flash Drive with or without BitLocker in Windows 10
 How to Recover Deleted Files from USB Flash Drive
 Fix Windows Couldn't Format USB Flash Drive