
Before upgrading from Windows 7/8 to Windows 10, it's important to back up both personal files and the system itself. This ensures that if the upgrade fails or the system doesn't perform well afterward, you can restore your original state without needing to reinstall Windows.
To back up personal files, you can manually copy them or use the backup tools available in Windows 7 (Backup and Restore) or Windows 8 (File History). The article will then explain how to back up the Windows system itself.
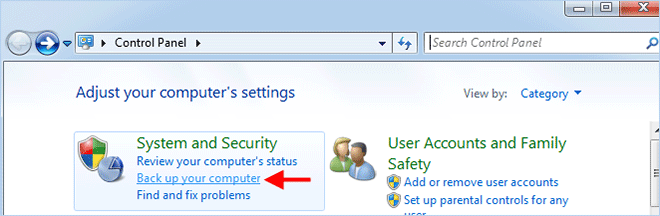
Step 1 Open Control Panel, and then click Back up your computer.
Step 2 Click Create a system image on the left pane.

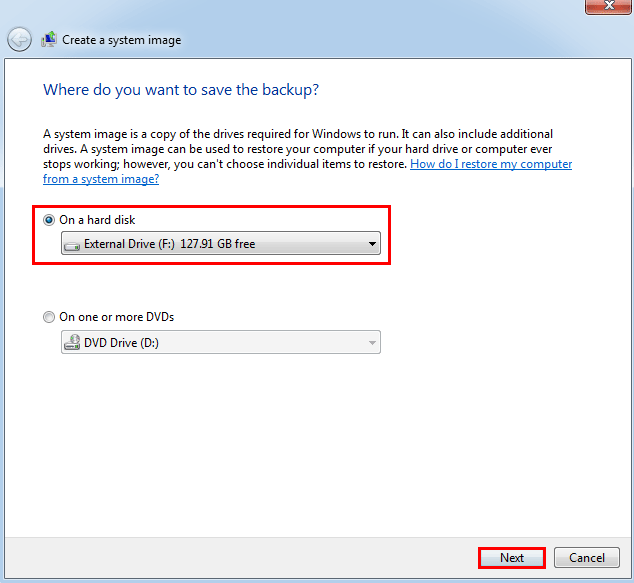
Step 3 Insert an external drive to your PC as a backup drive. Select the radio button of "On a hard disk", select the connected external drive from the drop-down list, and then click Next.
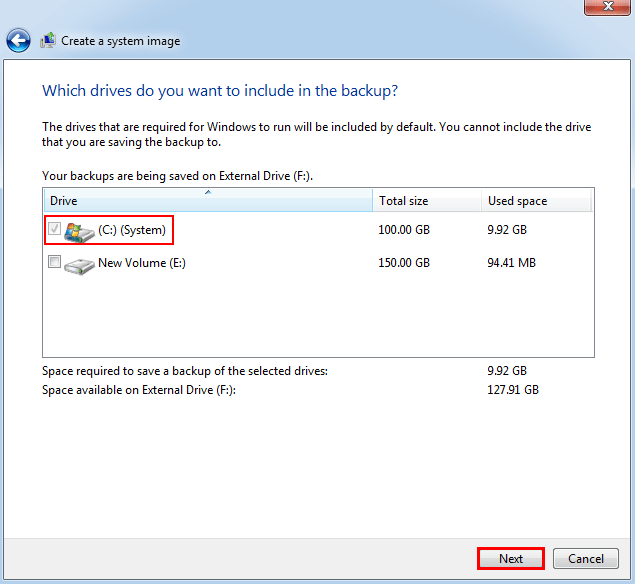
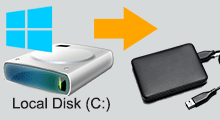
Step 4 Select which drives you want to back up. The drive (C:) that contains your Windows operating system is included by default. You can select other data drives if you want. Then click Next.
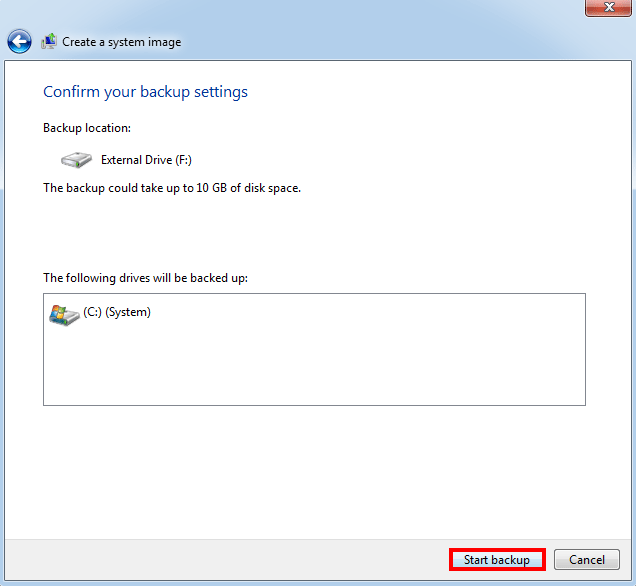
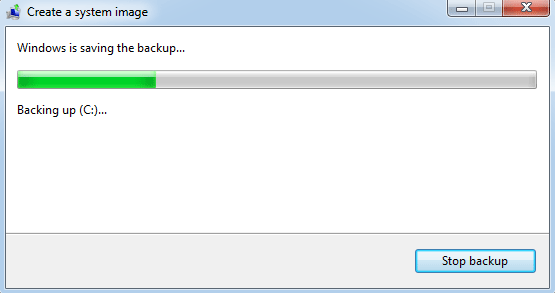
Step 5 Confirm your backup settings and then click Start backup. Windows will begin creating a system image.
Step 6 Wait for the backup process to complete. This will take several minutes.
Step 7 When the system image is created successfully, Windows will ask if you want to create a system repair disc at this time, which can be used to boot a failed computer. Just click Yes to create one if you have a CD or DVD flash drive.
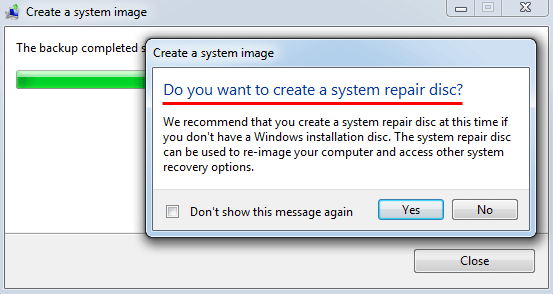
If something goes wrong in the process of upgrading to Windows 10 and your computer won't boot, you can boot your computer from the system repair disc, and then restore your original Windows from the system image backup.
For detailed steps plesae see How to Create and Restore System Image on Windows 10.
Another option to backup your Windows 7/8 before upgrading to Windows 10 is to employ a third-party backup program. Here we recommend using iSumsoft Cloner. It is designed with simple enough interface, enabling you to make a full backup of your Windows system within just a few clicks.

iSumsoft Cloner
Step 1 Connect the external drive where you want to save your Windows backup to your computer.
Step 2 Download and install iSumsoft Cloner on your computer. After installation, start the software.
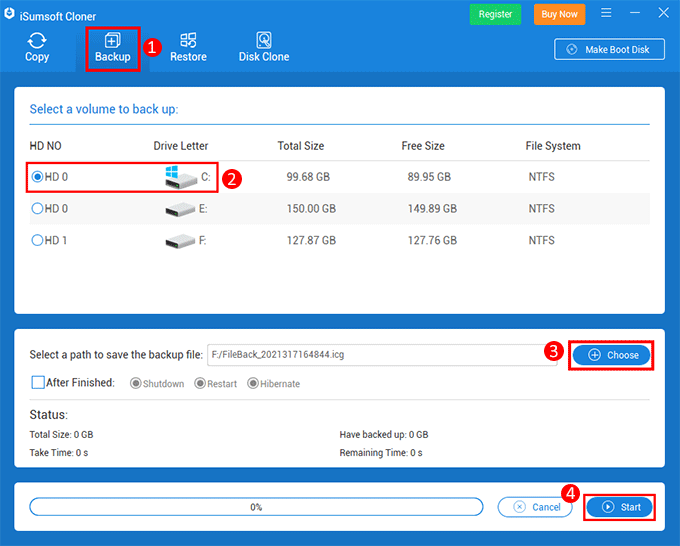
Step 3 Select the Backup option on the top. Select the drive containing your current Windows operating system as the source disk, and click Choose to select the connected external drive as the destination disk to save the backup. Then click Start.
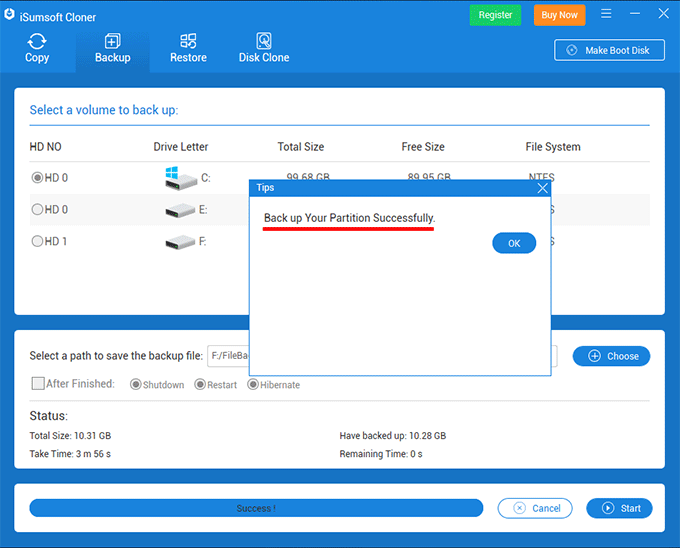
Step 4 The software will start backing up the Windows system to the externally connected drive. Wait for the backup to complete.
After making a backup of your Windows, you can safely upgrade your computer to Windows 10. In case the upgrade process goes wrong or the upgrade result is not so good, you can recover your Windows through the backup.
 How
to Back up Windows 10 System & Data to USB Flash Drive
How
to Back up Windows 10 System & Data to USB Flash Drive
 How
to Backup Computer to External Hard Drive in Windows 10
How
to Backup Computer to External Hard Drive in Windows 10
 How to Backup
Data without Booting into Windows 10
How to Backup
Data without Booting into Windows 10
 How to Create and
Use System Restore Point
How to Create and
Use System Restore Point
 How to Copy C
Drive to External Hard Drive in Windows 10
How to Copy C
Drive to External Hard Drive in Windows 10
 How
to Do a System Restore When Computer Won't Boot
How
to Do a System Restore When Computer Won't Boot
