To quickly access Print Management on your Windows 10 computer, creating a shortcut on your desktop can be a convenient solution. Normally, users have to navigate through multiple steps to open Print Management. By creating a shortcut, you can directly access it from your desktop.
This article will guide you through three simple methods to create a Print Management shortcut on your Windows 10 desktop.
Step 1: Go to your Windows 10 desktop.
Step 2: Right-click on an empty area of your desktop, then select New > Shortcut.

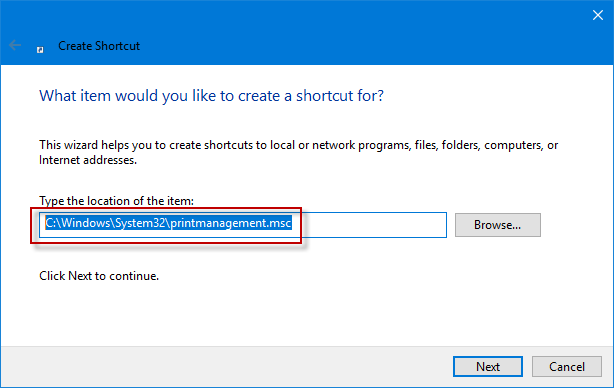
Step 3: In the Create Shortcut window, type C:\Windows\System32\printmanagement.msc in the location field and click Next.
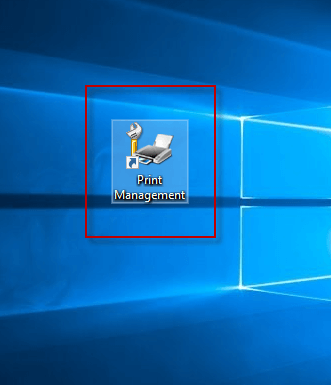
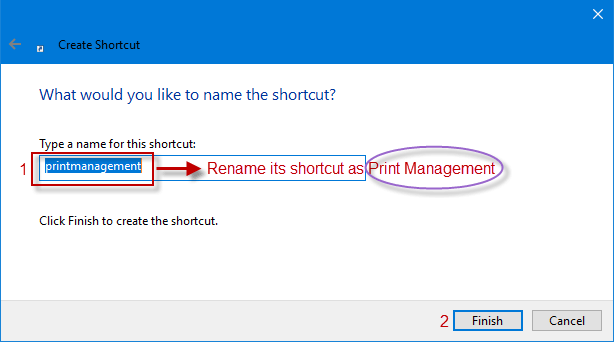
Step 4: You can rename the shortcut to Print Management and click Finish. If you don't rename it, the shortcut will be named printmanagement by default.
Step 1: Open File Explorer on your Windows 10 computer.
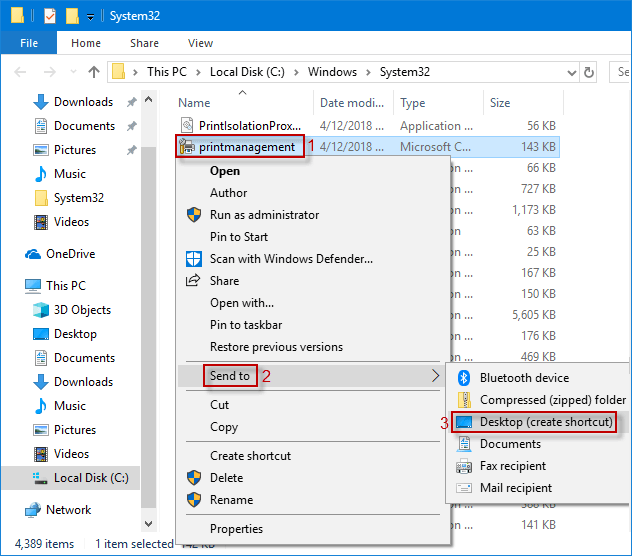
Step 2: Navigate to This PC > Local Disk (C:) > Windows > System32. Find printmanagement, right-click it, and select Send to > Desktop (create shortcut).
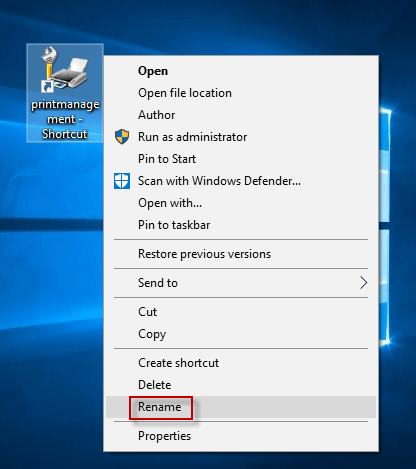
Step 3: Once the shortcut appears on your desktop, you can right-click it and choose Rename to change its name to Print Management.
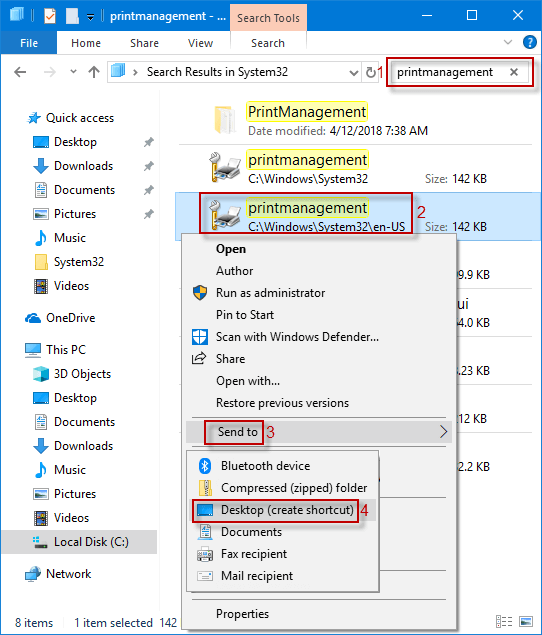
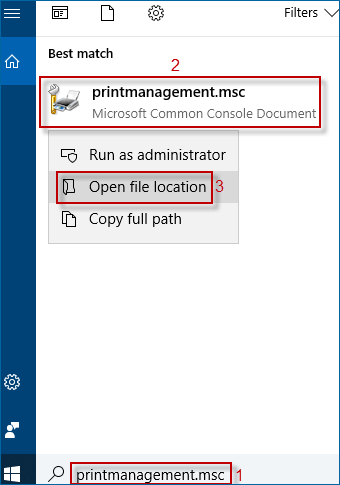
Step 1: Type printmanagement.msc in the Taskbar search box, right-click printmanagement.msc from the results, and select Open file location.
Step 2: Right-click printmanagement and choose Send to > Desktop (create shortcut).
Step 3: Follow Step 3 from Method 2.