Windows 10 automatically schedules maintenance activities to improve your computer's performance and energy efficiency. These tasks include Windows updates, security scans, and system diagnostics. By default, maintenance runs daily at 2 AM. This guide shows you how to change the automatic maintenance schedule to a more convenient time.
Step 1: Open Security and Maintenance settings.
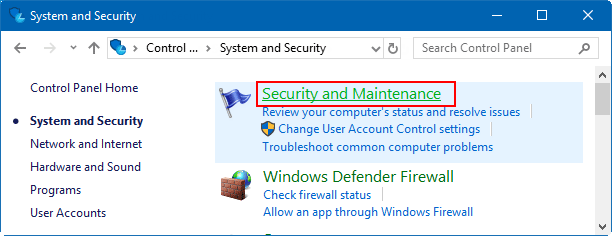
Open Control Panel, then click System and Security > Security and Maintenance.
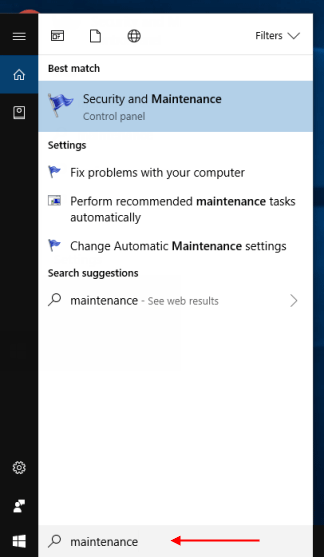
Alternatively, type maintenance into the taskbar search box and click Security and Maintenance.
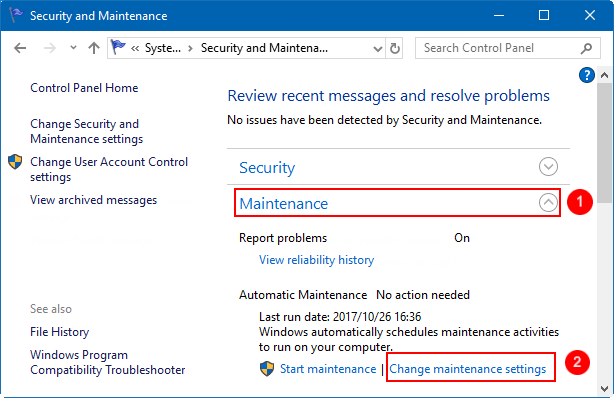
Step 2: Expand Maintenance in the Security and Maintenance window, then click Change maintenance settings to adjust the schedule.
If you need to run maintenance immediately, click Start Maintenance.
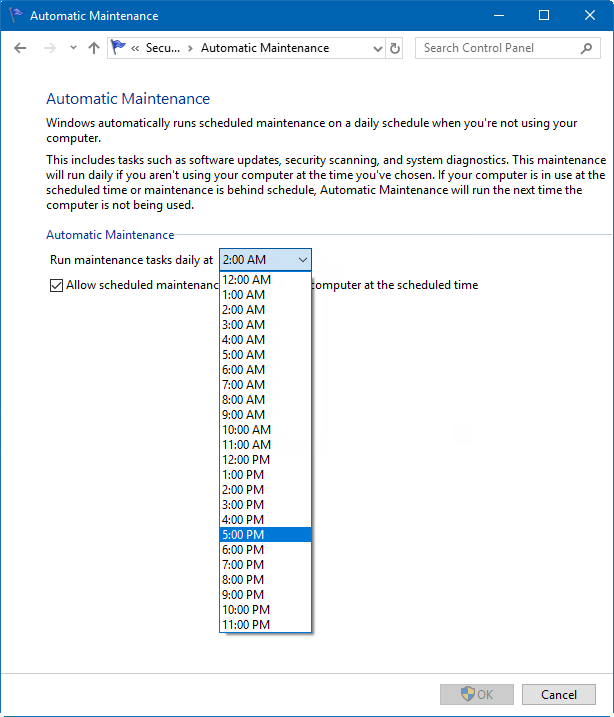
Step 3: Set a new schedule for Automatic Maintenance.