Is your hard drive malfunctioning and your computer running sluggishly? Perhaps you're suspecting potential issues with your hard drive. Running the Windows Error Checker can help detect and resolve problems. Checking your drive for errors can significantly improve your computer's performance. This article outlines various methods to check and repair hard drive errors, including scanning for file system errors and fixing corrupted sectors on Windows 10.
The Security and Maintenance panel in Windows 10 is your go-to for adjusting security settings and monitoring hardware health. To verify your drive's status, follow these steps:
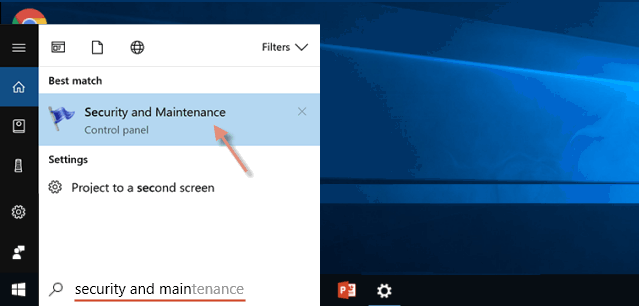
Step 1: Type security and maintenance in the taskbar's search box and press Enter.
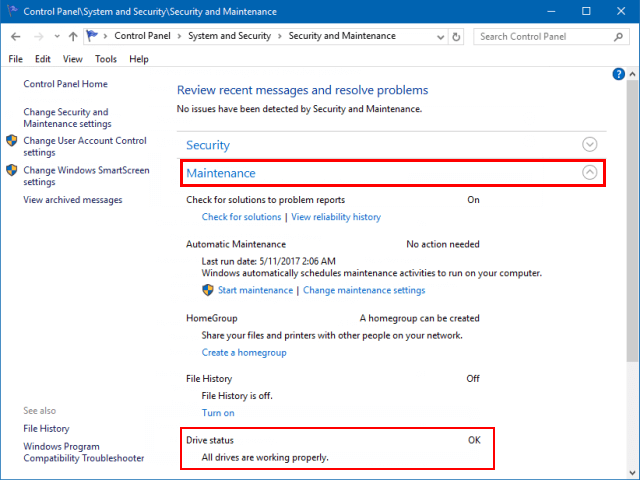
Step 2: Expand the Maintenance section and navigate to Drive Status to assess your drive's current condition.
If all drives are functioning properly, you'll see a confirmation message. Any issues detected will prompt an option to scan and fix them.
The Disk Check utility identifies and corrects file system errors, ensuring seamless data loading and writing. To run CHKDSK directly from your hard disk partition's properties dialog, follow these steps:
Step 1: Open File Explorer and right-click the desired drive under 'This PC', then select Properties.
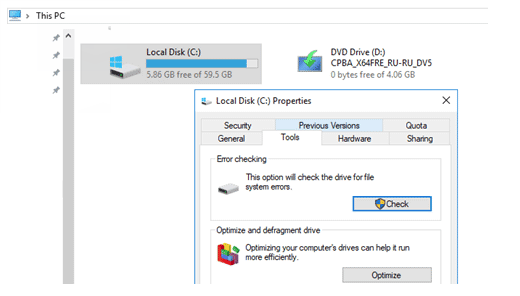
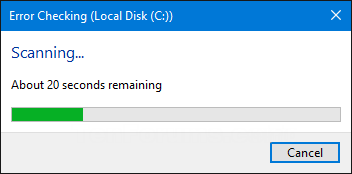
Step 2: Click the Tools tab and then the Check button under Error-checking.
A new window will appear, potentially indicating no errors found. You can still choose to scan the drive by selecting Scan drive.
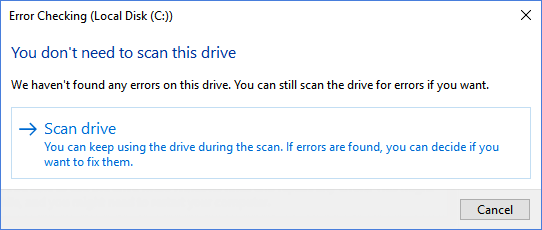
Step 3: After scanning, click to close the window.
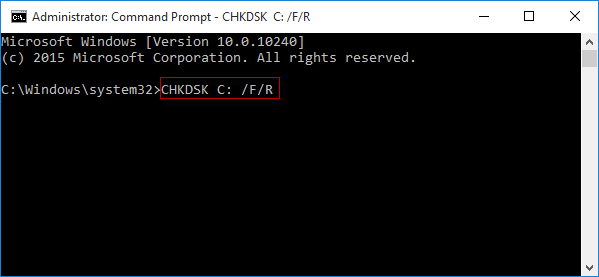
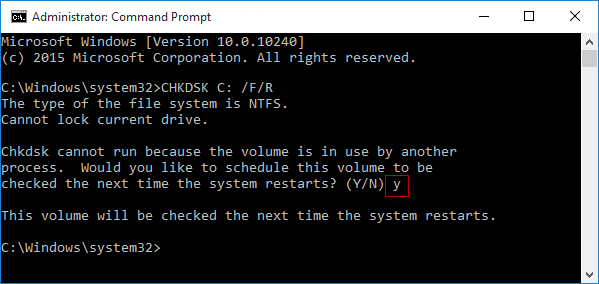
To check and repair your drive using the elevated Command Prompt, follow these steps. Without parameters, chkdsk displays the volume's status without fixing errors. With /f, /r, or /x parameters, it repairs volume errors.
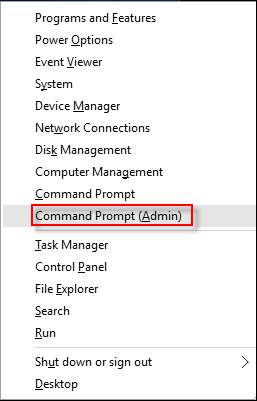
Step 1: Press Win+X and then hit A to open Command Prompt (Admin).
Step 2: Type CHKDSK C: /F /R and press Enter.
If CHKDSK can't scan your computer's boot drive immediately, you'll be asked to schedule the scan for the next restart.
Step 3: Type y (for yes) and press Enter to schedule the scan.
If your computer won't start, you can run CHKDSK from a command prompt in recovery mode or using the original installation disk. Refer to Open Command Prompt at Boot using Windows Installation Media for instructions.
If your PC shuts down improperly or crashes, it can damage system files. To verify your hard drive's integrity or fix file system errors, you can set the dirty bit for the drive, prompting an automatic disk check upon the next restart.
Open an elevated Command Prompt (Win+X, A) and type the following command:
fsutil dirty set C:
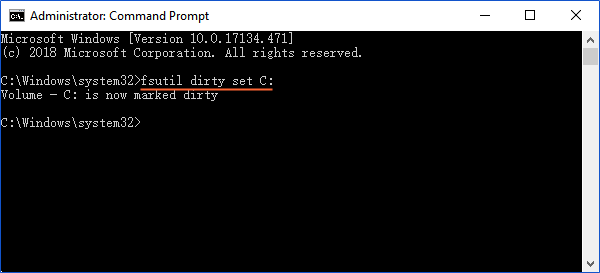
Upon the next reboot, the system will automatically perform a disk check using the chkdsk utility.
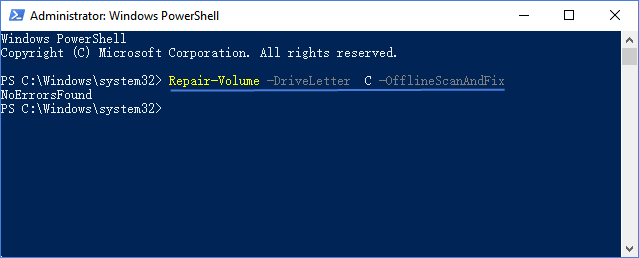
The Repair-Volume cmdlet in PowerShell performs repairs on a volume. To do so:
Step 1: Open an elevated PowerShell.
Step 2: Type the following commands into PowerShell and press Enter.
Repair-Volume -DriveLetter C -Scan
This command scans drive C and reports errors (equivalent to chkdsk /scan).
Repair-Volume -DriveLetter C -OfflineScanAndFix
This command takes drive C offline to scan and fix errors (equivalent to chkdsk /f).