Blocking internet access for specific programs in Windows 10 is useful in various situations. For instance, some programs update automatically when connected to the internet, which might not be desirable. You can prevent this by blocking the program's internet access. This post will guide you through the process of blocking a program from accessing the internet on a Windows 10 computer.
This can be achieved using Windows' built-in Firewall. The steps are as follows.
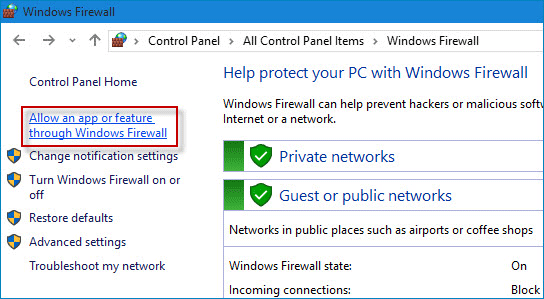
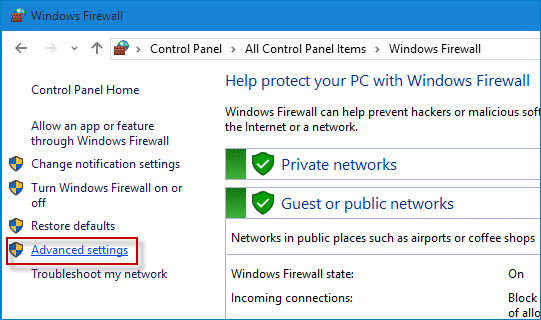
Step 1: Open Control Panel and navigate to Windows Firewall. Ensure that Windows Firewall is turned on in Windows 10. If not, enable it.
Step 2: Click the Allow an app or feature through Windows Firewall link on the left pane.
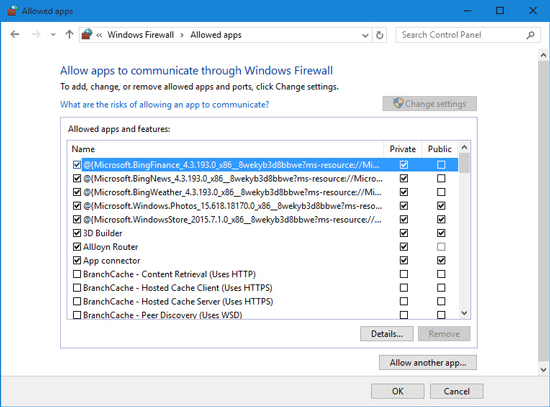
Step 3: On the Allowed apps page, click the Change settings button. Check if the application you want to block is listed under Allowed apps and features. If it is, clear its checkbox to block its internet connection.
If the program is not listed, return to the Windows Firewall window and follow these steps to block it from accessing the internet.
Step 4: Click the Advanced settings link on the left pane.
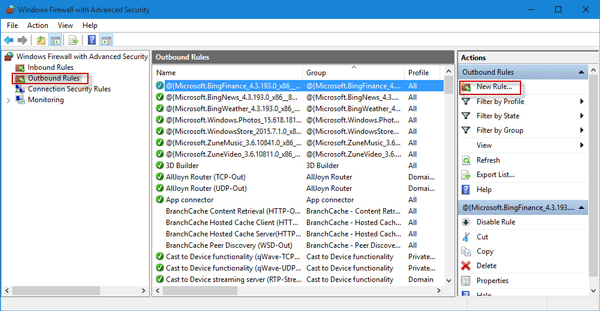
Step 5: After the Windows Firewall with Advanced Security window opens, click on Outbound Rules on the left-side pane and then click on New Rule on the right-side pane.
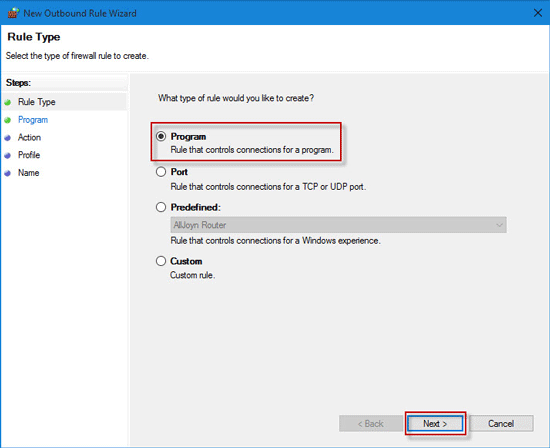
Step 6: In the New Outbound Rule Wizard dialog, select Program and click Next.
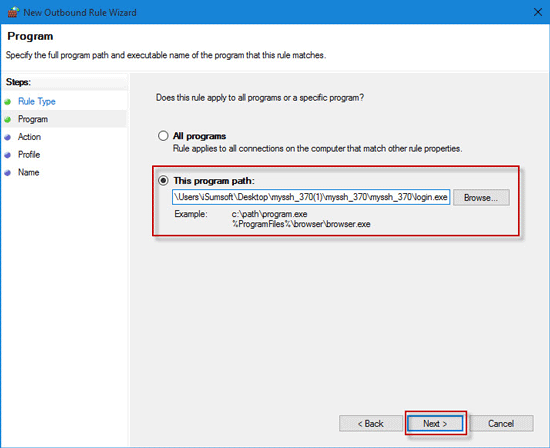
Step 7: Select This program path, and enter the path to the target program (.exe) file you want to block or use the Browse button to select the program file.
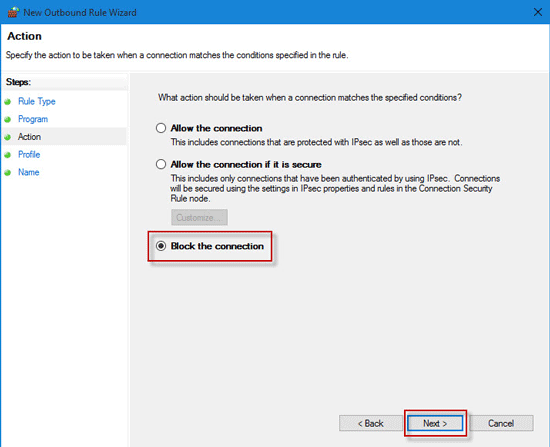
Step 8: Select Block the connection and click Next.
Step 9: Keep the checkboxes next to Domain, Private, and Public checked, and click Next.

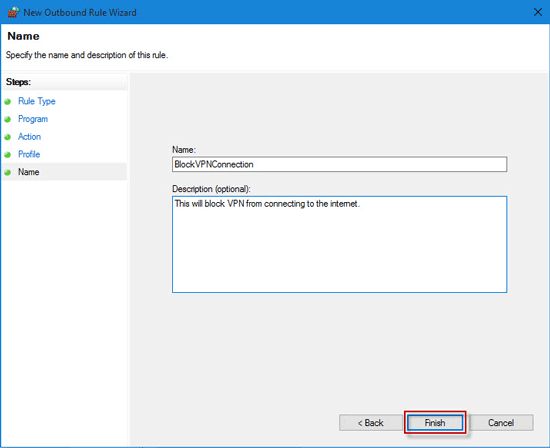
Step 10: Finally, type a name and description for this new outbound rule for easier identification, and click Finish.
Step 11 (Optional): Go back to the "Windows Firewall with Advanced Security" screen, and similarly, you can create a new Inbound Rule to completely block the program from accessing the internet if desired.
Tips: Outbound rules block programs from sending data to a remote server on the internet, while Inbound rules block a remote server from sending data to your local computer.