
Windows Firewall is system security defensive software pre-installed on all versions of Windows including Windows 10, which is turned on by default. Occasionally, for some reason, you may want to turn it off. In this page, I am going to show two ways to turn on/off Windows Firewall in Windows 10.
Way 1: Turn on/off Windows 10 Firewall via Control Panel
Step 1: Press Win + X key combination and then select Control Panel to access Windows 10 Control Panel.
Step 2: Type firewall in the search box and then click the Windows Firewall link.

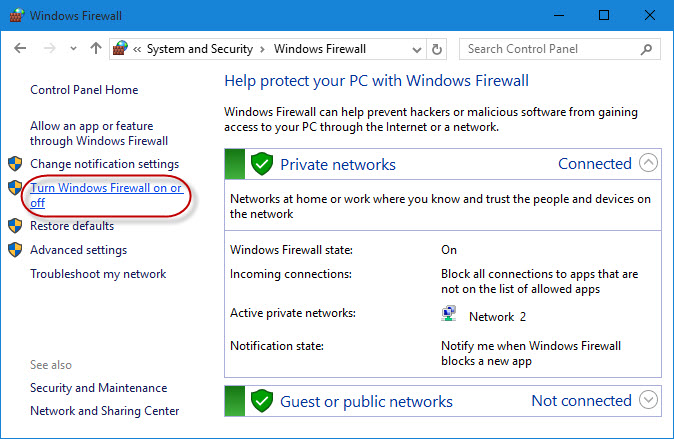
Step 3: Click the Turn Windows Firewall on or off the link on the left pane.
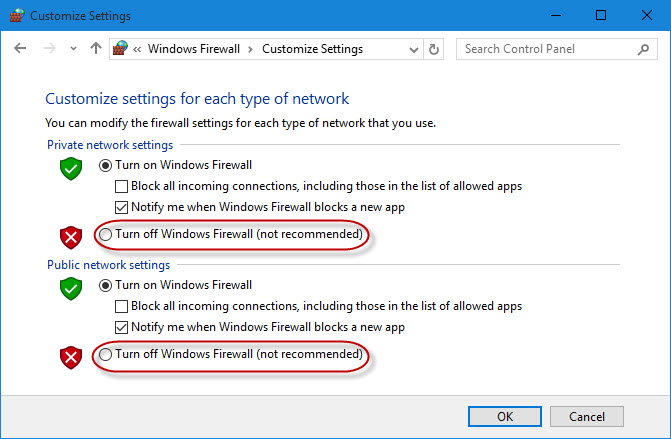
Step 4: As you can see, Windows 10 has checked the Turn on Windows Firewall option by default. You can check Turn off Windows Firewall and click OK if you want to turn it off.
Way 2: Turn on/off Windows 10 Firewall with Command Prompt
Step 1: Press Win + X key combinations and then select Command Prompt (Admin) to open Windows 10 Command Prompt as administrator. Click Yes to confirm the User Account Control dialog if prompted.
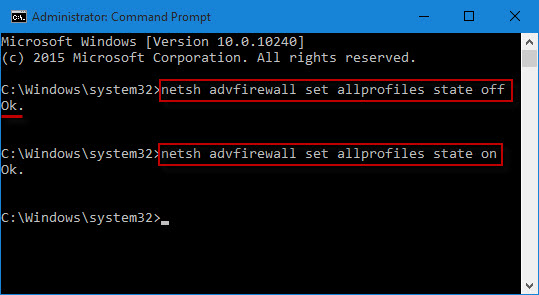
Step 2: In the Command Prompt window, type netsh advfirewall set allprofiles state off and hit Enter key. Once it displays OK, Windows Firewall is turned off. To turn it on, type netsh advfirewall set allprofiles state on and hit Enter.
Generally, Windows 10 turns on Firewall by default and notifies you each time when it blocks a new app. For system security, you are not recommended to turn off the Windows Firewall. However, if you need to install another third-party anti-virus software, then you may have to turn off Firewall in case of software conflicts or just in case multiple defensive software slow down your PC.

