To save hard drive space or quickly send and receive files, various compressed file formats are widely used for their convenience and efficiency. But do you know how to compress and password protect a folder? Many compression software programs offer encryption. Today, numerous compression tools are available online with similar functions. We recommend using 7-Zip or WinRAR.
If you want to secure your data, read this article to learn 3 easy ways to compress and password protect files/folders in Windows 10 & 11.
7-Zip is a popular, free, open-source compression software with an excellent compression ratio. Although it can't create RAR files, it can open almost all mainstream file formats.
The following content will show you how to use 7-Zip to password protect a file.
Step 1: Download 7-Zip and install it on your computer.
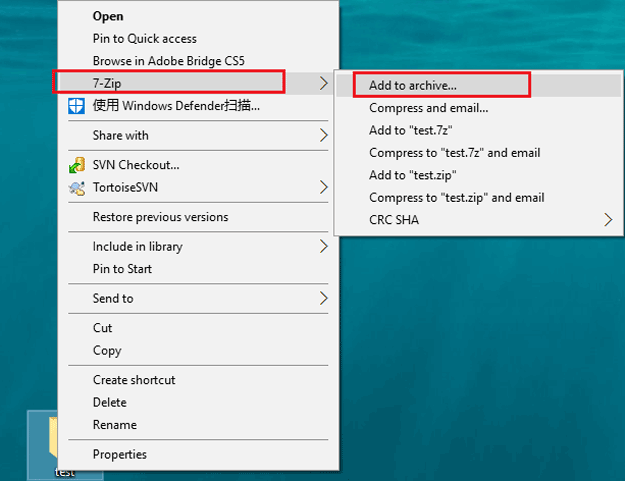
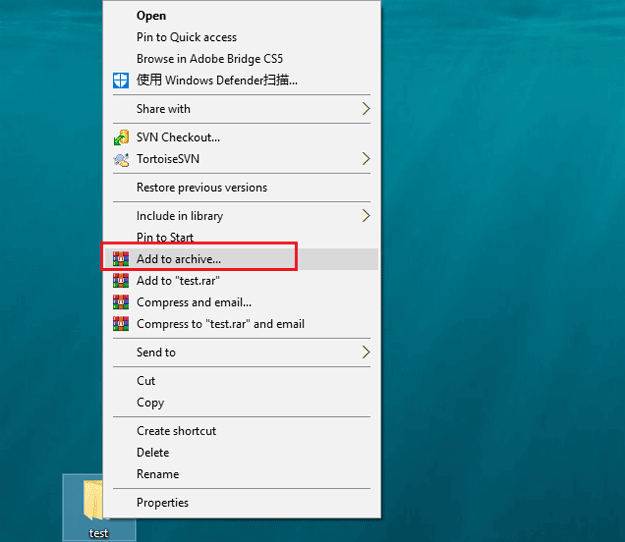
Step 2: Right-click the folder you want to compress and encrypt, hover over 7-Zip, and then click Add to archive. We're compressing the test folder as an example.
Note: These functions will be available after installing 7-Zip. If you can't find them, you may not have installed it successfully.
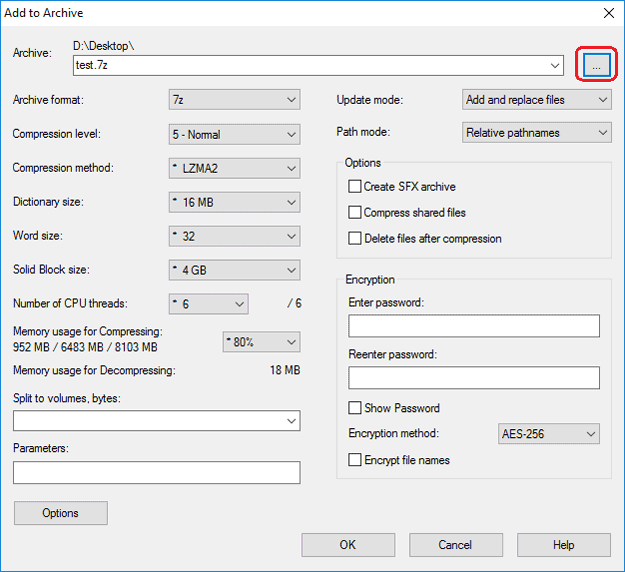
Step 3: You can choose a path to save the compressed file by clicking the Browse icon.
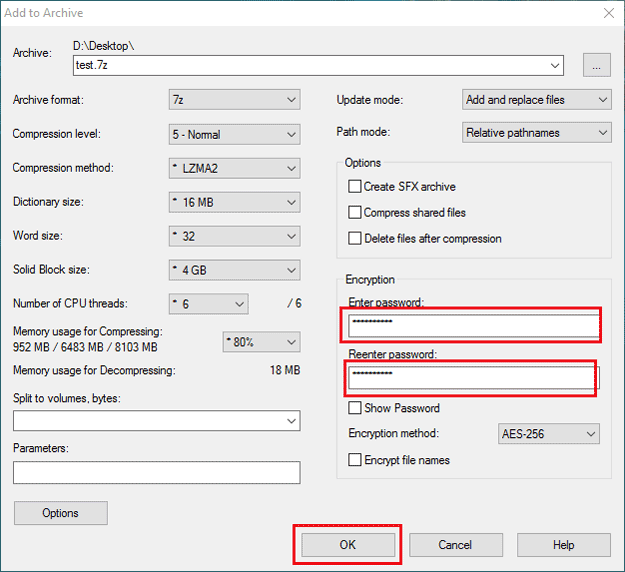
Step 4: Enter a password twice and click OK.
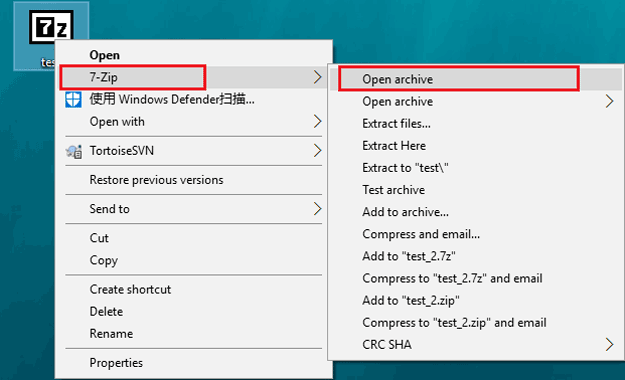
Step 1: Right-click the archive you just saved, hover over 7-Zip, and then click Open archive.
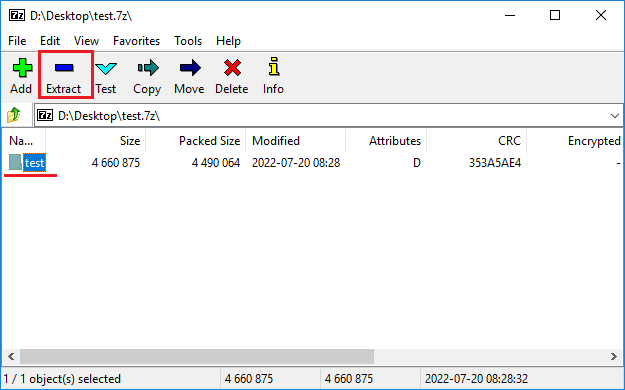
Step 2: Select the file and click Extract.
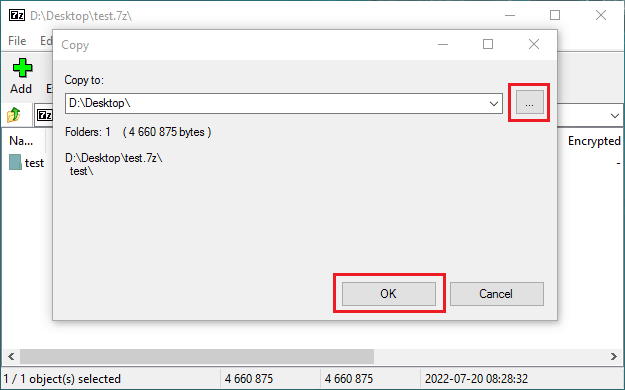
Step 3: Select a path to extract the file.
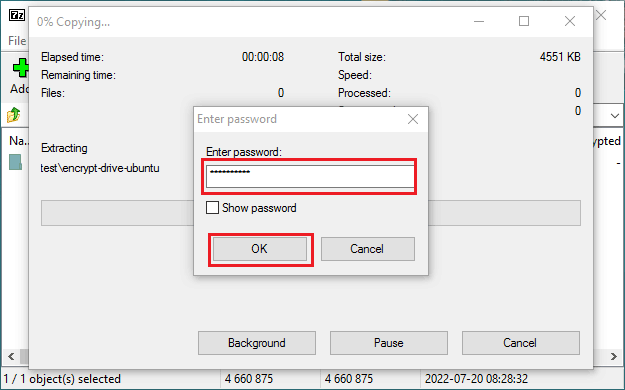
Step 4: Enter the password you set and click OK. After that, you can access the file normally.
With WinRAR, you can compress and create both RAR and ZIP files. It also encrypts files more securely due to its better encryption algorithm.
This part will show you how to create a ZIP file and password protect it with WinRAR.
Step 1: Download WinRAR and install it on your computer.
Step 2: Right-click the folder you want to compress and encrypt, and then click Add to archive. We're compressing the test folder as an example.
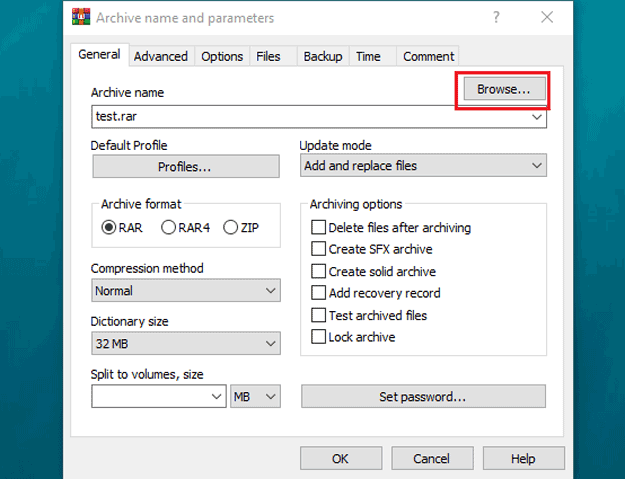
Step 3: You can click Browse to choose a path to save the archive.
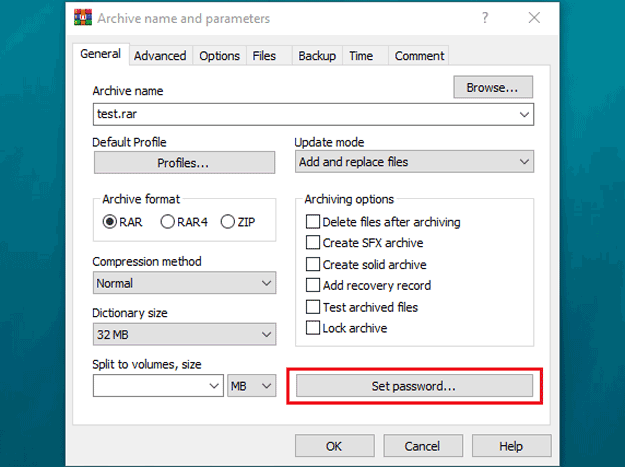
Step 4: Click Set password.
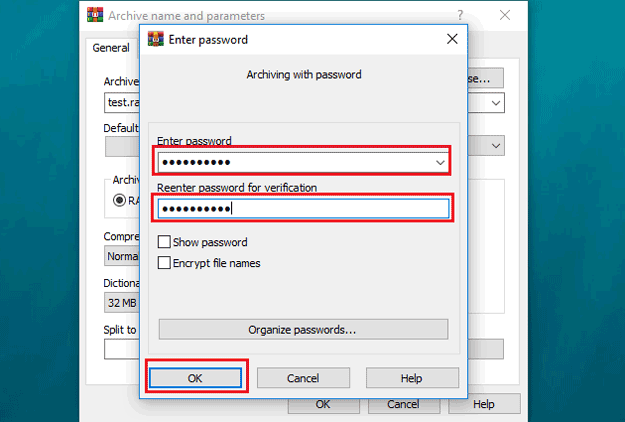
Step 5: Enter a password twice and click OK.
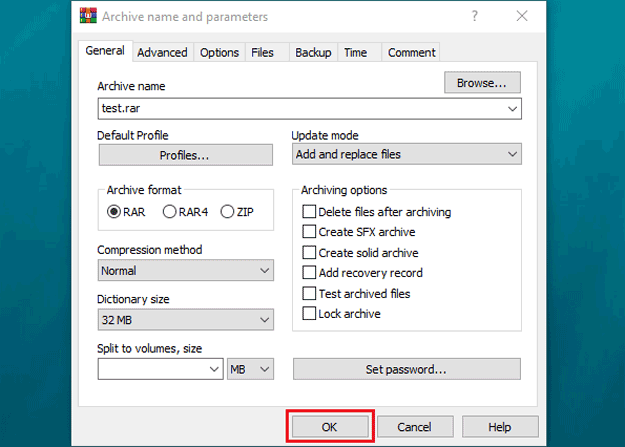
Step 6: Click OK to complete.
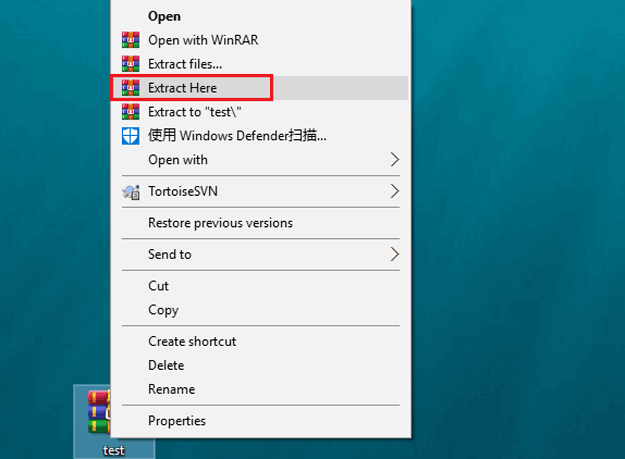
Step 1: Right-click the archive you just saved and click Extract Here, or you can click Extract files to choose another path.
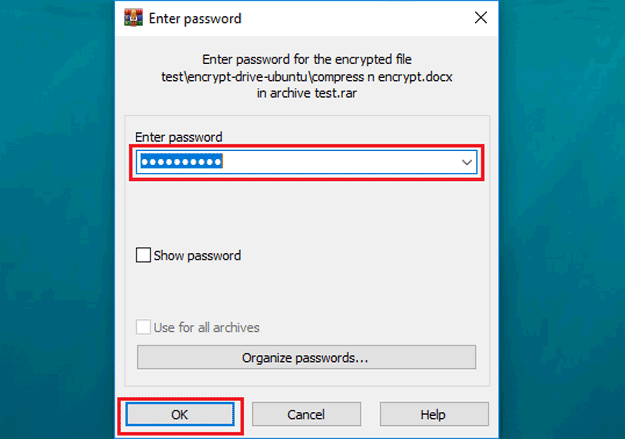
Step 2: Enter the password and click OK.
Windows also offers a function to encrypt files, which is used to block other users on the computer from accessing them.
Note: This feature is not available in Windows Home edition.
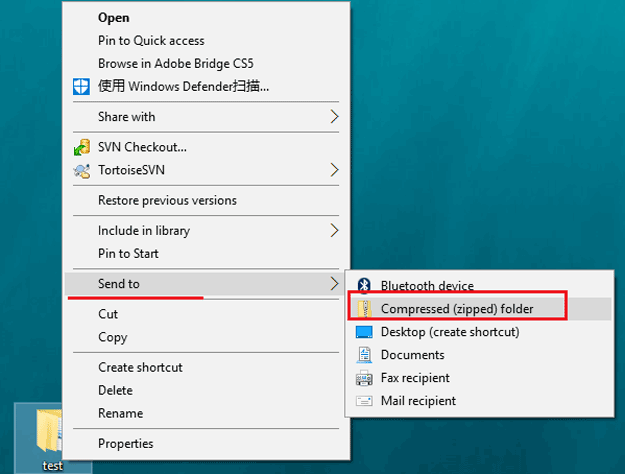
Step 1: Right-click the folder you want to compress and encrypt, hover over Send to, and then click Compressed (zipped) folder.
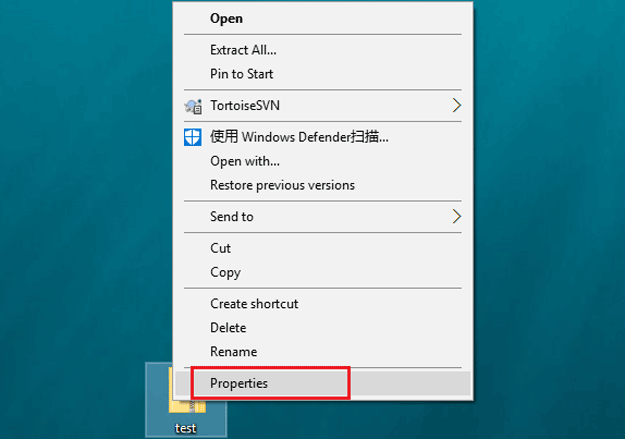
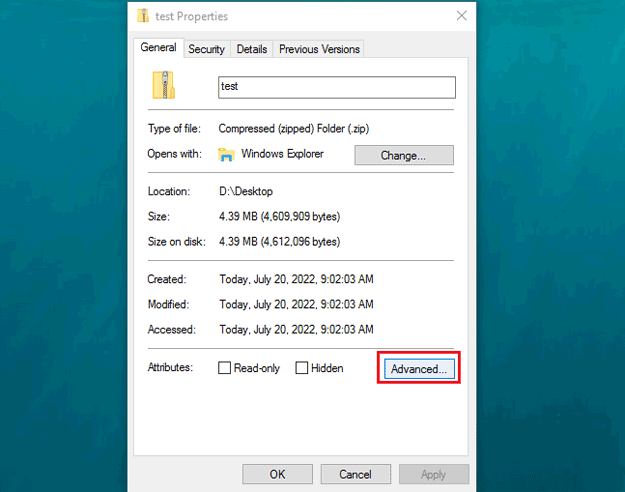
Step 2: Right-click the compressed folder and click Properties.
Step 3: Click Advanced.
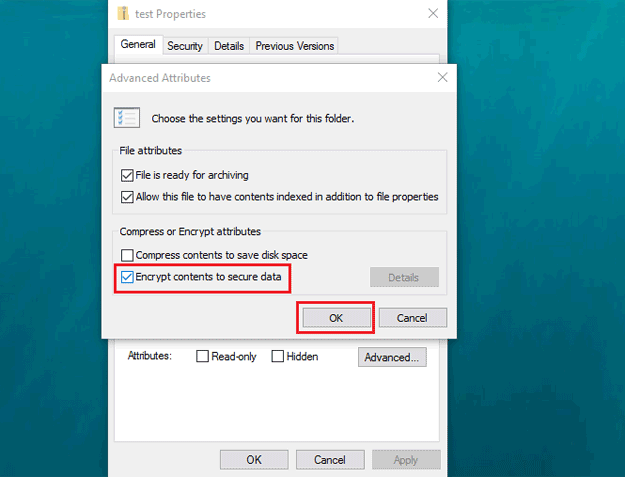
Step 4: Check Encrypt contents to secure data and then click OK.
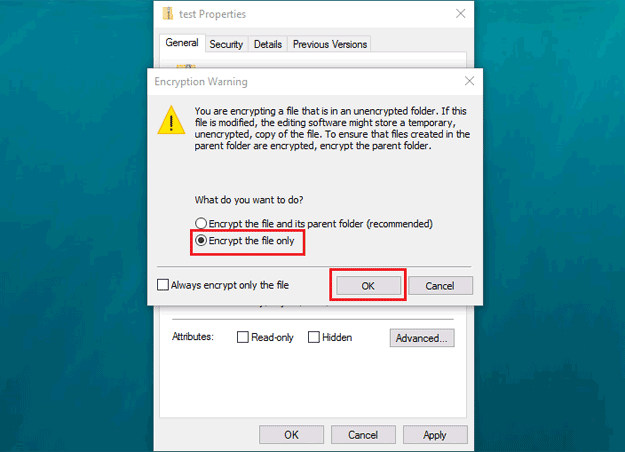
Step 5: Select Encrypt the file only and then click OK.
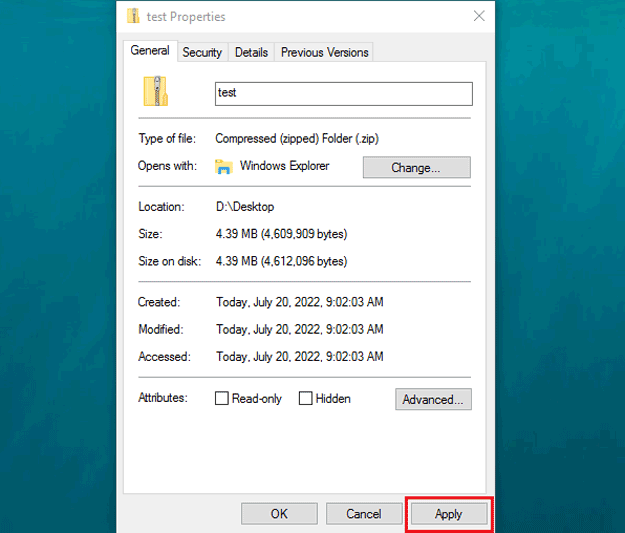
Step 6: Click Apply and then click OK.
Summary: The above three methods all show how to compress and password protect a folder in different situations. You can choose an appropriate way to secure your data.