
If you use Windows 11, you can create a bootable Windows 11 USB flash drive in case of emergencies. A bootable Windows 11 USB flash drive serves many purposes, such as to install/reintall Windows 11, repair a PC that fails to boot Windows 11 properly, bypass forgotten Windows 11 password, and so on. This article shows you how to create a Windows 11 bootable USB flash drive. Prepare a USB flash drive with a capacity of at least 8GB, and let's get started.

Step 1: Open Microsoft's Windows 11 Download page in any browser on your computer.
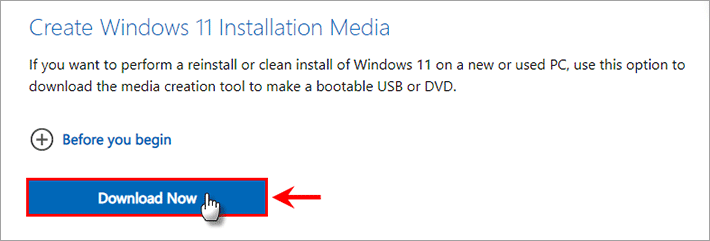
Step 2: Scroll down to the section titled "Create Windows 11 Installation Media", and then click the Download Now button under this section.
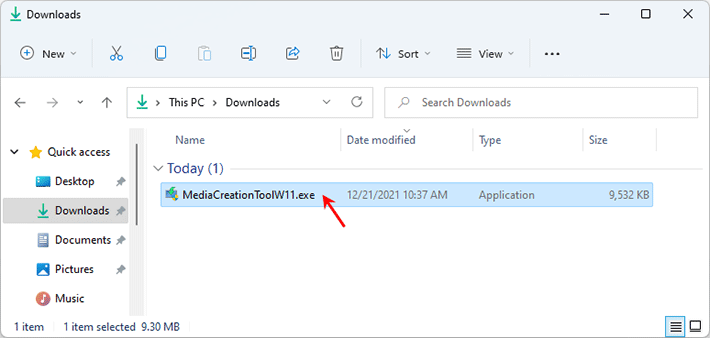
Step 3: Once the download is complete, locate the MediaCreationToolW11.exe file and double-click to run it.
Step 4: The Windows 11 Setup opens. Click Accept to agree to Microsoft software license terms.

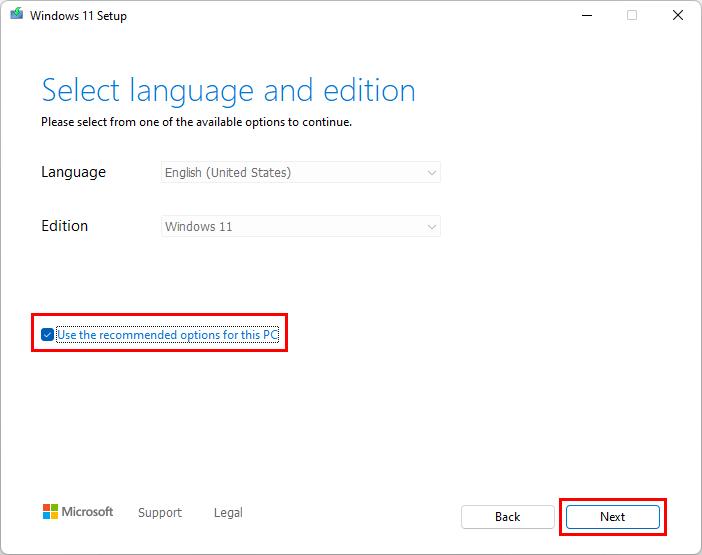
Step 5: Tick the "Use the recommended options for this PC" check box. Or, uncheck that check box and choose your desired language and Windows 11 edition. Then, click Next.
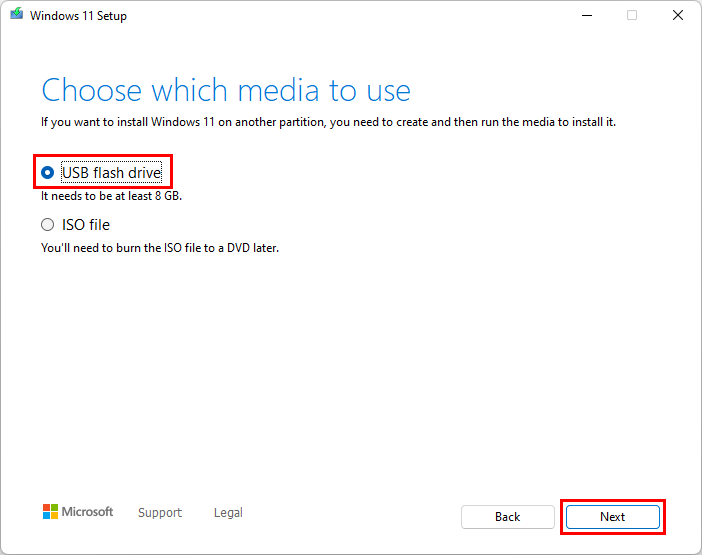
Step 6: Make sure you have inserted your USB flash drive into your computer. Choose "USB flash drive" and click Next.
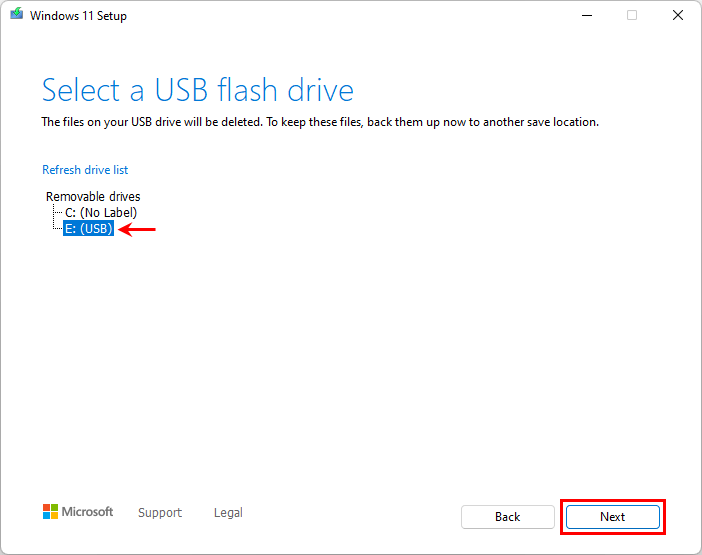
Step 7: Select your USB flash drive from the drive list. If your USB flash drive is not appearing on your screen, click Refresh drive list. Then click Next.
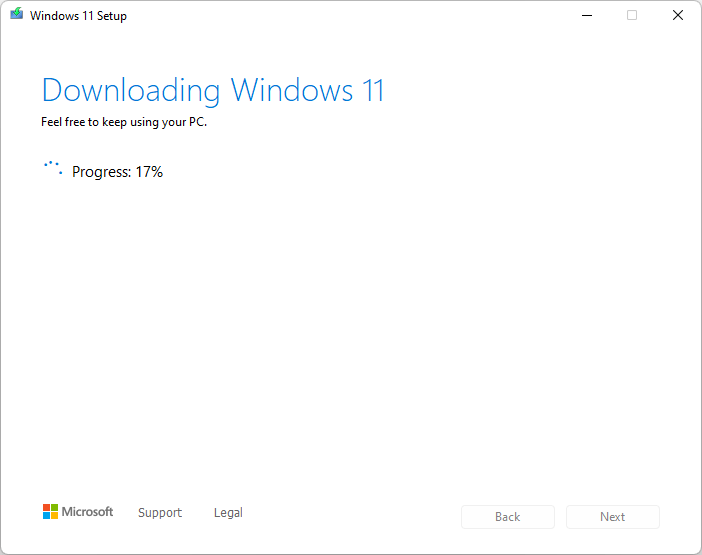
Step 8: The Windows 11 Setup will start downloading Windows 11. The download will take a few minutes, depending on your computer's network speed.
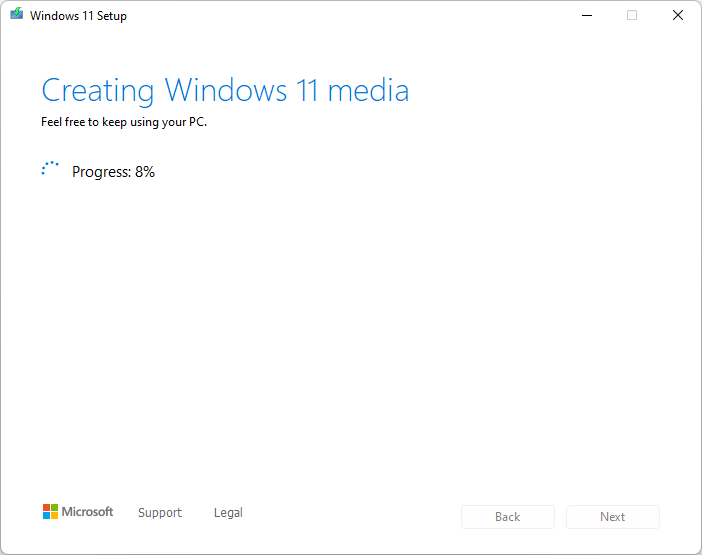
Step 9: When the download is complete, the Windows 11 Setup will begin creating a bootable media on your USB flash drive. This also takes a few minutes. Just keep the USB flash drive connected and wait for the media creation to complete. You can feel free to keep using your PC during media creation.
Step 10: When "Your USB flash drive is ready" is displayed on your screen, click Finish, and the Windows 11 bootable USB flash drive has been successfully created.
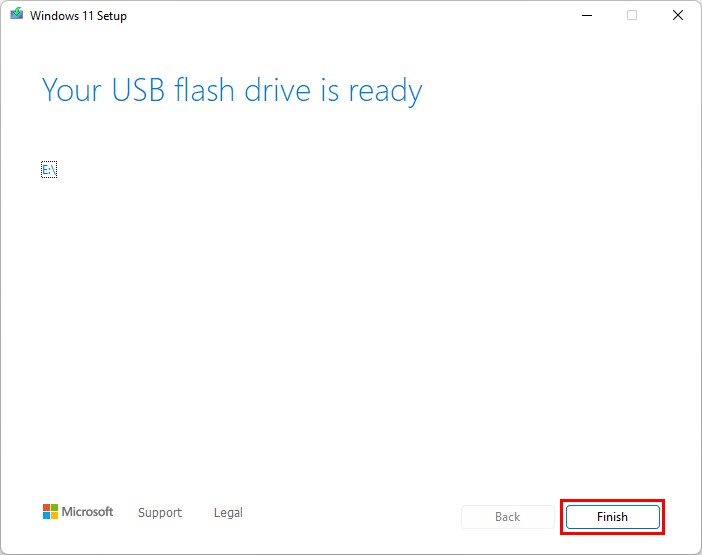
Your USB flash drive will be renamed ESD-USB. It contains Windows 11 boot files from which you can boot your computer. Keep the Windows 11 bootable USB flash drive in a safe place in case you need it.
If for some reason the Windows 11 media creation tool fails to work, the second option to create a Windows 11 bootable USB flash drive is to download the Windows 11 ISO file and then burn the ISO file to the USB flash drive. This requires an iSO burning tool like Rufus. Please follow the steps below.
1. Open the Microsoft's Download Windows 11 page in any browser on your computer. Of course, you can also download the Windows 11 ISO file from other reliable resources or websites, if you want.
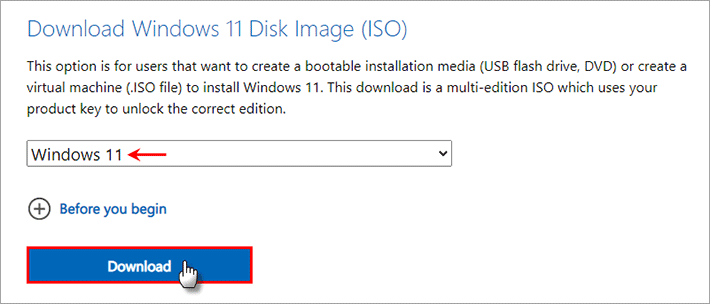
2. Scroll down to the section titled "Download Windows 11 Disk Image (ISO)". Select Windows 11 from the Select Download drop-down menu, and then click Download.
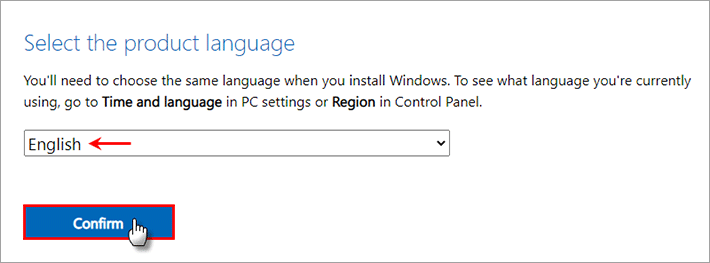
3. The "Select the product language" section will appear. Select your language and click Confirm.
4. The download button will be generated. Click the Download 64-bit or Download 32-bit button, depending on what is displayed on your screen. The download will begin immediately.

5. Wait for the download to complete. This will take a few minutes, depending on your computer's network speed.
Go to the Rufus page, scroll down to the Download section, and then click the Rufus 3.17 or Rufus 3.17 Portable link to download the Rufus tool to your computer.

1. Plug your USB flash drive into your computer and back up any important data stored on the USB if necessary.
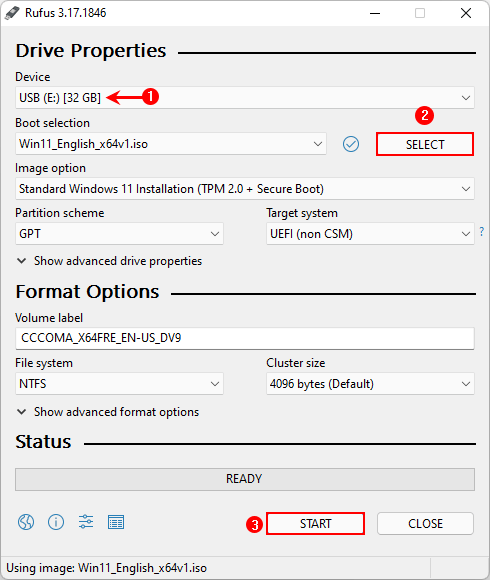
2. Open the Rufus tool on your computer. It automatically detects your connected USB flash drive and display it in the Device drop-down menu. If it does not, reconnect your USB flash drive.
3. Click the SELECT button. When the Open dialog opens, locate the Windows 11 ISO file you have downloaded, select it, and then click Open. The Windows 11 ISO file will be added to the Rufus tool.
4. Leave the other options default, and then click the Start button at the bottom. When the warning dialog pops up, click OK and Rufus will start burning the Windows 11 ISO file to your USB flash drive.
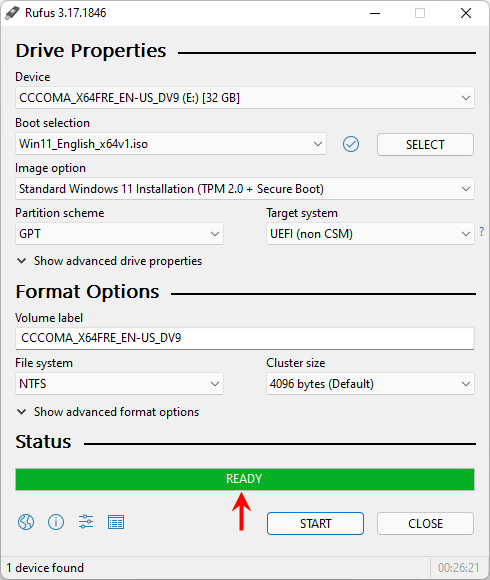
5. Wait for the burning to complete. This will take a few minutes. When the Status bar at the bottom shows Ready, the burning is complete, and the Windows 11 bootable USB flash drive has been successfully created.
 3
Options to Boot Windows 10 and Windows 11 on the Same PC & Laptop
3
Options to Boot Windows 10 and Windows 11 on the Same PC & Laptop
 3
Ways to Create ISO File from Folder in Windows 10
3
Ways to Create ISO File from Folder in Windows 10
 How
to Fix Windows 10 Bootable USB Not Working
How
to Fix Windows 10 Bootable USB Not Working
 How
to Check If A USB Drive is Bootable in Windows 10
How
to Check If A USB Drive is Bootable in Windows 10
 [FIXED]
Media Creation Tool Not Working in Windows 10
[FIXED]
Media Creation Tool Not Working in Windows 10
 How to
Install Windows 11 on VMware Workstation 16 Pro
How to
Install Windows 11 on VMware Workstation 16 Pro
 6 Ways to Fix
Taskbar Missing from Windows 10
6 Ways to Fix
Taskbar Missing from Windows 10
 How to Fix
Power Button Missing from Windows 10 Login Screen
How to Fix
Power Button Missing from Windows 10 Login Screen
