Windows 10's Mobile Hotspot feature allows you to share your PC's internet connection with other devices via Wi-Fi, making it a convenient option when you're on the go. This guide will walk you through the process of setting up and enabling Mobile Hotspot on your Windows 10 laptop.
Mobile Hotspot is available on Windows 10 laptops and tablets with Wi-Fi, Ethernet, or cellular data connections.
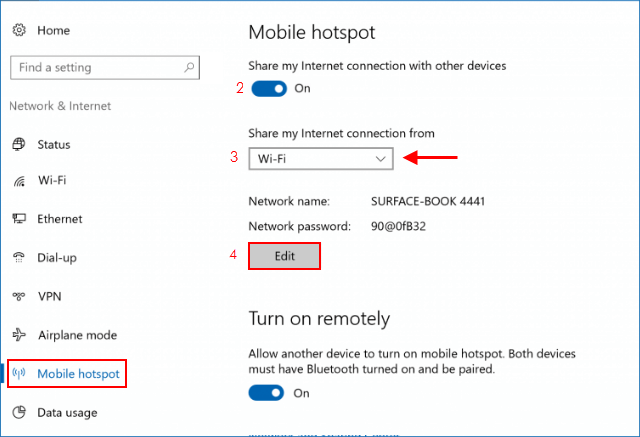
Step 1: Navigate to the Settings app from the Start menu, then click on Network & Internet.
Step 2: Select the Mobile hotspot tab and toggle the Share my Internet connection with other devices switch to the 'On' position.
Step 3: Choose the internet connection you want to share from the Share my Internet connection from dropdown menu.
Step 4: Click Edit to modify the network name and password if desired.
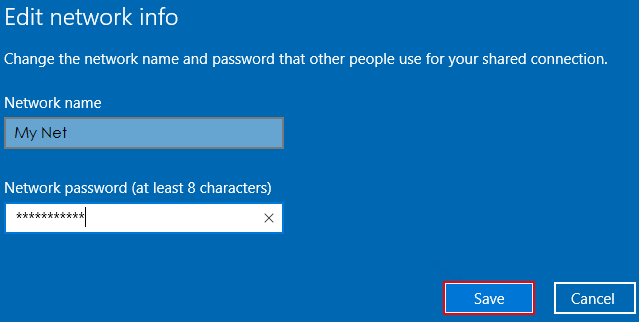
Step 5: Enter your preferred network name and password, then click Save.
To connect another device to your Mobile Hotspot, go to the device's Wi-Fi settings, locate your network name, select it, enter the password, and establish the connection.