To secure wireless connections, network administrators often hide Wi-Fi networks by not broadcasting their SSID. Here's a step-by-step guide on how to connect to a hidden wireless network in Windows 10.
Hidden networks are not visible in your list of available networks, making them difficult to detect and connect to. To successfully connect, you need the network's SSID, password, and other security details. Obtain this information from your network administrator or the router's configuration menu.
For details on accessing your router's configuration menu, see How to Change Your Wi-Fi Password in Windows 10.
Follow these steps to connect to a hidden wireless network:
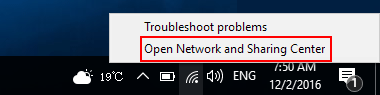
Step 1: Open the Network and Sharing Center.
Right-click the wireless network icon and select Open Network and Sharing Center.
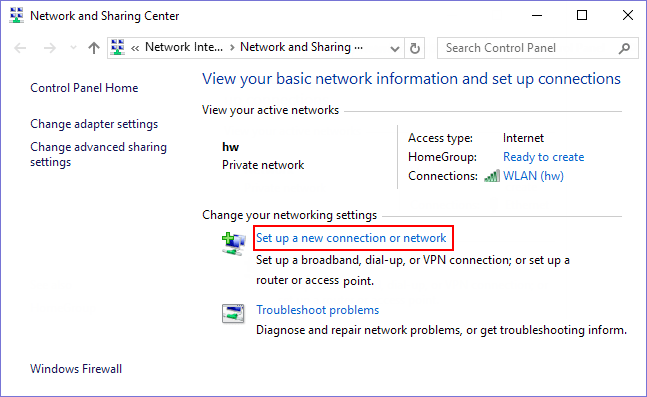
Step 2: Click Set up a new connection or network.
Step 3: Select Manually connect to a wireless network and click Next.

Step 4: Enter your network's security details and click Next.
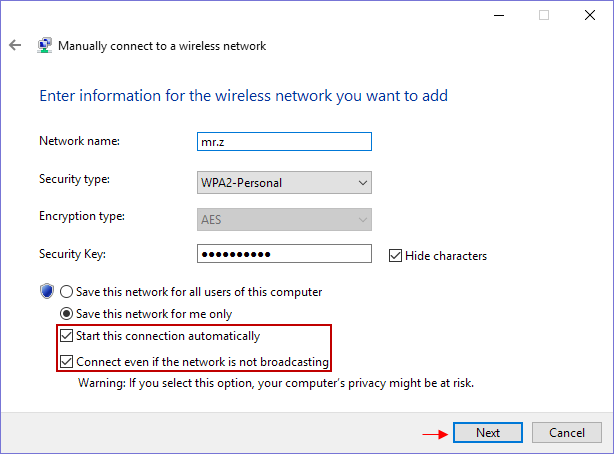
Tip: Check Start this connection automatically and Connect even if the network is not broadcasting for seamless connectivity.
Step 5: Windows 10 will confirm successful addition of the wireless network.
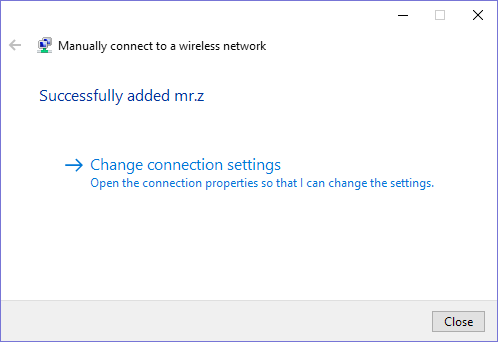
Your device will automatically connect to the hidden network thereafter.
For other Wi-Fi issues, such as connection problems, refer to Troubleshooting WiFi Connection Issues.