Secure Boot is a security feature of UEFI in Windows, which makes sure that your PC boots using only software that is trusted by the PC manufacturer. However, many times you will need to disable Secure Boot in Windows 10 due to some hardware misconfiguration. This tutorial will show you how to disable Secure Boot temporarily in Windows 10.
In this post, you will learn how to check if your PC is supported with Secure Boot, and how to temporarily disable Secure Boot on HP, ASUS, Dell, Acer laptop, XiaoMi.
To check if secure boot is enabled or disabled in Windows Security, go to open Windows Security, and click on the Device security icon. Under Secure boot, look to see if it Secure boot is on or Secure boot is off.
The way you enable and disable Secure Boot varies by PC and motherboard manufacturer. You should read your manufacturer's manual or support site for specific instructions. Common steps are two:
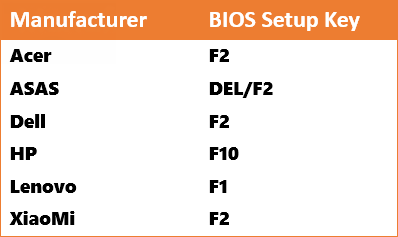
You can access to your PCs/laptop/tablets BIOS or UEFI setup utility by using BIOS setup access key while restart or turn on your PC.
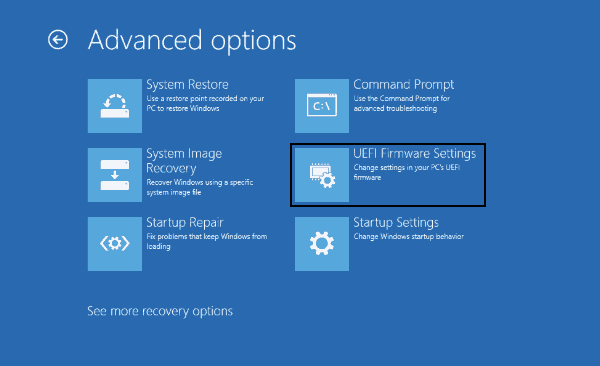
Otherwise, you can press and hold the Shift key as you click the Restart option on the sign-in screen. Windows will reboot into Advanced Setup Option, select Troubleshoot > Advanced Options. From there, click UEFI Firmware Settings, it should take you to the BIOS you need.
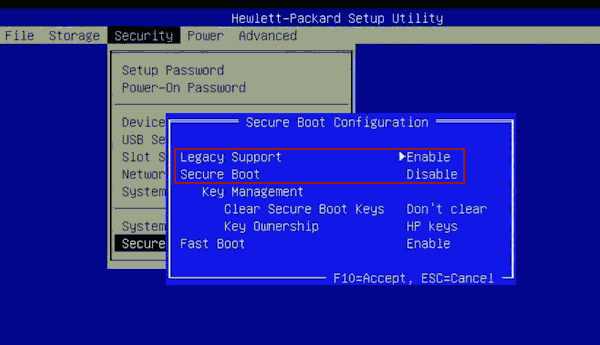
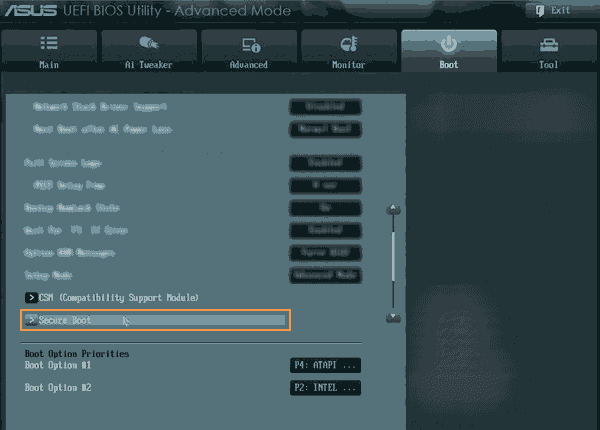
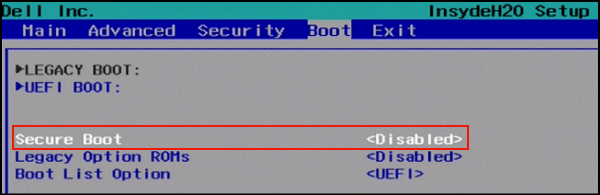
Locate the Secure Boot setting, and if possible, set it to Disabled. This can be found in either the Security tab, the Boot tab, or the Authentication tab.
Press the F10 key to save the changes. The computer should reboot.
Now you can install the graphics card, hardware, or operating system that's not compatible with Secure Boot. Most importantly, you can follow a traditional method to boot computer from USB device or CD-ROM.
If this isn't working for you, in some cases, you may need to change other settings in the firmware, change Boot List option as "Legacy", and enable "Load Legacy Option Rom".
While power on your computer, instantly press F2 to access BIOS/UEFI Setup. On the UEFI setup utility, use the right arrow key to select Boot. Press the down arrow key to select Secure Boot and press Enter. With the arrow key, highlight Disabled and press Enter.
In some cases, you have to set Supervisor Password before you can disable Secure Boot settings.
Step 1: Power on your computer, immediately press F2 to enter the BIOS.
Step 2: Use the right arrow key to select Security. Then, use the down arrow key to highlight Set Supervisor Password and press Enter. Create a password and press Enter. Retype the password to confirm and press Enter again.
Step 3: Use the right arrow key to select Boot. Press the down arrow key to select Secure Boot and press Enter.
Step 4: With the arrow key, highlight Disabled and press Enter.

Turn on XiaoMi laptop air, immediately press F2 to access BIOS Setup.
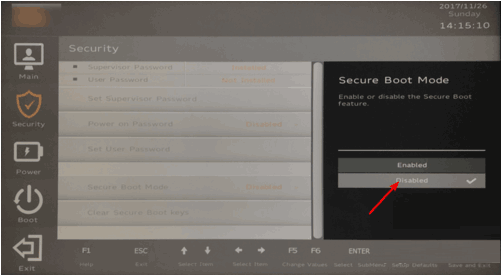
Select Security, press the down arrow key to select Secure Boot mode and press Enter.

With the arrow key, highlight Disabled and press Enter.
Press the F10 key and select Yes to save the changes and exit the BIOS.
Make sure to follow the same steps again, and this time enables the Secure Boot.