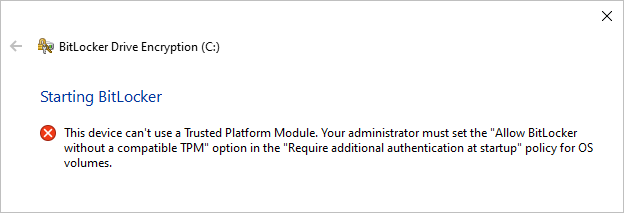
By default, enabling BitLocker encryption on Windows 10 requires a Trusted Platform Module (TPM) chip on the computer's motherboard. BitLocker typically stores the encryption key in the TPM for added security. If your PC lacks a TPM, attempting to enable BitLocker on your OS drive (C:) will result in an error message, as illustrated below.
Related: 4 Ways to Check If a Computer Has a TPM Chip
However, not having a TPM does not mean you cannot use BitLocker on your computer. Windows 10 includes a concealed option that allows you to enable BitLocker without a TPM. You simply need to activate the "Allow BitLocker without a compatible TPM" setting in the "Require additional authentication at startup" policy for the OS volume. Follow the steps below to implement this solution.
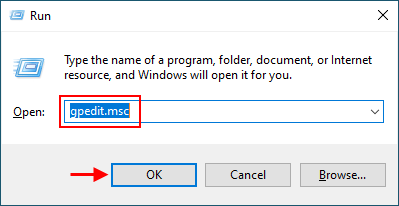
Step 1 Press Windows key + R to open the Run dialog. Then type gpedit.msc and click OK to open Local Group Policy Editor.
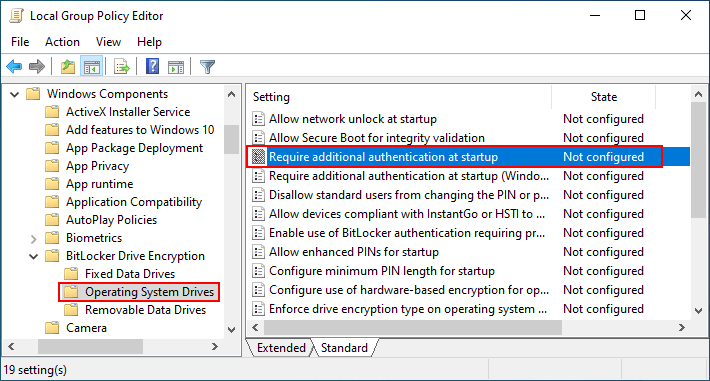
Step 2 In the left pane of Local Group Policy Editor, expand Local Computer Policy > Computer Configuration > Administrative Templates > Windows Components > BitLocker Drive Encryption > Operating System Drives. Select the Operating System Drives folder and then in the right pane, double-click on the "Require additional authentication at startup" policy to configure it.
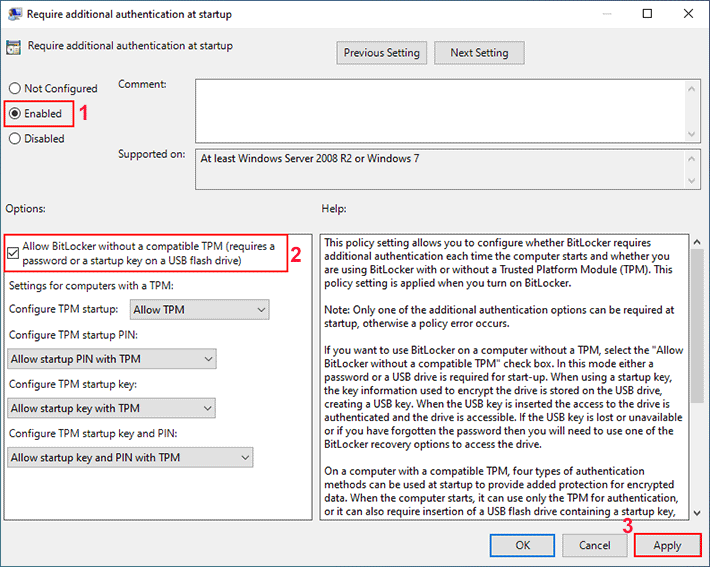
Step 4 Select the Enabled radio button and make sure that the "Allow BitLocker without a compatible TPM (requires a password or startup key on a USB flash drive)" option is checked. Then click Apply.
The change will take effect immediately, without restarting Windows 10. Next, you can enable BitLocker for the operating system drive on your computer without a TPM.
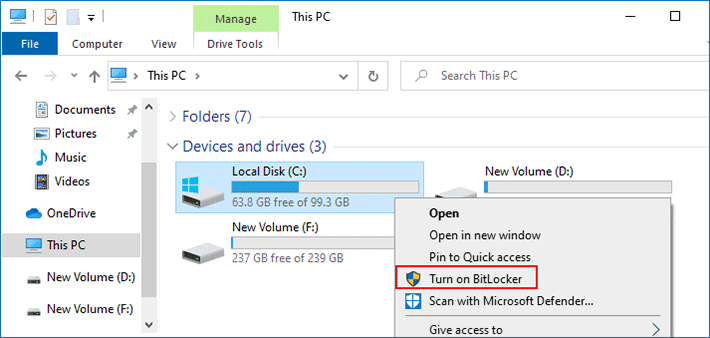
Step 1 Go to This PC, right-click the drive you want to enable BitLocker for, and then select Turn on BitLocker.
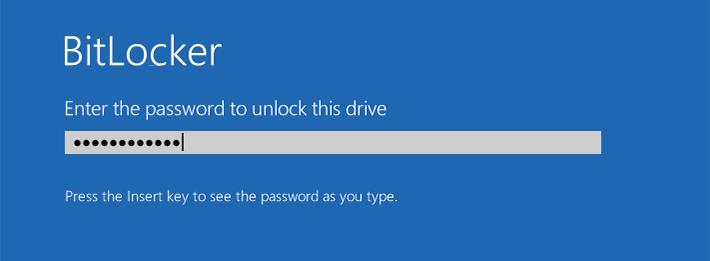
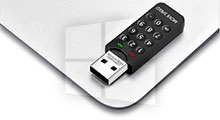
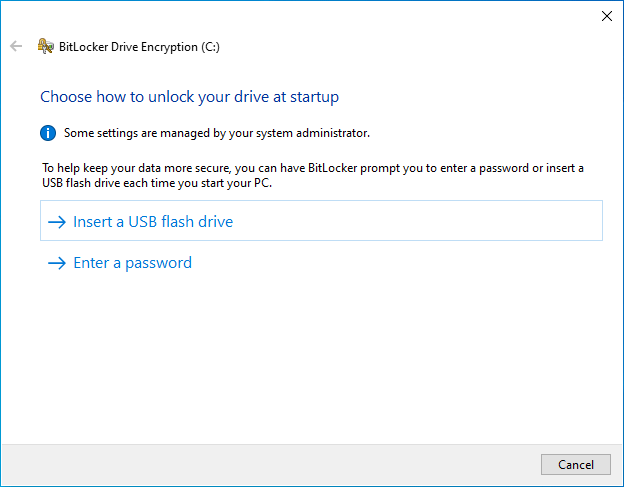
Step 2 You'll first be asked how you want to unlock your drive when your PC starts up. If your PC had a TPM, you could have your computer automatically unlock the drive or use a short PIN that requires the TPM present. Because your PC does not have a TPM, BitLocker requires you to enter a secure password or insert a USB flash drive to unlock the drive.
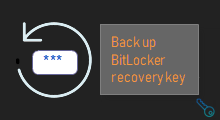
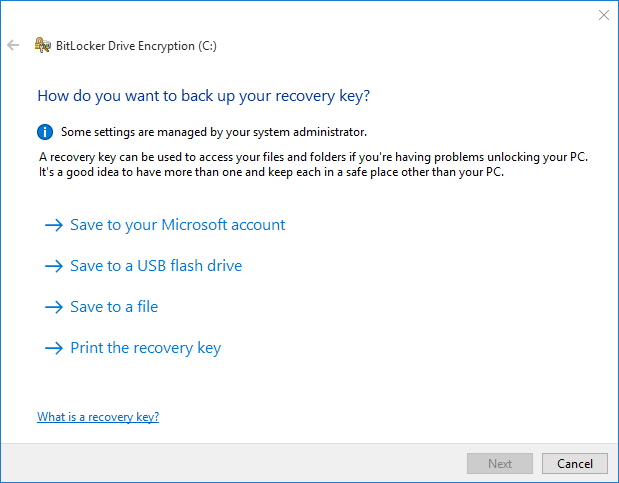
Step 3 BitLocker will generate a recovery key that can be used to unlock your drive, just in case you forget your password or lose your key stored on the USB flash drive. So, in this step, you will be asked to backup your BitLocker recovery key to a safe location.
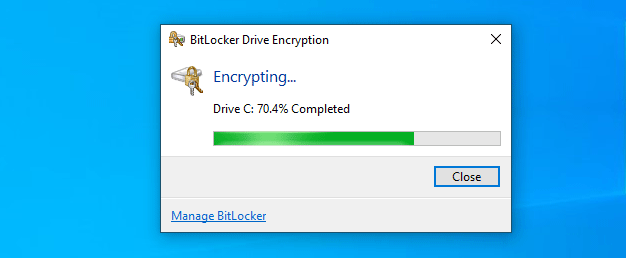
Step 4 After the recovery key is saved, click Next and follow the remaining steps on the screen to enable BitLocker to encrypt your drive. Then wait for the encryption process to complete.
Once BitLocker is activated on the operating system drive, the encryption process will begin during the Windows 10 startup. Subsequently, every time your PC starts or reboots, you will need to input your password or insert the USB flash drive to unlock the drive. Failure to provide the correct password or insert the USB drive will result in BitLocker being unable to unlock your drive, consequently preventing you from booting into your Windows system and accessing your files.