
Formatting a USB drive can happen accidentally or intentionally, and can result in the loss of important data. However, all hope is not lost if you have accidentally formatted your USB drive and need to retrieve your data. In this article, we will go through the steps involved in using TestDisk to recover files from a formatted USB drive and help you maximize your chances of successfully recovering your data.

TestDisk is a powerful and versatile data recovery tool that can help you recover lost or deleted files from a wide range of storage devices, including hard drives, USB drives, and memory cards. One common use case for TestDisk is recovering files from a formatted USB drive. Compared with the software Windows File Recovery, which only works for the NTFS file system, it supports various types, including NTFS, FAT32, FAT16, exFAT, and others.
Step 1: Insert the formatted USB drive into your computer.

Step 2: Download TestDisk (Windows 64-bit) from the official website.
Note: If your computer runs the 32-bit system, get Windows 32-bit version.

Step 3: Navigate to the downloaded file. Then click Extract all to extract it to the current directory, creating a folder named testdisk-7.2-WIP.

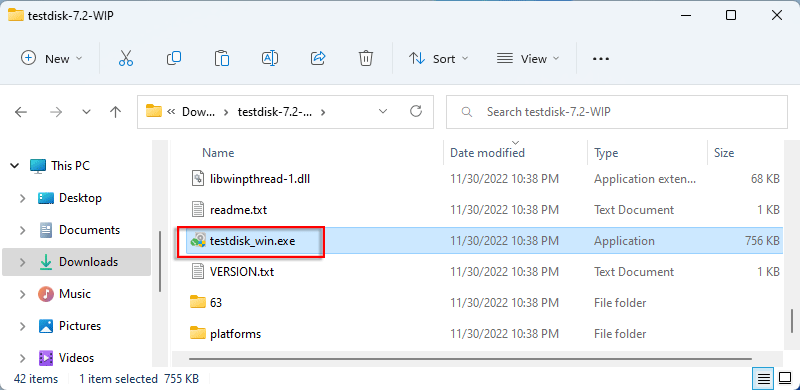
Step 4: Open the extracted folder testdisk-7.2-WIP folder. Locate and double-click testdisk_win.exe to launch it.
Step 5: When you are asked to allow this app to make changes to your computer, click Yes.

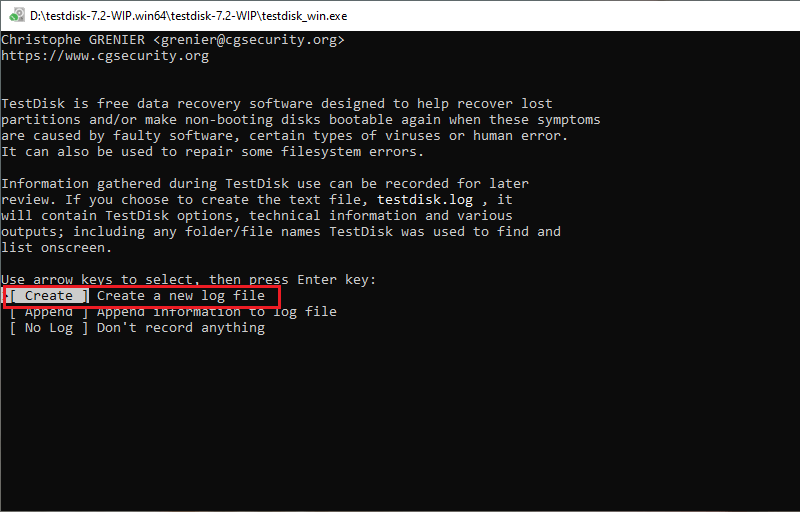
Step 6: Use the arrow key to select Create and press Enter.
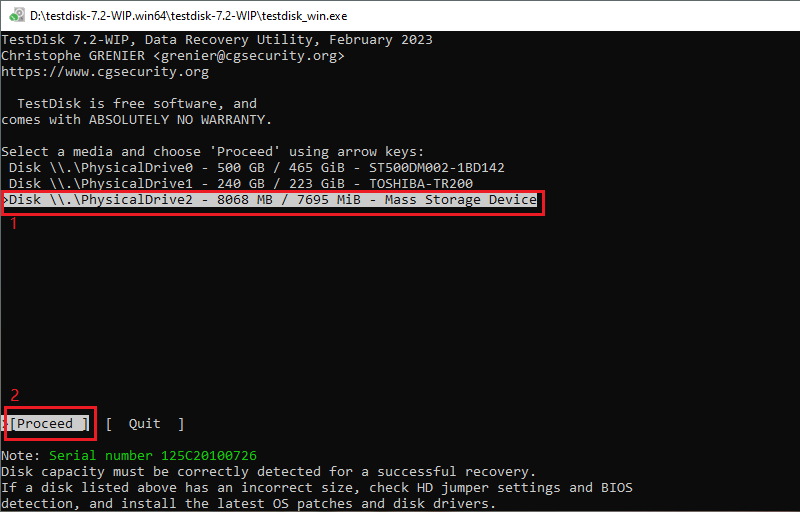
Step 7: Use the Up or Down key to choose your formatted USB drive, then press Enter to Proceed.
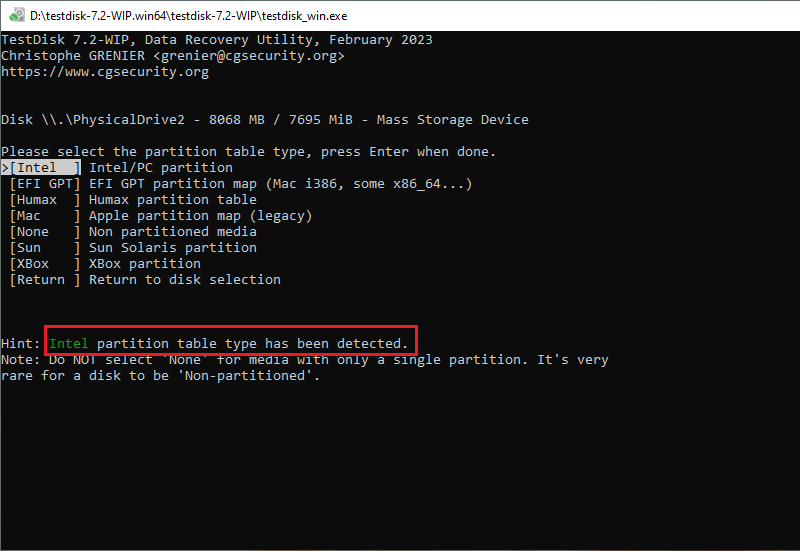
Step 8: The application has automatically chosen the correct partition table type for you, showing the Hint message. Choose the default option and hit Enter.
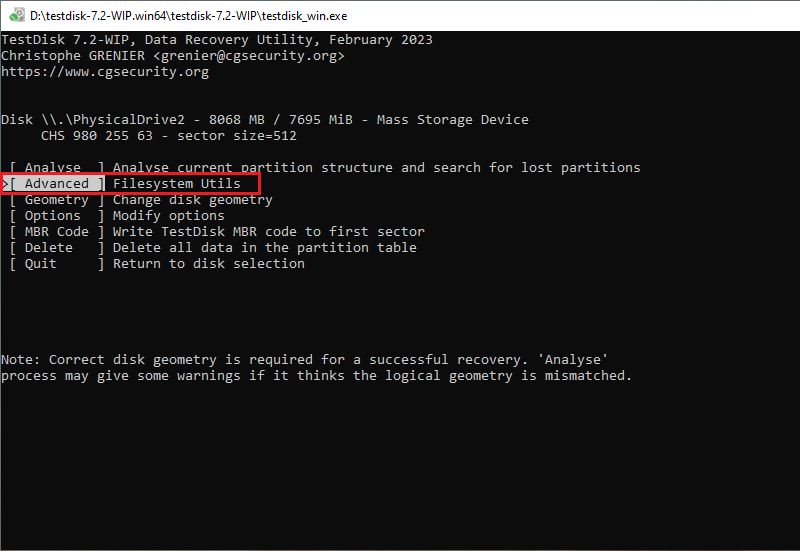
Step 9: Use the arrow key to choose Advanced and press Enter.
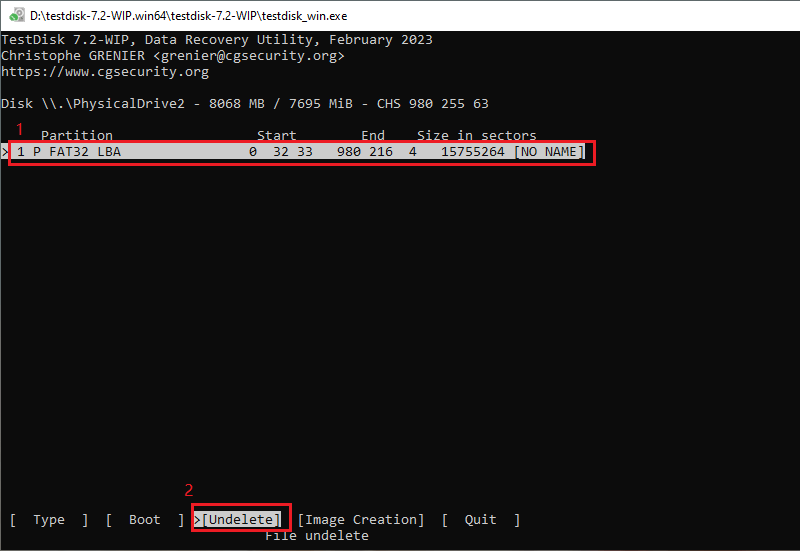
Step 10: Select the USB drive and choose Undelete by pressing Enter key.
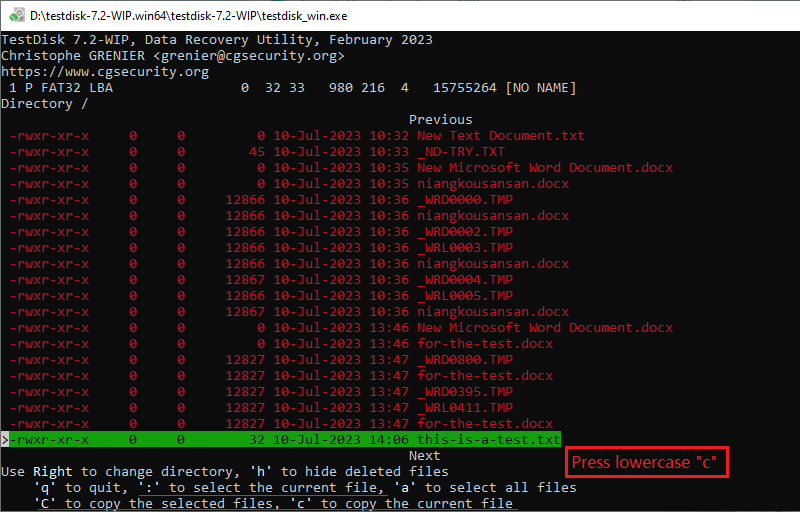
Step 11: Deleted files and directories are displayed in red. Use ':' key to select the necessary file to recover (the selected file will turn green), and press lowercase "c" to copy the current file. (Take "this-is-a-test.txt" as an example.)
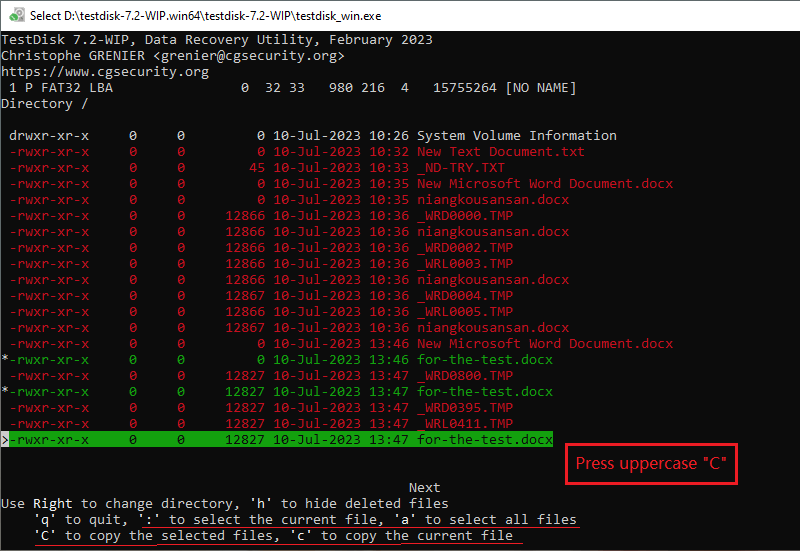
If the file you want to recover has more than one file but with the same name, select all of them using ':' key and then hit uppercase "C" to copy them. (Take "for-the-test.docx" for instance.)
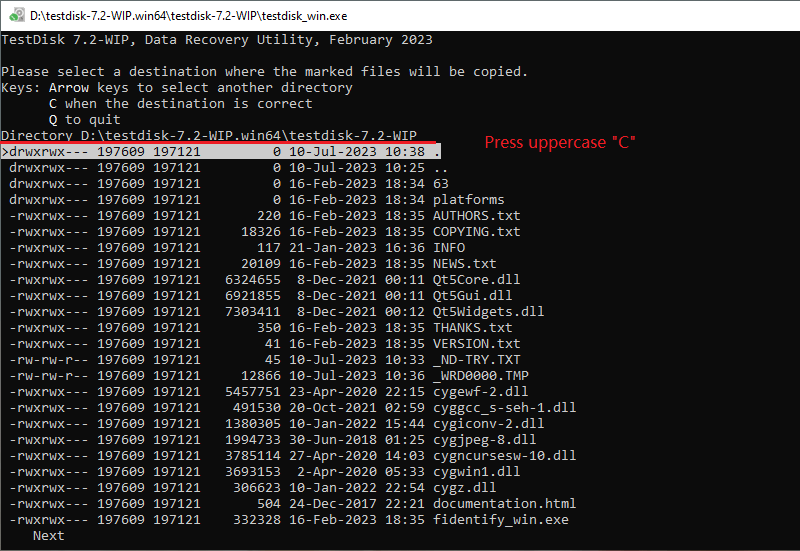
Step 12: When the destination is correct, enter uppercase "C" to save the recovered file(s).
Step 13: Files are successfully restored when you are prompted with the following information in green.
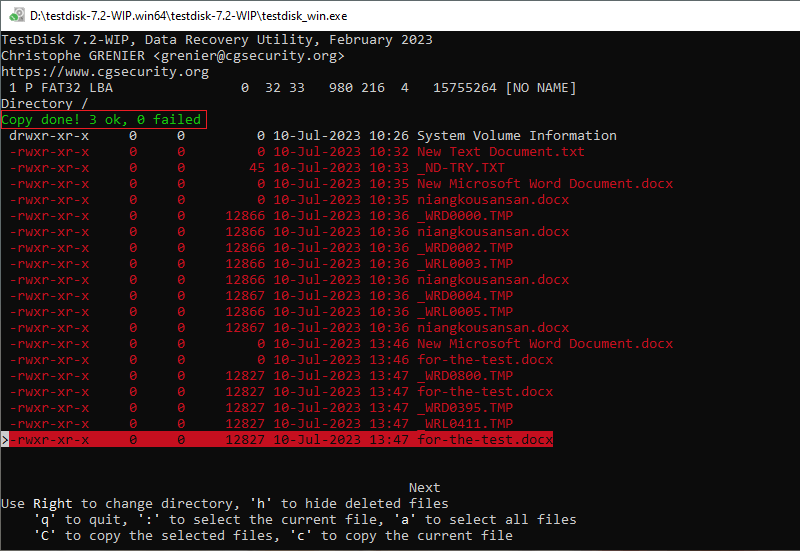
Step 14: You can check the recovered file in the testdisk-7.2-WIP directory. (Or any other directory you choose.)

If the USB drive has been fully formatted with a thorough data erasure tool, TestDisk may not be able to recover any files because the data has been completely overwritten and irretrievable. Usually a quick format operation only deletes the file system's index, while a full format operation completely erases the data on the drive by overwriting it with zeroes.
If the files are essential, you may need to seek the help from a third-party recovery tool, which can solve the problem easily.
 Permanently
Delete Files from Computer – No One Can Recover Them
Permanently
Delete Files from Computer – No One Can Recover Them
![[Video Guide] Windows File Recovery Usage & Recover Deleted Files](../images/computer/video-guide-windows-file-recovery-usage-recover-deleted-files/video-guide-windows-file-recovery-usage-recover-deleted-files-s.webp) [Video
Guide] Windows File Recovery Usage & Recover Deleted Files
[Video
Guide] Windows File Recovery Usage & Recover Deleted Files
![[Solved] Fix](../images/computer/fix-the-disk-you-inserted-was-not-readable-by-this-computer-on-mac/disk-not-readable-on-mac.png) [Solved]
Fix "The disk you inserted was not readable by this computer" on Mac
[Solved]
Fix "The disk you inserted was not readable by this computer" on Mac
 Difference
between a quick format and a full format for a hard drive (concise and
comprehensive)
Difference
between a quick format and a full format for a hard drive (concise and
comprehensive)
 Solutions for
Recovering an Unsaved Word Document
Solutions for
Recovering an Unsaved Word Document
 How
to Clone Windows System Drive to a New Hard Drive
How
to Clone Windows System Drive to a New Hard Drive