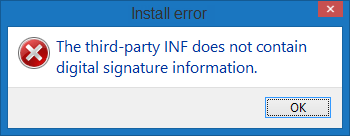
When you try to install a digitally unsigned driver in 64-bit edition of Windows, it will block the installation and alert you with one of the messages like:
Here shows you 2 ways to disable driver Digital Signature in Windows 10.
Windows 10 64-bit edition enforces driver signatures by default. This can be disabled to install drivers that are not digitally signed. Use the following steps to disable driver signature enforcement.
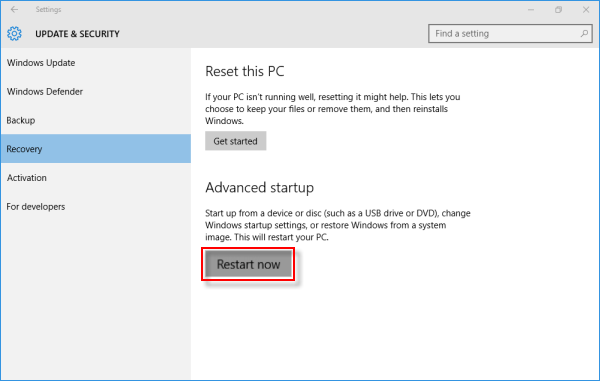
Step 1: Click the Start menu and select Settings. Then click Update & Security.
Step 2: Click on Recovery. Click Restart now under Advanced Startup.
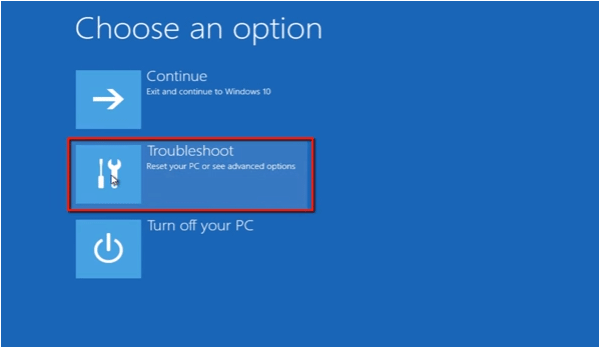
Step 3: Click Troubleshoot.
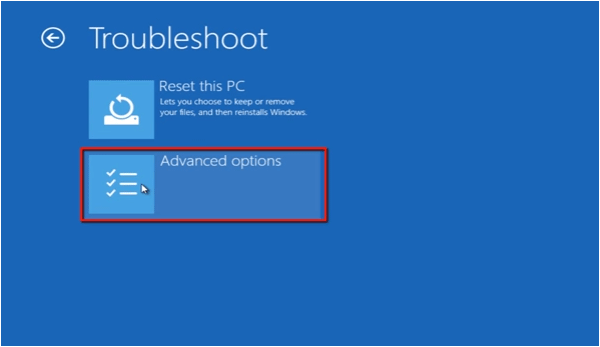
Step 4: Click Advanced options.
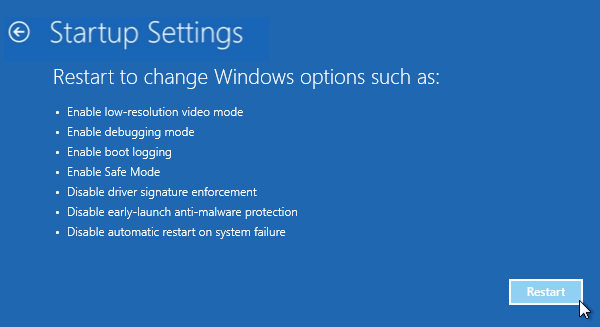
Step 5: Click the Startup Settings.

Step 6: Click on Restart.
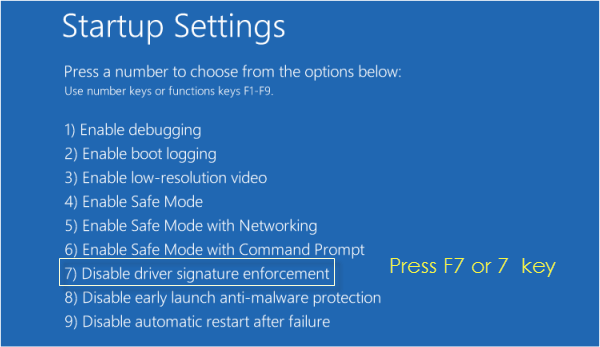
Step 7: On the Startup Settings screen, press 7 or F7 to disable driver signature enforcement.
Your computer will restart and you will be able to install non-digitally signed drivers.
Tips: If you restart your computer again, the driver signature enforcement will be re-enabled.
Because 64-Bit editions of Windows require digitally signed drivers. If you want to install a digitally unsigned driver, you need to bypass digitally signed driver requirement. You can do it in Command Prompt.
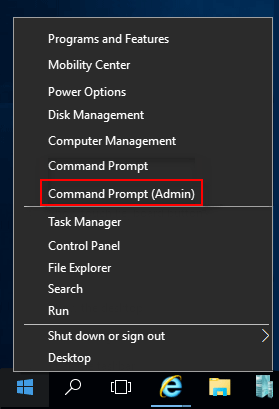
Step 1: Run Command Prompt as an administrator.
Press Win + X shortcut keys, then click Command Prompt (Admin) from the context menu.
Step 2: In Command Prompt window, execute the command below, hit Enter key.
To disable Digital Signature: bcdedit.exe /set nointegritychecks ON
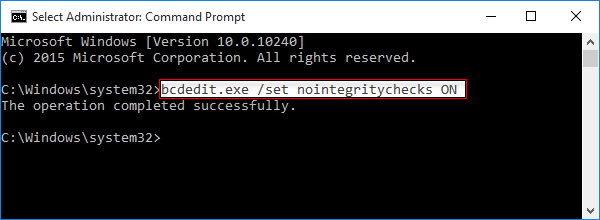
Step 3: After operation completing, close the Command Prompt window and restart your computer.
Now, you can install any unsigned drivers without problems.
Step 1:Run Command Prompt as an administrator.
Step 2: In Command Prompt window, execute the command below, and press Enter.
To enable the Digital Signature: Bcdedit.exe /set nointegritychecks OFF
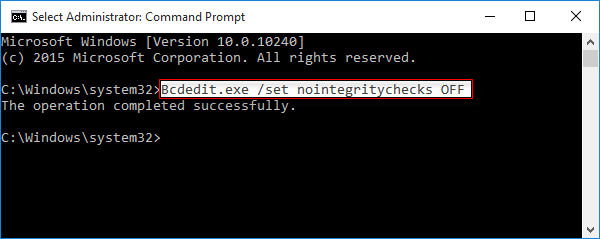
Then reboot your computer, it will enable the Driver Digital Signature Enforcement.