
A backup is a second copy of all your important files, for example, your documents, photos, emails, passwords and so on. Instead of storing it all in one place, like your computer hard drive, you can keep another copy of everything somewhere safe. This article covers six different ways to back up your personal data in Windows 10.
Tips: If your Windows 10 fails to boot, see How to Backup Your Data without Booting into Windows 10.
A traditional way to back up personal data is manually copying important files from the computer's local disk to an external storage device, such as a USB flash drive or removable hard drive. This is good for backing up small amounts of data. But in terms of huge amounts data, manual copying is a very time-consuming task and can sometimes be error-prone.
In fact, advanced users, and users who want their data to be backed up automatically and regularly, are using some convenient data backup tools or services from Microsoft Windows. Read on for details.

Online cloud storage like OneDrive is also a good data backup strategy. OneDrive is a default app in Windows 10, which can save and automatically sync the personal data on your computer like photos, documents and other files to the Internet. Then you can access the backed-up data from any device, anywhere.
We have previously written a sperate article on how to use OneDrive to back up files on Windows 10. So, we won't repeat it here. You can move straight into that article for detailed steps.

File History is a file backup tool integrated in Windows 10, which can quickly and completely back up your personal files to an external or network drive. The most convenient is that you can set how often it automatically saves a copy of your files. In addition, it allows you to quickly restore the selected files to the specified location with just one click of a button.
We have also written before how to turn on File History on Windows 10 to back up personal data. You can go directly to this article to see how it works.

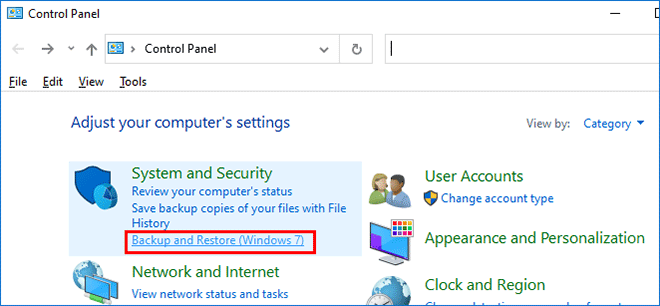
Step 1: Open Control Panel and then click Backup and Restore (Windows 7).
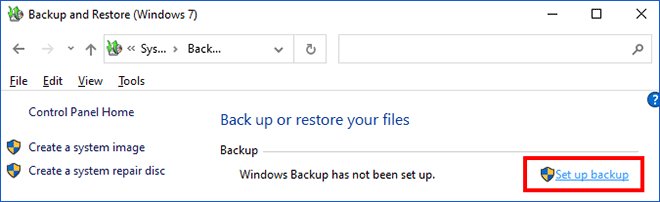
Step 2: The Backup and Restore panel opens. Click Set up backup.
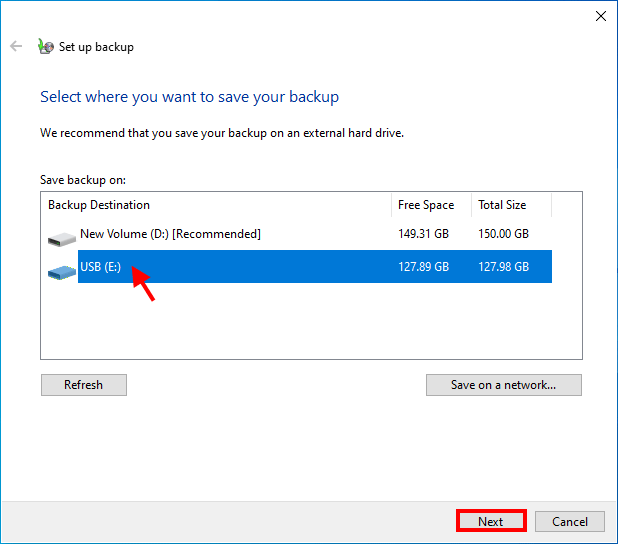
Step 3: Windows Backup tool starts. Select where you want to save your backup. It's recommended that you connect an external hard drive to your computer as a backup drive.
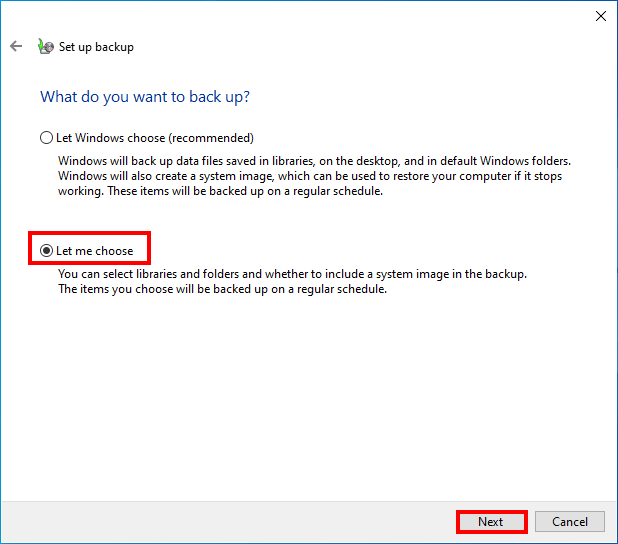
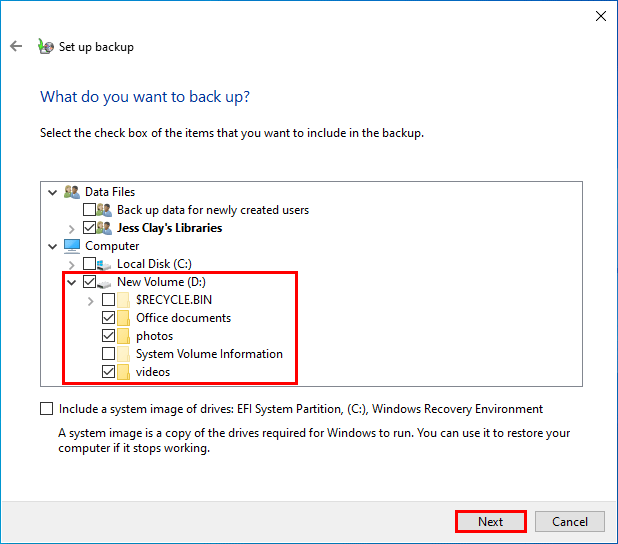
Step 4: You will need to select what you want to back up. Select Let me choose and click Next.
Step 5: Select the check box of the items that you want to back up, and then click Next. A system image backup will be created by default. If you don't want to back up your Windows 10 system, uncheck the box of the system image.
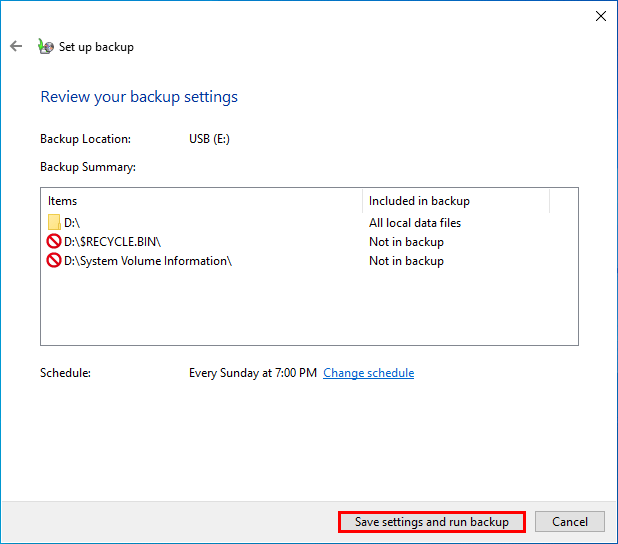
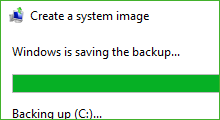
Step 6: All is set up. Now click Save settings and run backup. Windows will start backing up your files. Just wait for the backup progress to complete.
Creating a restore point is another data backup method that Windows provides for users. A restore point is a saved snapshot of a computer's data at a specific time. The snapshot can be considered as a complete backup, but you can't directly access the data inside until you restore it.
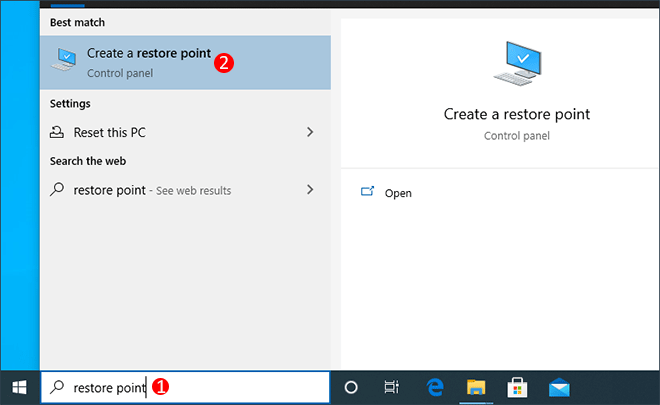
Step 1: Type restore point in the Windows 10 search box and then hit Enter.
Step 2: The System Properties dialog opens. On the System Protection tab, select the drive which contains your personal data you want to back up, and then click Create. Type a description to help you identify the restore point, and then click Create again.
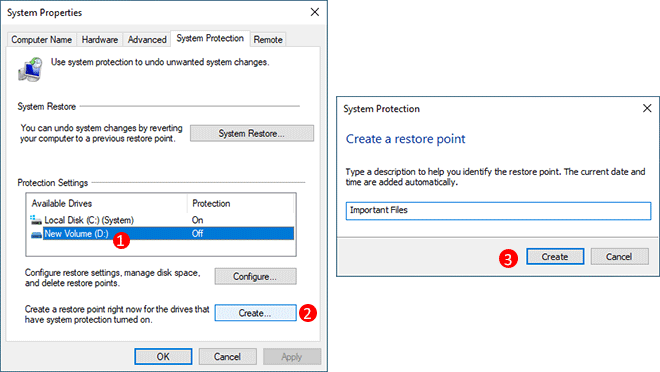
Step 3: Windows will start creating a restore point for the entire D drive. Just wait for the process to complete successfully.
If you want to backup an entire partition or drive that stores your personal data, a drive cloning program like iSumsoft Cloner is also a good choice.
Step 1: Download and install iSumsoft Cloner on your Windows 10. After installation, launch this tool.
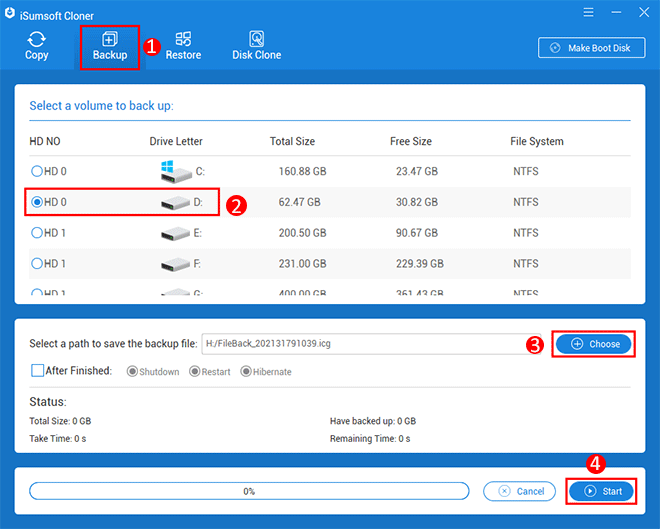
Step 2: Select the Backup option on the top. Select the volume that contains the personal files you want to back up, select a path or drive to save the backup file, and then click Start. The software will promptly start backing up your files.
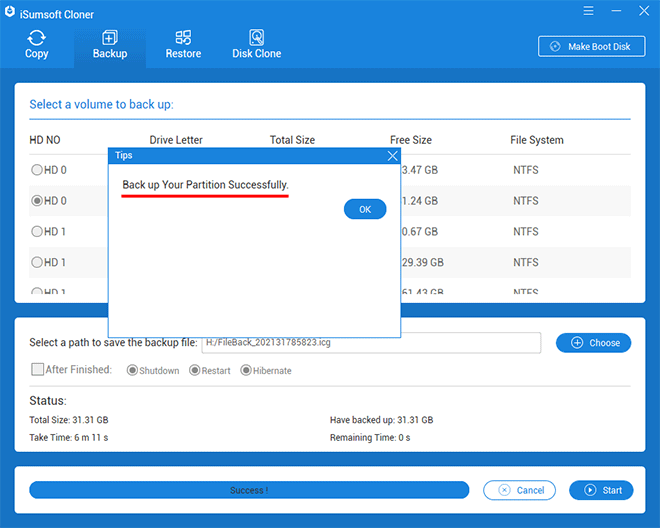
Step 3: Wait for the backup to complete. This will take a few minutes, depending on the amount of data to be backed up. When you are prompted that the backup is successful, you are done.
You can open the backup drive to check the backup file. It is a separate file with the .icg suffix. Knowing the form of the backup file helps you recover your files from it.
To restore your files from the backup, launch the iSumsoft Cloner tool and select the Restore option on the top. Select the restoration destination, click Choose to select the backup file, and then click Start.
The above are the six ways to back up personal data on Windows 10 that we want to share with you. You can choose the right method according to your own needs. Needless to say, backing up useful personal data is necessary and should be done on a regular basis. After all, only backup allows you to recover permanently deleted files without having to use any third-party data recovery software.
 How to Backup Data without Booting into Windows 10
 How to Backup Computer to External Hard Drive in Windows 10/8/7
 How to Backup Windows 7/8 before Upgrading to Windows 10
 How to Turn on File History in Windows 10 to Back up Data
 How to Create and Restore System Image Backup on Windows 10
 How to Do a System Restore on Windows 10 if Computer Fails to Boot