Windows 10 has a built-in screenshot tool that is easy to use for capturing, saving, and sharing screenshots of the lock screen. This guide will show you how to capture Windows 10 lock screen and sign-in screen screenshots using the Print Screen key and Snipping Tool.
You can easily capture a lock screen screenshot using the Print Screen key.
Step 1: Press Win + L to lock your screen.
Step 2: Press the Print Screen (PrtScr) key to copy the lock screen to the clipboard.
Step 3: Unlock your screen, go to the desktop, and launch the Paint app. Paste the screenshot from the clipboard into the app.

You can capture a sign-in screen screenshot using the Snipping Tool. Follow these steps to add the Snipping Tool as an Ease of Access button on the sign-in screen.
Step 1: Open the Registry Editor.
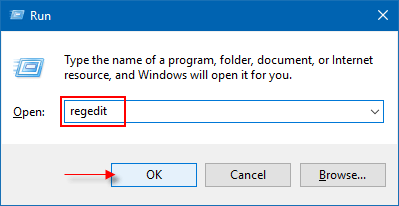
Press "Win + R" to open the Run dialog box, type regedit, and click OK.
Step 2: Navigate to the following location in the Registry Editor:
HKEY_LOCAL_MACHINE\SOFTWARE\Microsoft\Windows NT\CurrentVersion\Image File Execution Options
Step 3: Right-click the Image File Execution Options folder, select New > Key, and name the new key utilman.exe. Create a new String value called Debugger on the right panel.
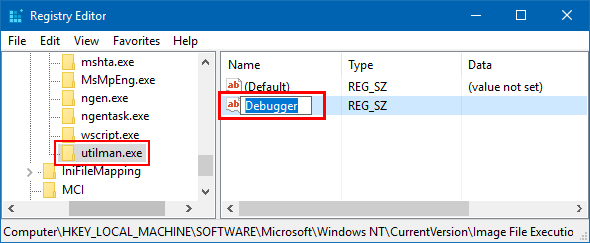
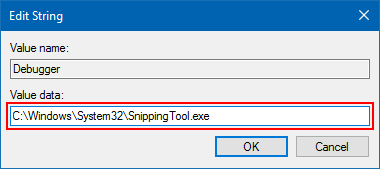
Double-click Debugger and set the Snipping Tool path as the value.
C:\Windows\System32\SnippingTool.exe
Step 4: Exit the Registry Editor and restart your computer.
On the login screen, click the Ease of Access button to open the Snipping Tool.

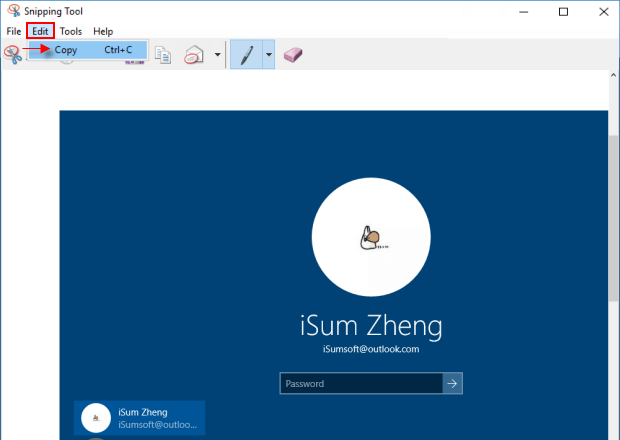
Step 5: In the Snipping Tool, select the arrow next to the New button to capture the login screen screenshot. Click Edit > Copy to copy it to the clipboard and save the snip.