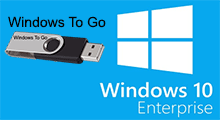
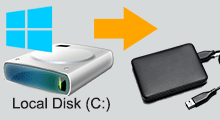
This article shows you how to make a bootable Windows 10 external hard drive just in case. When the computer around you fails to work or doesn't have the Windows system you want, you can just boot from the external hard drive to run your own Windows.

Rufus is a small program for making bootable drives. It makes it easy to make a bootable external hard drive for Windows 10.
1. Download the Windows 10 ISO file and Rufus onto your Windows 10 and connect an external hard drive to your Windows 10.
2. Launch the Rufus tool and follow these steps.
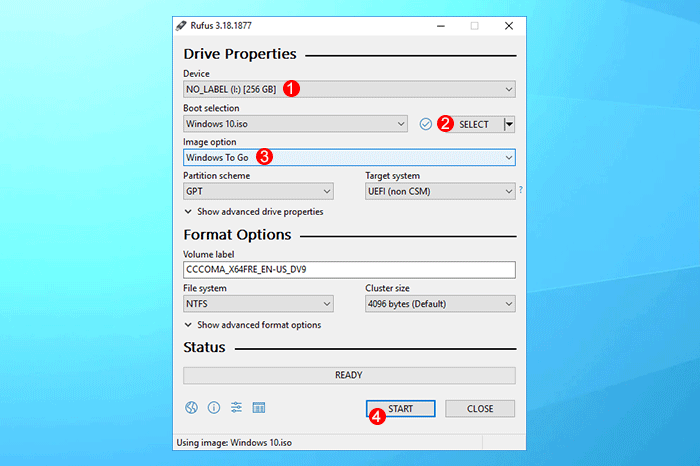
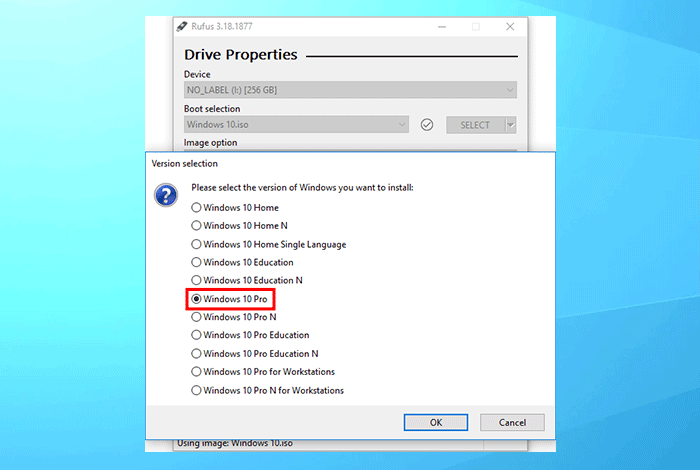
3. Select the Windows 10 version you want to install on the external hard drive, and then click OK when prompted. Rufus will start writing Windows 10 to the external hard drive and make it bootable.
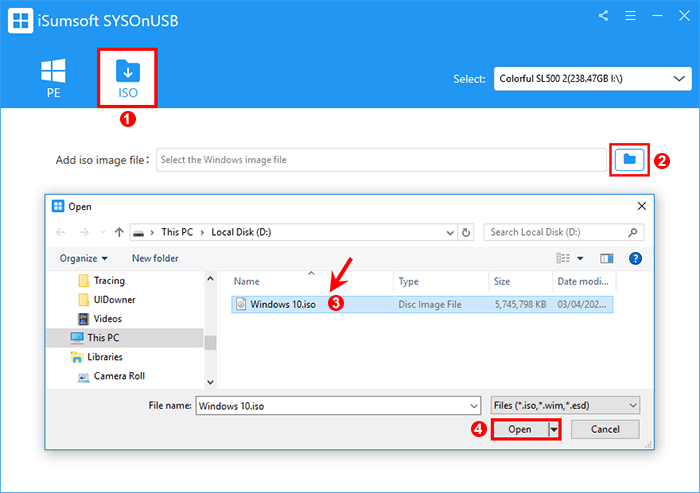
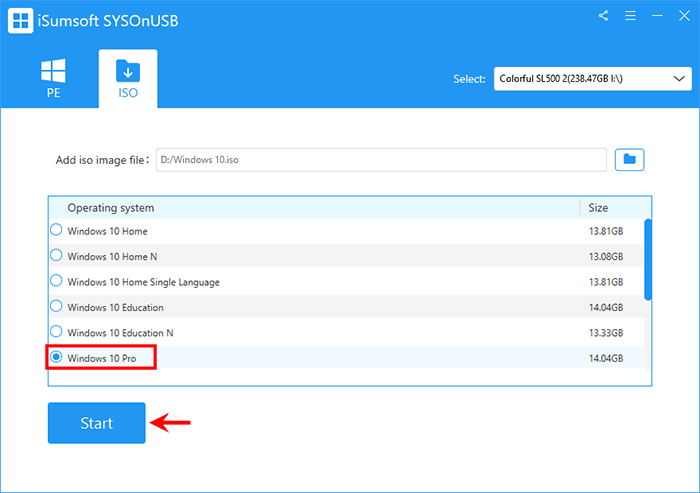
iSumsoft SYSOnUSB is another simple and powerful tool for making a bootable external hard drive for Windows 10. You need a Windows 10 ISO file and follow the steps below.
Step 1: Launch iSumsoft SYSOnUSB and select the external hard drive from the Select drop-down menu in the upper right.
Step 2: Select the ISO option in the upper left, and under this option, click the file icon to import the Windows 10 ISO image file.
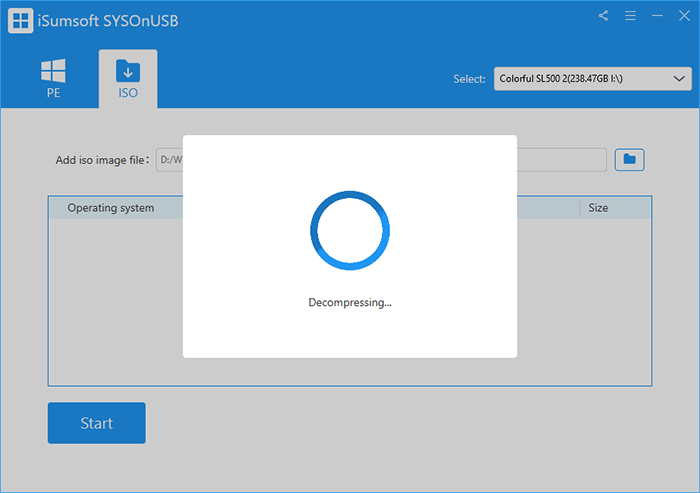
Step 3: The software will automatically extract Windows 10 operating systems from the added image file.
Step 4: Select the Windows 10 version you want to install onto the external hard drive and click Start. The software immediately starts making a bootable Windows 10 external hard drive.
If you are familiar with Windows commands, you can also make a bootable Windows 10 external hard drive using Command Prompt without any third-party tools. The whole process will be a little complicated.
Download the Windows 10 ISO image file from the Microsoft website. After downloading, right-click the ISO file and select Mount to mount the ISO file to your computer.
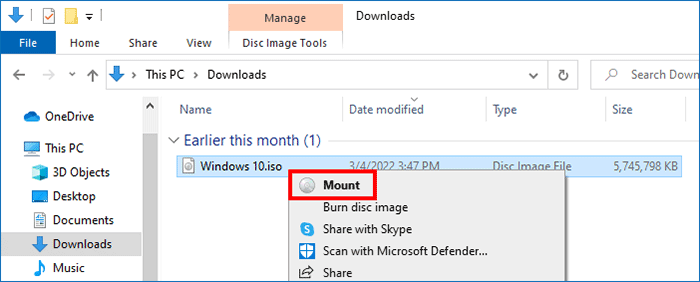
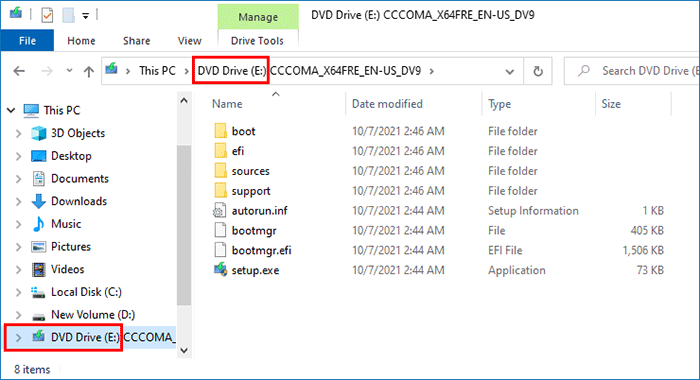
The mounted ISO image is assigned a DVD drive letter. Write down the DVD drive letter as you will need to use it later.
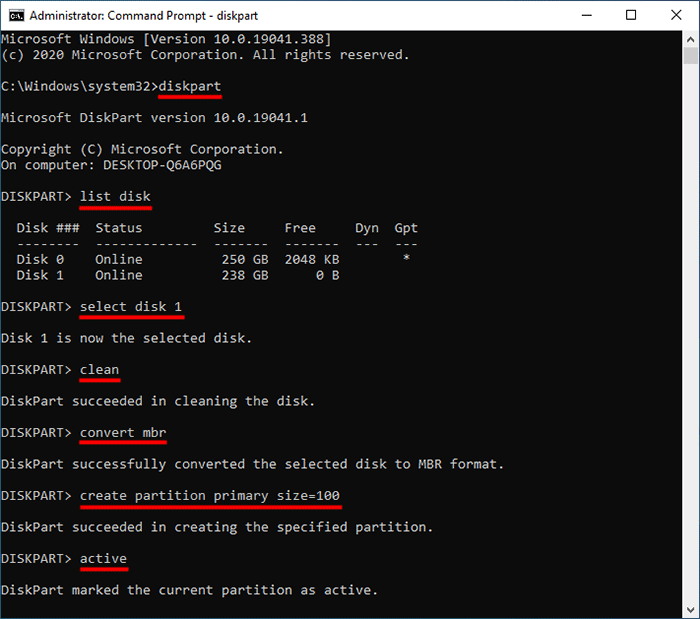
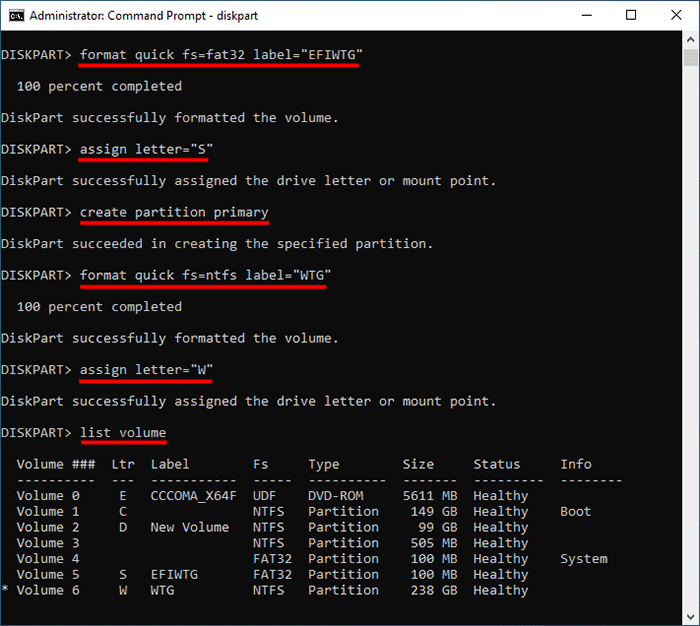
1. Connect the external hard drive to your computer via a USB to SATA adapter cable and make sure it is recognized by your computer.
2. Open the Command Prompt as administrator and type the following diskpart commands in sequence to format the external hard drive and create a bootable partition on it. Press Enter after typing each line of command.
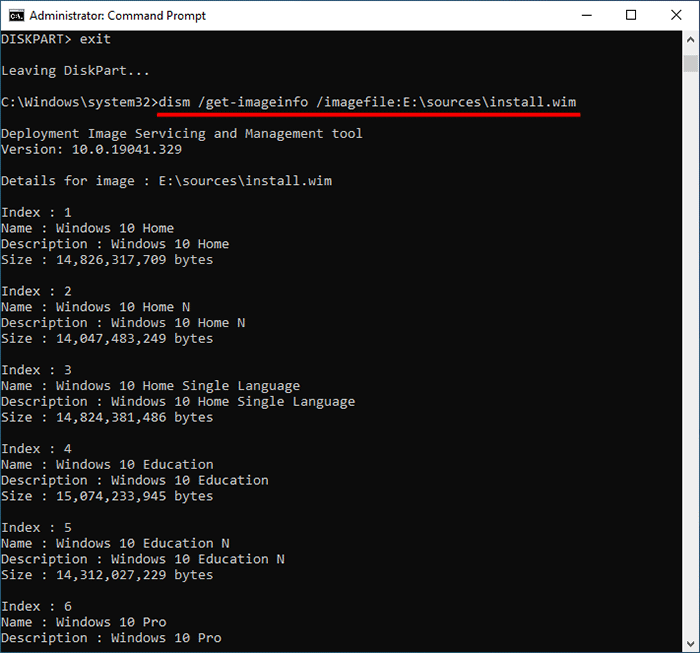
1. In the Command Prompt window, type the following command and press Enter to extract the Windows 10 operating systems included in the ISO image. Make a note of the index number corresponding to the Windows 10 version you want to install onto the external hard drive.
dism /get-imageinfo /imagefile:E:\sources\install.wim (E is the DVD drive letter of the Windows ISO mounted in Step 1)
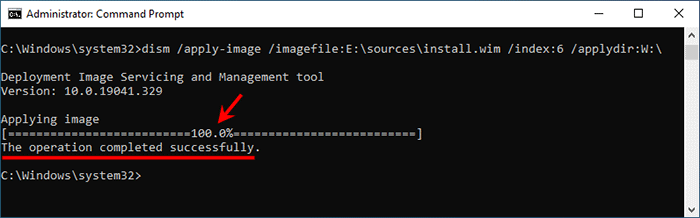
2. Type the following command to starting writing Windows 10 to your external hard drive.
Dism /apply-image /imagefile:E:\sources\install.wim /index:6 /applydir:W:\

3. Wait for the process to complete. When 100% is displayed under Applying image, Windows 10 has been successful installed on the external hard drive.
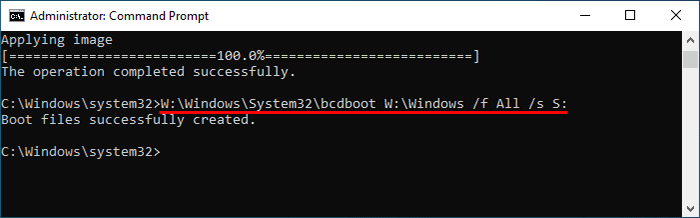
In the Command Prompt window, type the following bcdboot command to create boot files on the external hard drive to make the drive bootable.
W:\Windows\System32\bcdboot W:\Windows /f ALL /s S:
So far, you have successfully created a bootable external hard drive for Windows 10 using the Command Prompt. At this point, the Windows 10 system can boot and run from the external hard drive, but it may be affected by the host computer's internal disks and run unsteadily. To ensure that the Windows 10 OS can run stably from the external hard drive, proceed to Step 5 below.
1. Download the sanpolicy.zip file onto your computer, extract the zip file and you will see an san_policy.xml file and a unattend.xml file in it. Then, follow the steps below to add the two .xml files to the external hard drive.
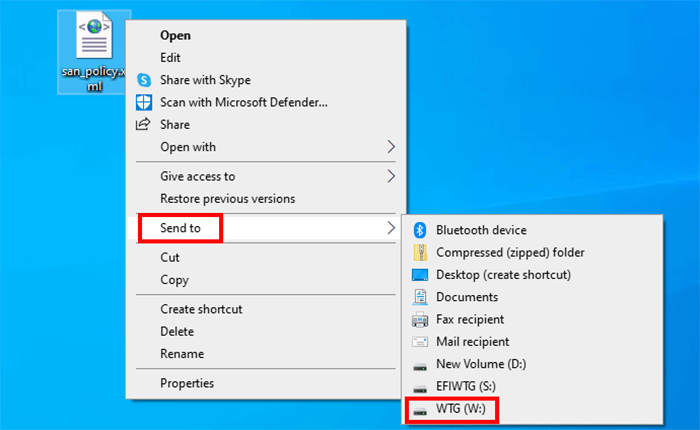
2. Right-click the scan_policy.xml file and select Send to > WTG (W:) from the context menu. Then, click Continue to grant administrator permission to send the scan_policy.xml file to the OS partition(W:) of the external hard drive.
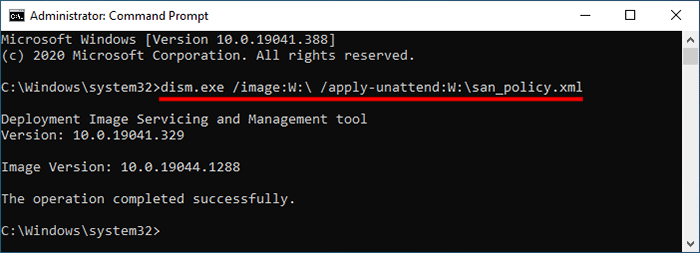
3. Open the Command Prompt as administrator, run the following dism command to prevent the Windows 10 on the external hard drive connecting to the host's internal disk.
Dism.exe /Image:W:\ /Apply-Unattend:W:\san_policy.xml
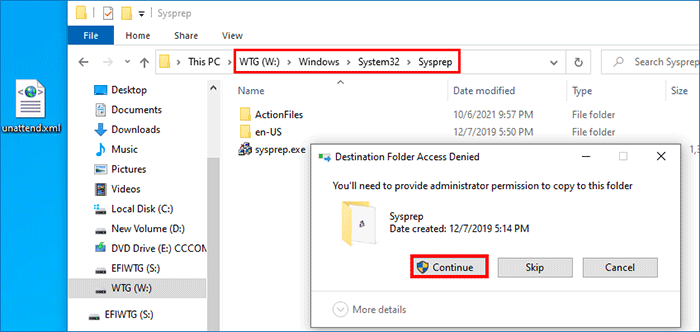
4. Open the external hard drive and navigate to the folder W:\Windows\System32\Sysprep. Then, copy and paste the unattend.xml to the folder W:\Windows\System32\Sysprep. Click Continue to grant administrator permission to copy the file.
That's all you need to do to create a Windows 10 bootable external hard drive using Command Prompt.
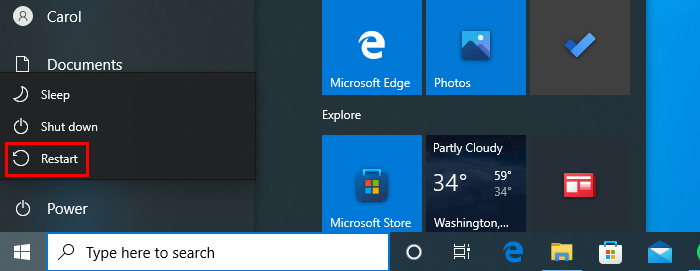
1. In Windows 10, click Start > Power, then select Restart from the Power option while holding the Shift key.
2. When the PC boots to the "Choose an option" screen, choose Use a device.

3. Select your external hard drive on the screen and your PC will boot from the external hard drive.

4. After your PC has finished booting from the external hard drive, Windows 10 will boot and run from the external hard drive.
Alternatively, you can enter the computer's BIOS firmware settings to make the computer boot from the external drive.