It is troublesome that an important file or folder is deleted unintentionally by oneself or others. In fact, there are several ways that could help you protect files from being deleted. If you are eager to know how to protect files from being deleted, take the methods below.
You are allowed to modify users and their corresponding rights by altering security permissions. Here is the guide:
Step 1: Right-click the file that you want to protect from being deleted in your computer and select the option Properties in the context menu.
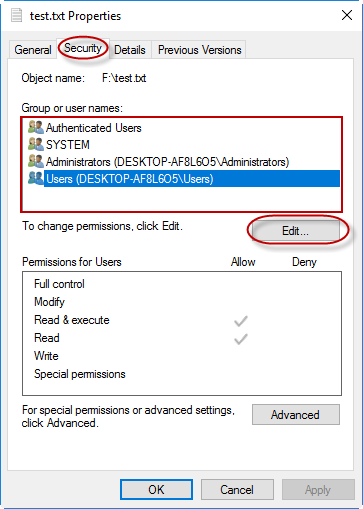
Step 2: When the dialog box pops up, select the Security tab. Next, click on the specific user that you want to remove the permission to delete the file. Then click the Edit button.
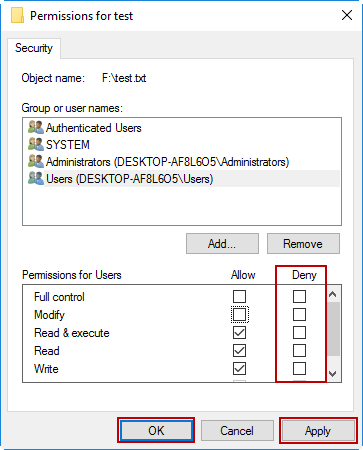
Step 3: In the Permissions dialog box, make sure you select the specific user. Then select all the option under the Deny column. Click the button Apply and OK to change the settings. In this way, this user won't be able to access the file.
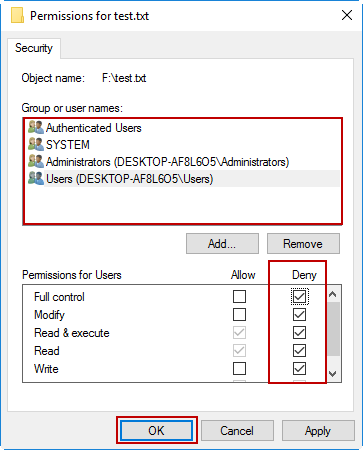
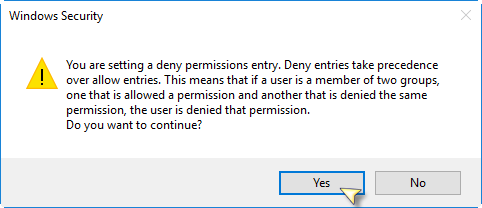
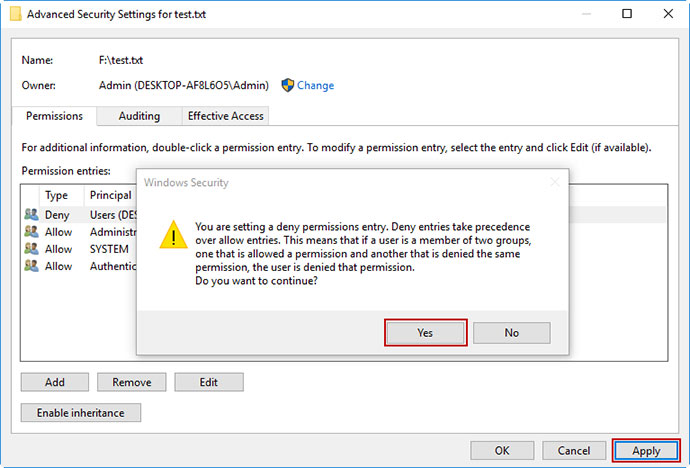
Step 4: When the warning dialog box pops up, just click yes to confirm the deny permissions entry.
Attention: if you want to allow that user to access the file, you should go back to the Permissions dialog box and remove all the deny options as shown below.
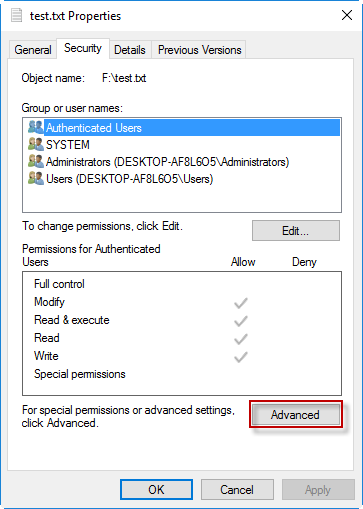
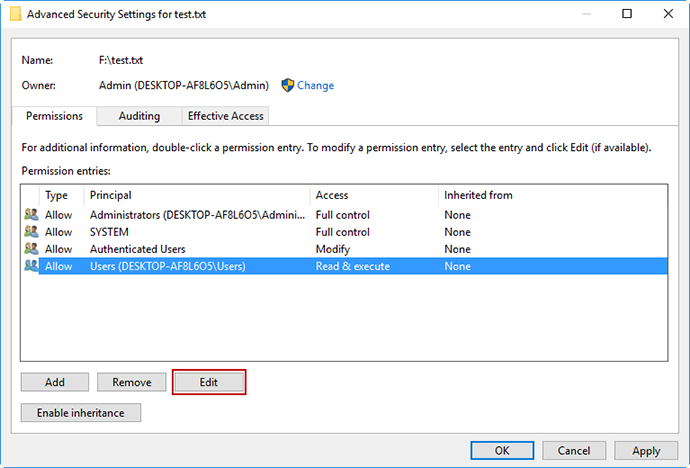
Step 1: Open Properties dialog box as the method above and then click on the Security tab. In the Security tab, click the Advanced button.
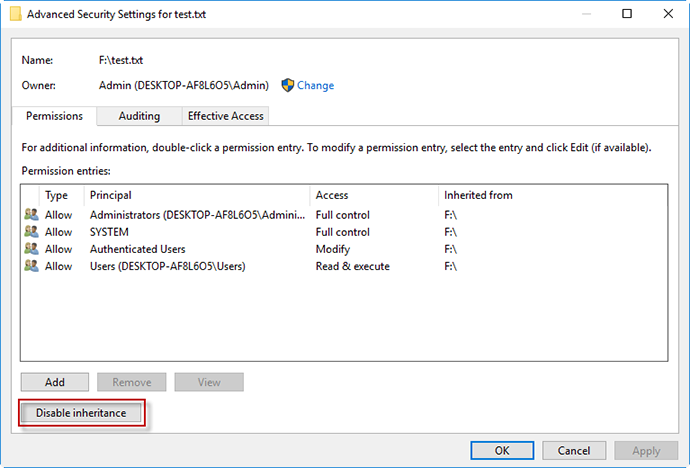
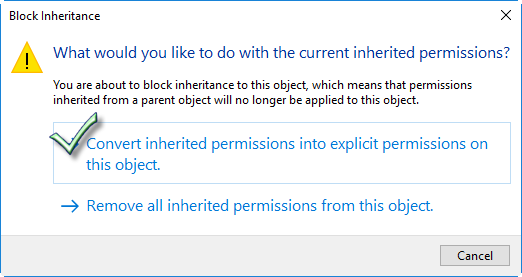
Step 2: After opening the Advanced Security Settings dialog, you have to click on the Disable inheritance button. Then select the prompt Convert inherited permissions into explicit permissions on this object. Thus, you are allowed to edit the file permissions.
Step 3: Select the user by which you want to protect the file from being deleted. Then click on the Edit button.
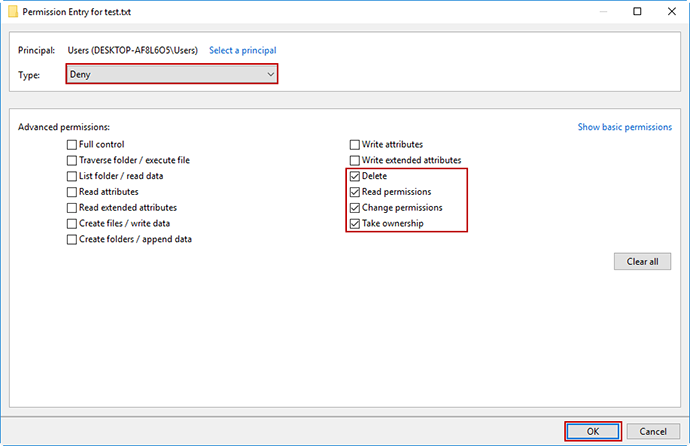
Step 4: To reach all the advanced permissions, don’t forget to click on Show advanced permissions. Then, click Deny in the Type drop-down box. Under the Deny menu, select 4 radio buttons: Delete, Read permissions, Change permissions, Take ownership. Click on the OK button to exit this dialog box.
Step 5: Click the Apply button to confirm this setting. Without administrator permissions, the user won’t be able to delete the selected file but still access it.
This simple method also enables you to protect files from being deleted. Here are the steps:
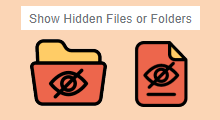
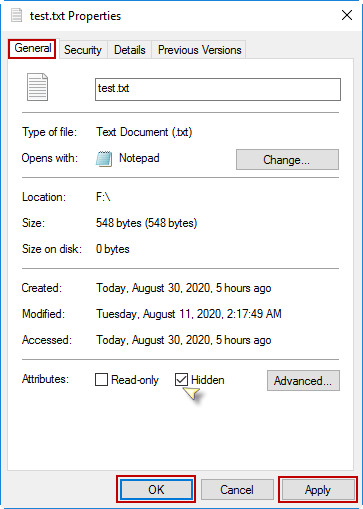
Step 1: Hide the file.
Locate the file and right-click it to open the Properties dialog box. In the General tab, click on the radio button Hidden. Then click the Apply button and the OK button.
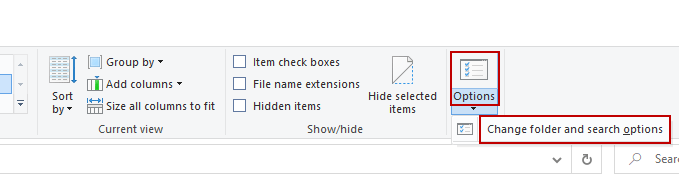
Step 2: Disable to view hidden files.
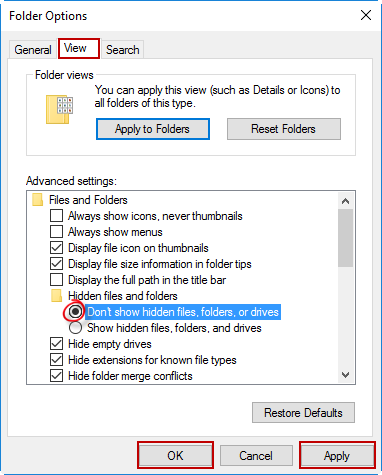
Enter the File Explorer window and select the View tab. Then in the Options tab, select Change folder and search options. In the Folder Options dialog, click on the View tab. Make sure the option Don’t show hidden files, folders, or drives is selected. Click on the button Apply and OK. Then the selected file won’t show in the File Explorer window.
Able to protect the files from being deleted, you could choose two methods as the article points out at no costs. Nevertheless, it is still suggested that you should back up important data or create a system restore point for a rainy day.


![[3 Ways] How to Recover Deleted Videos from Laptop Windows 10](../images/backup-recovery/how-to-recover-deleted-videos-on-laptop-windows-10/how-to-recover-deleted-videos-on-laptop-windows-10.webp)