"Can I password-protect an .mp4 file in WIN 10? If not, where can I find a trusted app?"
If you are looking for a way to protect your important and private mp4 video file with password from prying eyes. here you are in the right place. This article will show you how to password protect an mp4 video file in Windows 10 with built-in encryption tool and several trusted software such as VeraCrypt, 7-Zip and iSumsoft FileCarer. If you are using MacOS, the bonus tips will show you how to password protect an mp4 video file on Mac.

Though there is no native feature designed to put password on specific video in Windows, you can still protect video file with BitLocker. BitLocker is a built-in encryption tool that can help you encrypt the entire hard drive with a password. To protect your video file, you can put it in a hard drive and encrypt the hard drive using BitLocker with the following steps.
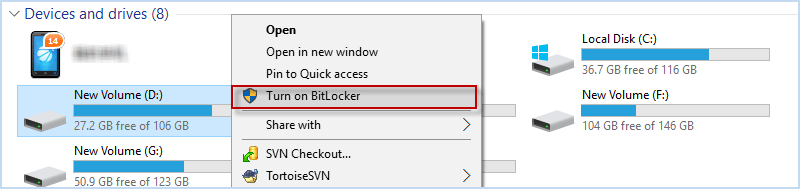
Step 1: Right-click on the hard drive and choose Turn on BitLocker.
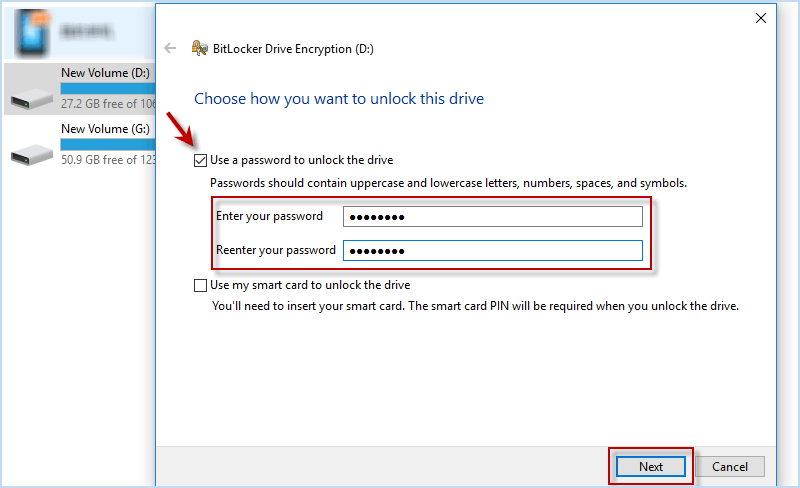
Step 2: Check Use a password to unlock the drive and enter a wanted password. Then click Next.
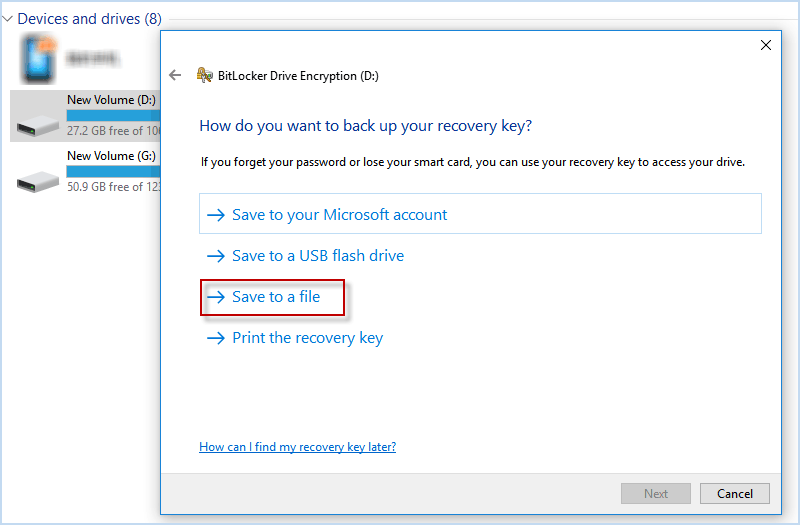
Step 3: Click Save to a file to back up your recovery key on your Computer in case the password is forgotten.
Step 4: Choose the encryption space and encryption mode according to your needs.
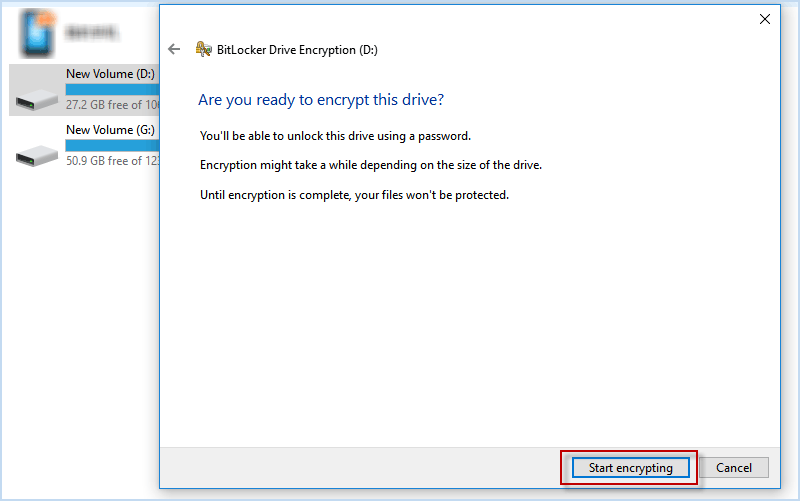
Step 5: When all setting is ready, click Start encrypting and BitLocker will encrypt the hard drive including the mp4 video file.
Since BitLocker isn't available on Windows 10 Home edition, you can choose other software such as VeraCrypt to password protect your mp4 video file. VeraCrypt is a free application that allows you to create an encrypted file container and save your video in it. Now you can install VeraCrypt from its official site (https://www.veracrypt.fr/en/Downloads.html) and follow the detail steps as below.
Step 1: Open VeraCrypt and click Create Volume.
Step 2: Choose Create an encrypted file container and click Next.
Step 3: Choose Standard VeraCrypt volume and click Next.
Step 4: Click Select File to choose a location for new volume, set volume name and then click Next.

Step 5: Choose the encryption algorithm you need and click on Next.
Step 6: Enter a volume size larger than your video file and click on Next.
Step 7: Enter a password twice and click on Next.

Step 8: Move your mouse randomly according to the IMPORTANT tips and then click Format. Finally you will be noticed that the VeraCrypt volume has been successfully created.

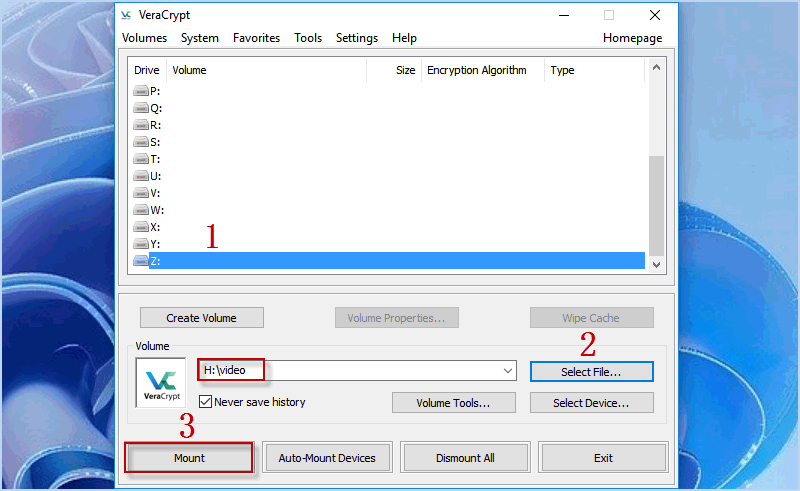
Step 9: Launch VeraCrypt again, select a drive letter on the list and click Select File to choose the newly created volume. Finally click Mount. When a pop-up window appears, enter a correct password and click OK.
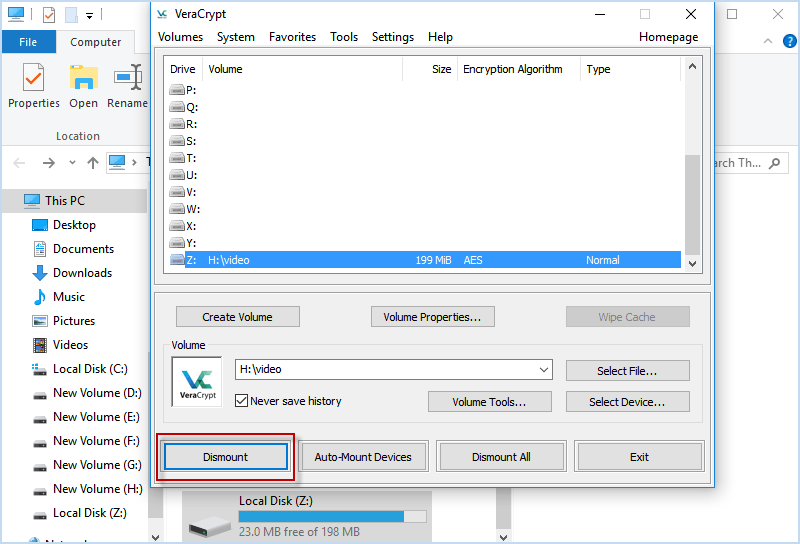
Step 10: Drag and drop your mp4 video file to the mounted and encrypted volume.

Step 11: Click Dismount and you’ll successfully password protect your MP4 video file in the encrypted volume.
If your video is comparatively large, you can add it to a password protected archive with 7-Zip, WinRAR, WinZip, etc. This is an easy way to help you not only zip but also password protect a video file on Windows 10. Here I will take 7-Zip as an example.
Step 1: Download and install 7-Zip on your Windows 10 Computer.
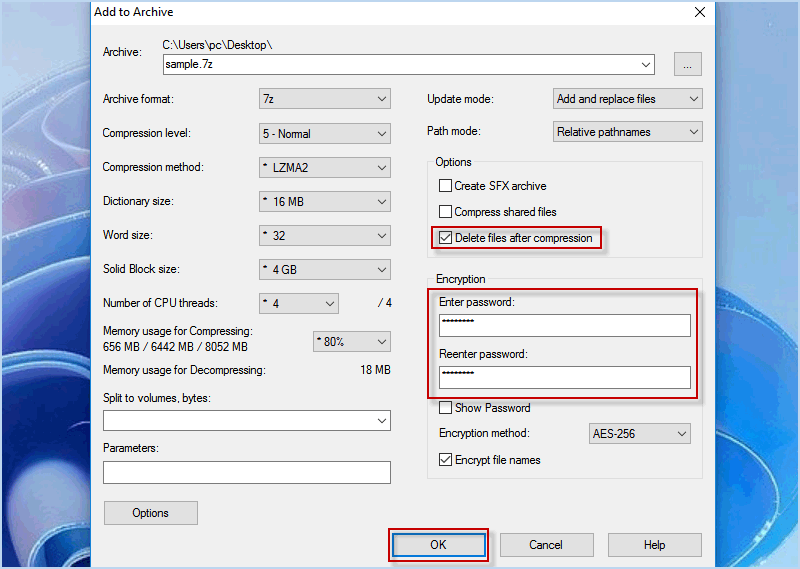
Step 2: Right-click on the video file and choose 7-Zip > Add to archive…

Step 2: Tick Delete files after compression and enter a desired password. Then click OK and 7-Zip will create a password-protected zip video for you.
What is the easiest and safest way to password protect an MP4 video file? You should definitely install iSumsoft FileCarer and have a free try. It is a professional encryption tool that enables you to encrypt an comparative large video in a few seconds. Moreover, it protect more than just video on Windows 10, it also allows you encrypt any important file on Windows 11/10/8/7 local/external drive. Here’s how to use iSumsoft FileCarer to password protect your mp4 video file.
Step 1: Before protection, you need to download and install iSumsoft FileCarer on your Windows Computer.
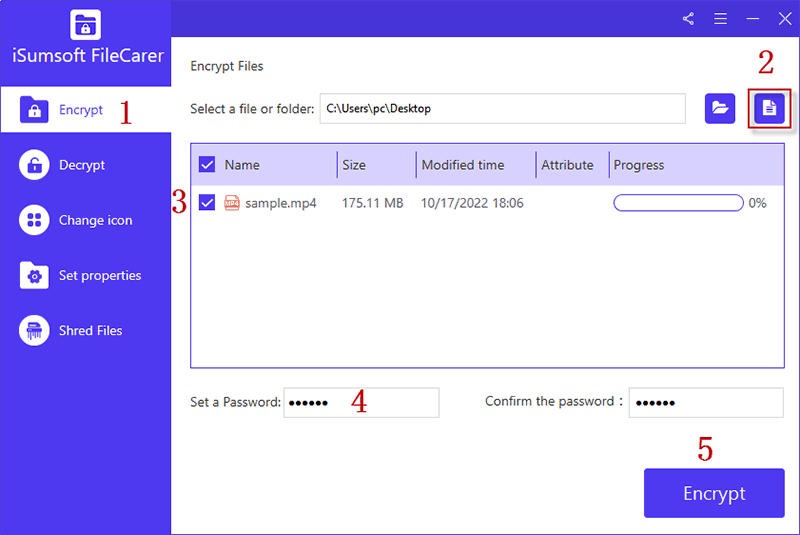
DownloadStep 2: Once the encryption tool is set up, select Encrypt option on the left pane.
Step3: On the upper right, click the folder/file icon to pick the video you wish to protect.
Step 4: Create a password and enter it twice in password bar. Then hit Encrypt button.
After that, iSumsoft will instantly encrypt the selected video file. Without a correct password, no one can decrypt and see your private contents in video.
Step 1: On your Mac, create a new folder and put the video file you want to protect into it.
Step 2: Click Finder icon > Applications > Utilities > Disk Utility. In Disk Utility, click File > New Image… > Image from Folder…. Then select the folder containing your video file and click Choose button.

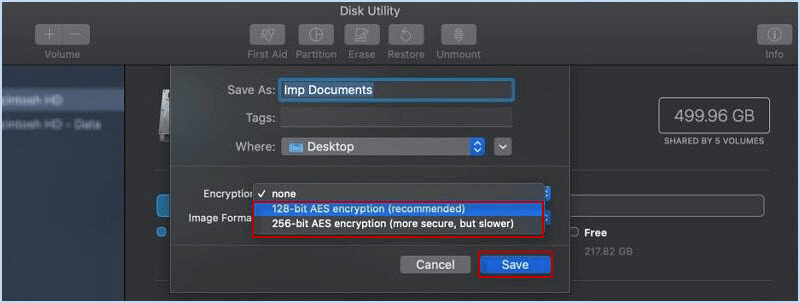
Step 3: Choose the encryption you need, and here 256-bit AES is recommended.
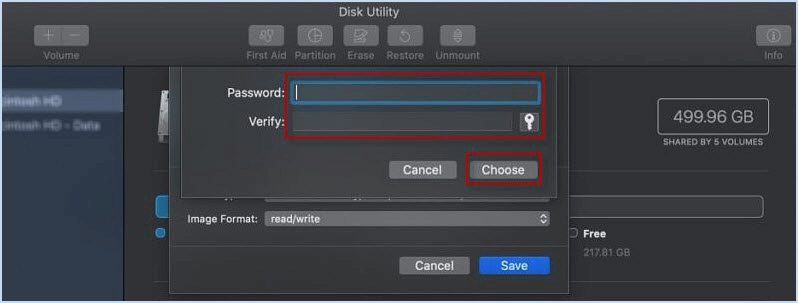
Step 4: Enter a password twice and keep the Image Format as read/write. Then click Save.
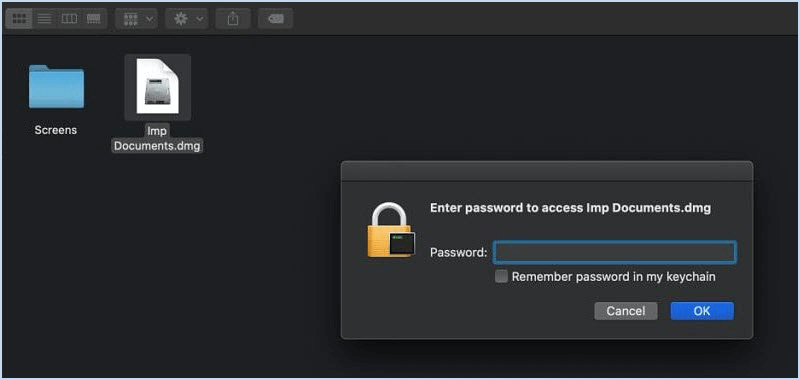
Step 5: Very soon, a password-protected folder disk image will be created. You can put more videos in it since its size can grow along with the file you add.
![[6 Ways] Fix MP4 File Not Playing in Windows Media Player](../images/windows-tips/mp4-file-not-playing-in-windows-media-player/windows-media-player-not-playing-mp4.webp) [6 Ways] Fix MP4 File Not Playing in Windows Media Player
[6 Ways] Fix MP4 File Not Playing in Windows Media Player