To protect sensitive files on your computer, consider hiding the entire disk partition where they are stored. By doing so, the partition becomes invisible in Windows File Explorer, enhancing privacy. This guide outlines three methods to hide and unhide a hard disk partition in Windows 10.
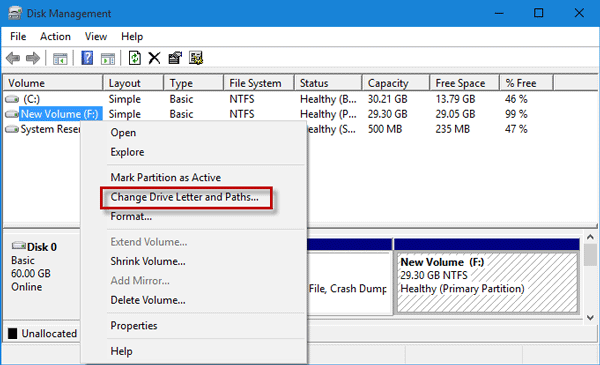
Step 1: Open Disk Management in Windows 10.
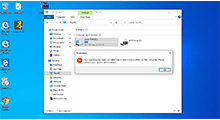
Step 2: Right-click the volume you want to hide and select Change Drive Letter and Paths.
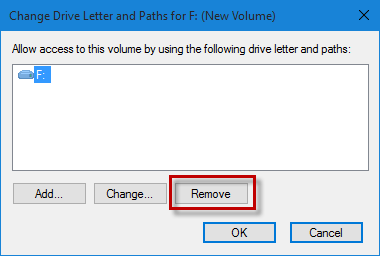
Step 3: In the Change Drive Letter and Paths dialog, click Remove and confirm any warning dialogs. The drive partition will be hidden after removing the drive letter.
To unhide the hard disk partition:
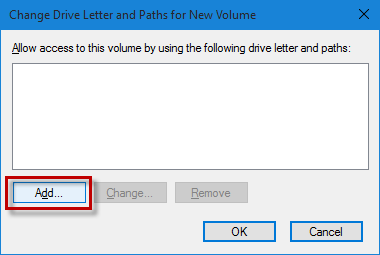
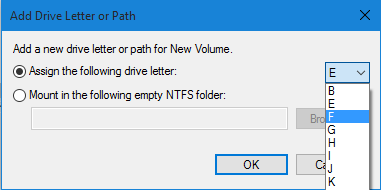
Click the Add button.
Select Assign the following drive letter, choose a letter from the drop-down menu, and click OK. The hard disk partition will reappear in File Explorer.
Step 1: Open Local Group Policy Editor in Windows 10.
Step 2: Navigate to User Configuration > Administrative Templates > Windows Components > File Explorer, and double-click Hide these specified drives in My Computer.
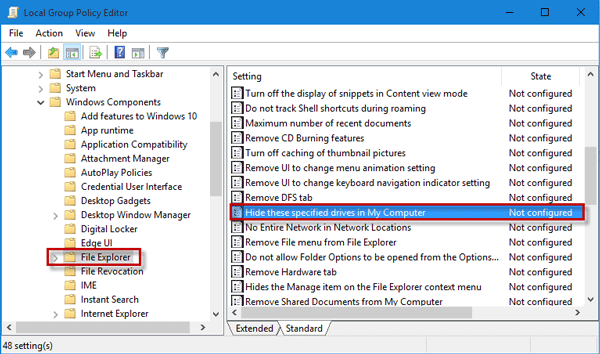
Step 3: Select Enabled, choose the drive to hide, and click OK. The disk partition will disappear from This PC in File Explorer.

To unhide the hard disk partition, select Not Configured or Disabled and click OK.
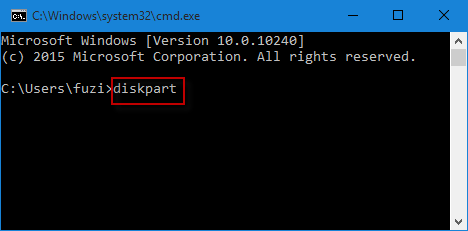
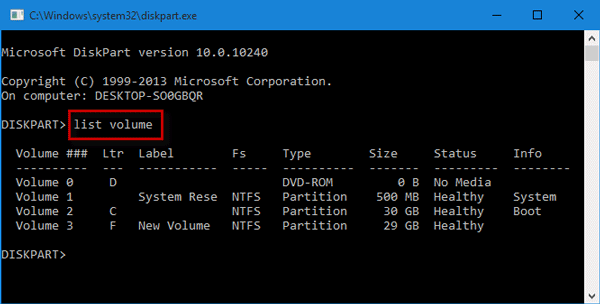
Step 1: Open a command prompt, type diskpart, and press Enter. If prompted by User Account Control, click Yes.
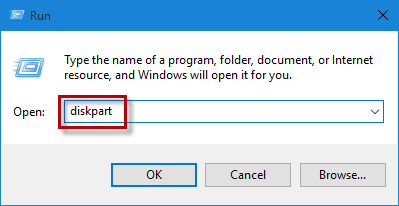
Alternatively, type diskpart in the Run dialog box and press Enter.
Step 2: In the diskpart window, type list volume and press Enter to list all hard disk partitions.
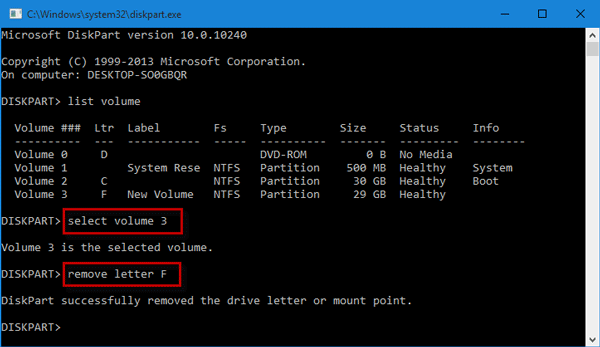
Step 3: Type select volume x (replace x with the volume number) and press Enter.
Step 4: Type remove letter X (replace X with the drive letter) and press Enter to hide the volume.
To unhide, type select volume x and press Enter, then type assign letter X and press Enter.