
If you have a shared or public computer that several people use, you may be worried about your important data being viewed, tampered with, or deleted. To dispel such concern, it's a good idea to prevent access to certain drives from This PC.
To prevent users from accessing the drive from This PC, one possible method is to use BitLocker to encrypt the drive. However, BitLocker encryption is a time-consuming task. You may not want to do that, and in fact you don't have to. Now, on this page, we will show you two simple and fast ways to prevent access to drives from My Computer in Windows 10.
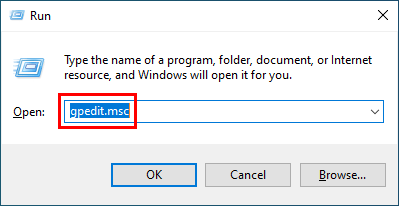
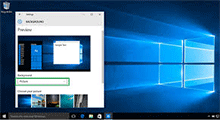
Step 1: Open the Run dialog box using Win + R, type gpedit.msc, and then click OK. This will open Local Group Policy Editor.
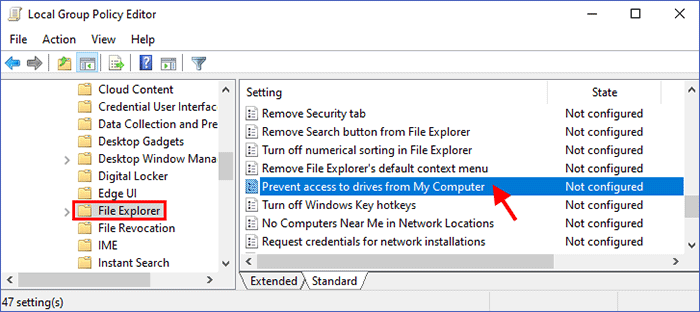
Step 2: Once the Local Group Policy Editor opens, navigate to User Configuration > Administrative Templates > Windows Components > File Explorer. Select the File Explorer folder on the left pane, and then double click the setting titled "Prevent access to drives from My Computer" on the right pane.
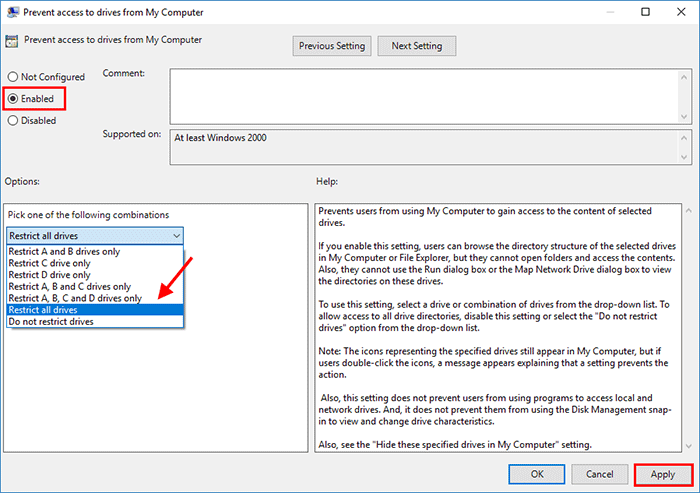
Step 3: Select the Enabled radio button, select the drive or drive combinations you want to prevent access to, and then click Apply.
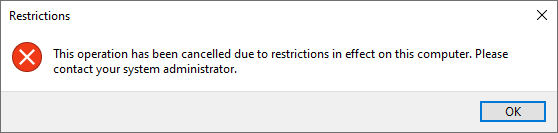
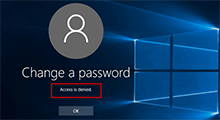
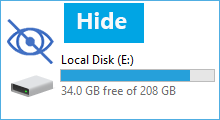
Changes will take effect immediately without restarting Windows 10. Then if the user tries to access the drive from This PC, he will be blocked and get an error message as shown in the figure below.
If you want to allow access to the drive, just open that policy setting and set it to Not Configured or Disabled.
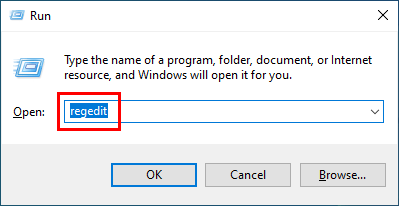
Step 1: Open the Run dialog box, type regedit, and then click OK. This will open Registry Editor.
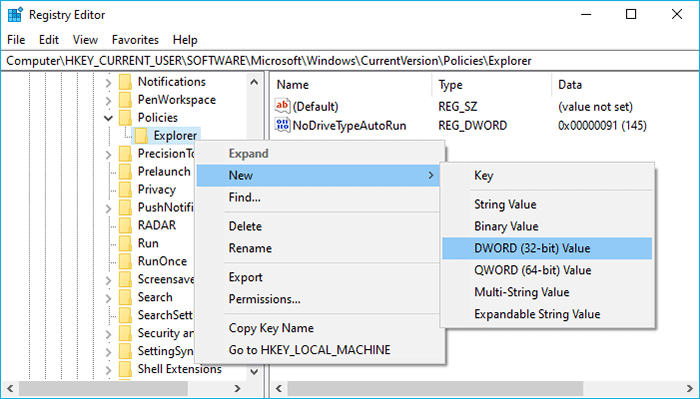
Step 2: Once the Registry Editor opens, navigate to the key Computer\HKEY_CURRENT_USER\SOFTWARE\Microsoft\Windows\CurrentVersion\Policies\Explorer on the left pane.
Tips: If the Explorer key does not exist, you can right-click on Policies and select New > Key to create a new key. Then name this new key Explorer.
Step 3: Right-click the Explorer key on the left pane, and select New > DWORD (32-bit) Value. Then name the new value NoViewOnDrive.
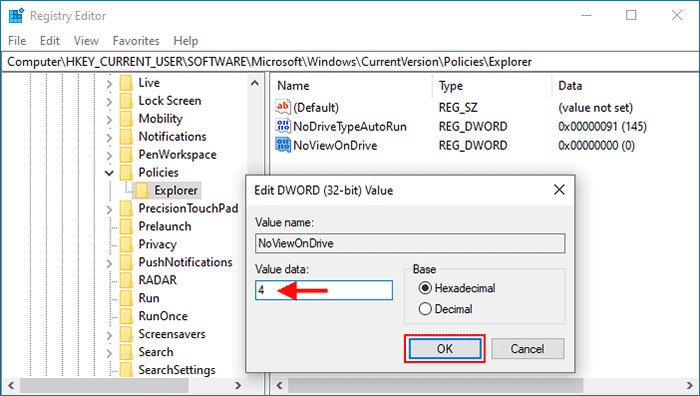
Step 4: Double-click the NoViewOnDrive value, set its value data to 4 (to prevent access to C drive), or 8 (to prevent access to D drive), or 67108863 (to prevent access to all drives), and then click OK to save the changes.
Tips: If you want to prevent access to C drive and D drive, set the value data to 12 (4 + 8).
Step 5: Close the Registry Editor and restart Windows 10 for the changes to take effect.
 How to Protect Files from Being Deleted in Windows 10
 How to Prevent Users from Changing Password in Windows 10
 How to Prevent Users from Installing Software in Windows 10
 How to Prevent Users from Changing Desktop Wallpaper in Windows 10
 How to Hide Hard Disk Partition in Windows 10 File Explorer
 How to Unblock Apps, Files, and Folders in Windows 10