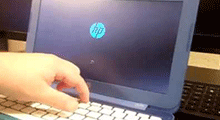
Your Windows 10 HP laptop is very slow and almost unusable, so you open Task Manager and find that it's showing 100% disk usage? No abnormal software was found? Restarted the laptop, but the 100% disk usage problem persists? You are not alone. More than one thousand users reported on the Microsoft community and HP forum that they had the same problem. But take it easy. We have collected some effective methods to help you fix the problem of 100% disk usage on Windows 10 HP laptop.
In fact, this problem can occur on any brand of laptop, such as Dell, Lenovo, Asus, etc. The reason varies from computer to computer. Try these methods one by one until you find the one that works for you.
If you can't find any programs that are constantly reading and writing to your hard disk, and restarting your computer does not work, check your hard drive for errors and malware before taking any further measures. Because disk errors and malware attacks can be the cause of 100% disk usage.
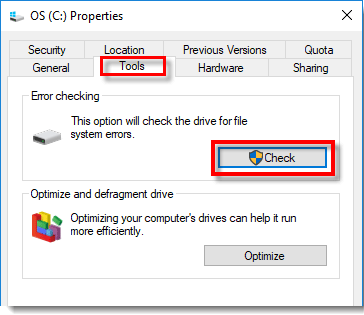
To check for disk errors, right click the drive (e.g. C:) which you wish to check and select Properties. After the Properties dialog is opened, click the Tools tab and then click on the Check button. Click Scan drive if necessary. Then wait for the checking to complete. If errors are found, you will be required to restart your computer to repair the errors.
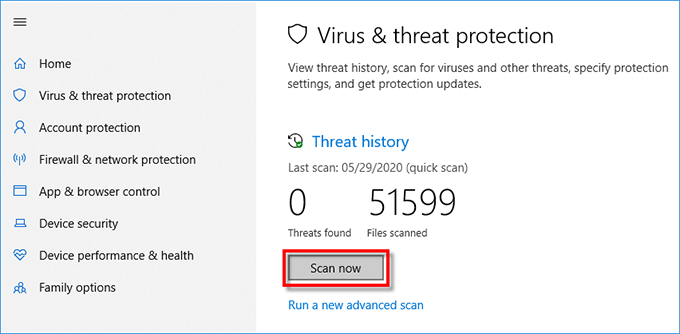
To check for virus or malware, just open the Windows Security app, click Virus & threat protection, and then click Quick scan (or Scan now in an older version of Windows 10) to run a scan of your computer. If a virus or malware is found, remove it.
According to Microsoft Agent, some system services sometimes result in 100% disk usage. It has been confirmed that the main services causing the problem are Superfetch, Xbox Live Auth Manager, Windows Search, Windows Update, HomeGroup Listener and HomeGroup Provider. Follow the steps below to disable the service.
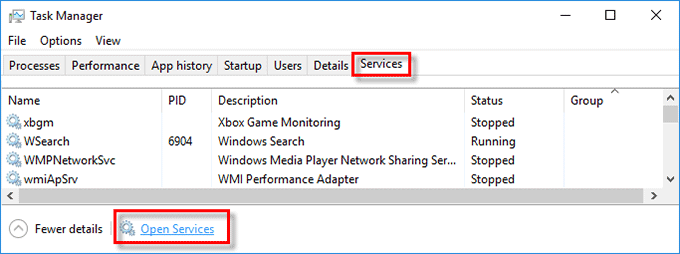
Step 1: Open the Task Manager, select the Services tab, and then click Open Services at the bottom.
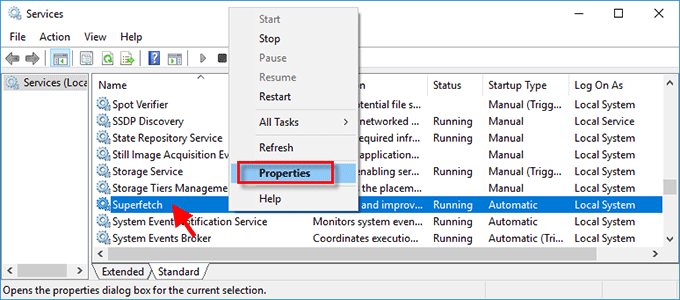
Step 2: When the Services app is opened, find the service named Superfetch (called SysMain in the newer version of Windows 10), right click it and select Properties.
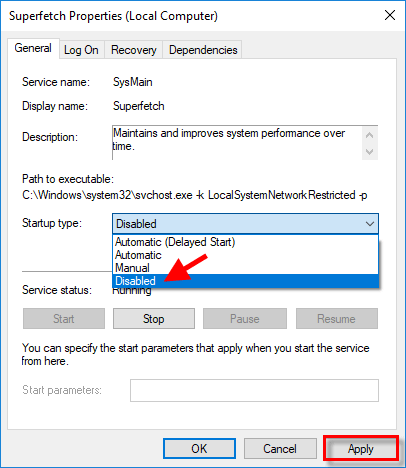
Step 3: When the Superfetch Properties window opens, select 'Disabled' from the drop-down menu next to 'Startup type', and then click Apply to save the changes.
Step 4: Restart Windows 10 and check if the 100% disk usage issue has been solved. If the issue persists, disable Xbox Live Auth Manager, Windows Search, Windows Update, HomeGroup Listener and HomeGroup Provider services respectively, and then restart Windows 10. You may also want to read How to Disable Unnecessary Services in Windows 10
The fragmentation consolidates fragmented files on your hard drive and enables efficient and quicker access to storage locations on the drive. However, sometimes this process could get corrupted by some malware or applications, hence creating an undo process in the disk and causing problems like 100% disk usage. To fix this problem, you will need to disable scheduled defragmentation from your task scheduler.
Step 1: Type "task scheduler" (without quotation marks) in the search box on the left side of the taskbar and press Enter to open the Task Scheduler app.
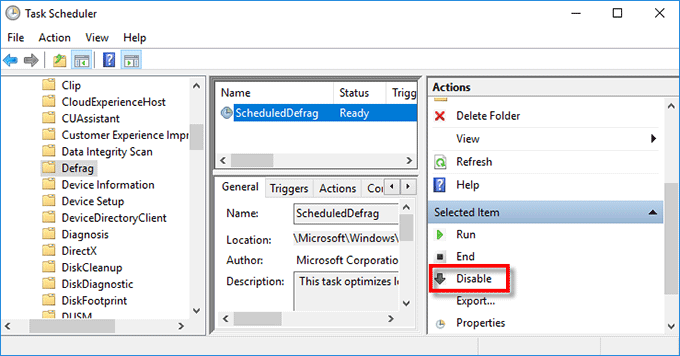
Step 2: Go to Task Scheduler Library > Microsoft > Windows > Defrag. Select ScheduledDefrag on the middle pane, and then click End on the right-side pane. When a dialog pops up asking if you want to end all instance of this task, click Yes.
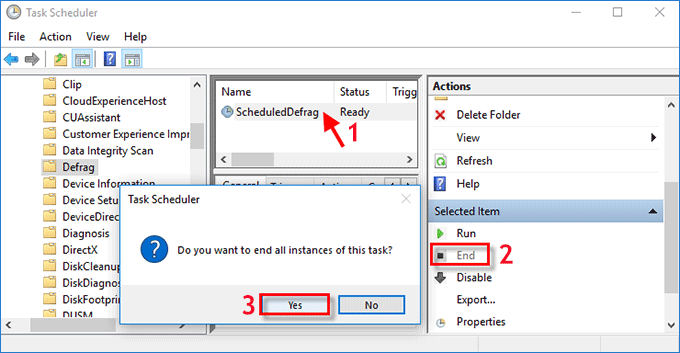
Step 3: Click Disable on the right-side pane and the defragment schedule will be disabled.
Step 4: Restart your Windows 10 and check if the 100% disk usage has been resolved.
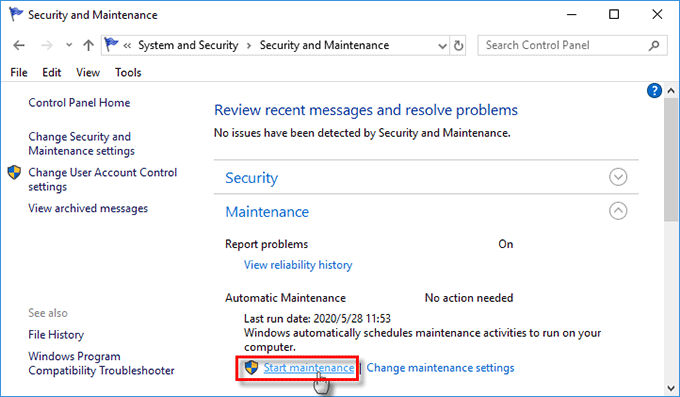
Dozens of HP laptop users reported that they fixed the 100% disk usage issue by Start Maintenance.
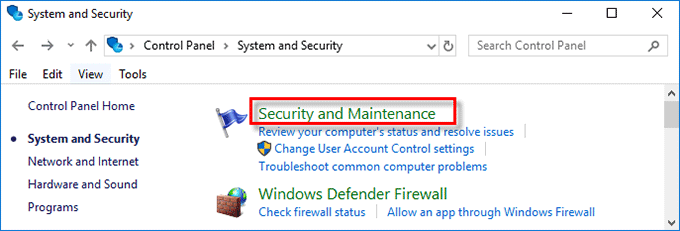
Step 1: Open Control Panel and go to System and Security > Security Maintenance.
Step 2: Expand Maintenance and then click Start maintenance. Wait about 15 minutes and then see if the disk utilization has dropped.
In general, system junk files do not have a significant impact on Windows, but when they accumulate to a certain level, problems can occur on some computers, and the disk usage problem is not ruled out.
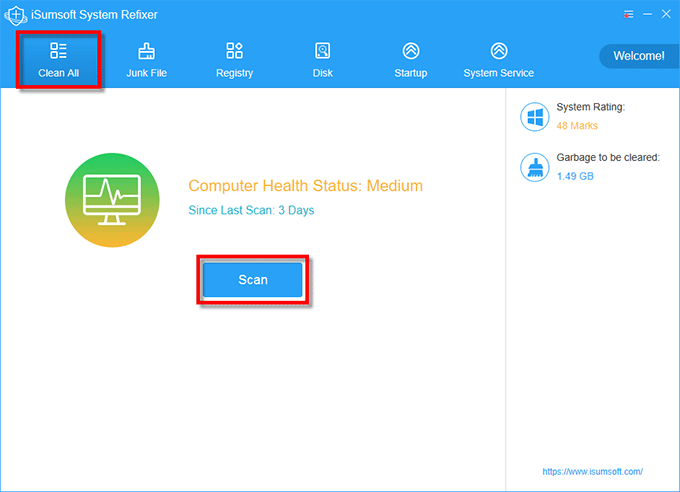
Step 1: Download and install iSumsoft System Refixer on your Windows 10 HP laptop. After installation, launch this tool.
Step 2: Select the Clean All tab and click Scan. This tool will scan your hard disk quickly.
Step 3: When the scan is complete, click Clean to clean out all unnecessary system junk files and broken registry entries.
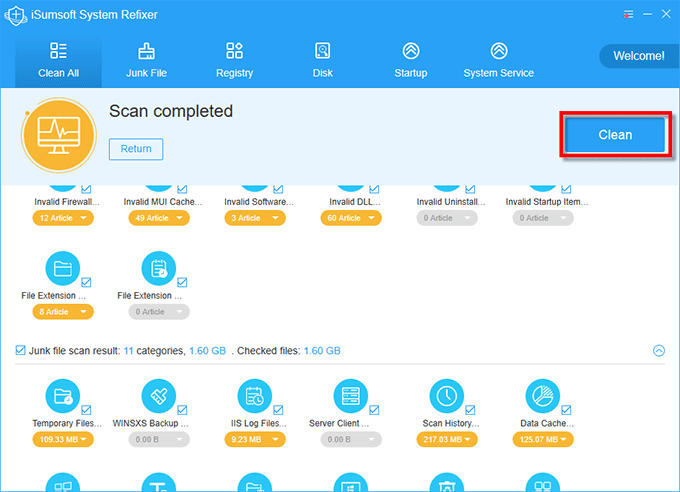
Step 4: When the cleaning is complete, restart your Windows 10 and see if the 100% disk usage problem has been solved.
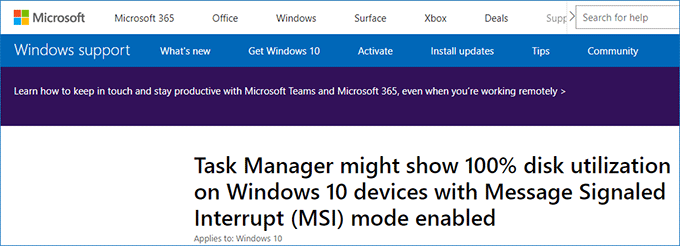
There is a page on Microsoft's official website that clearly stats that Task Manager might show 100% disk utilization on Windows 10 devices with Message Signaled Interrupt (MSI) mode enabled. This mainly happens on the computer running the inbox AHCI driver. In this case, you need to disable MSI for the AHCI controller in the registry. For detailed steps, refer to Microsoft Official page.
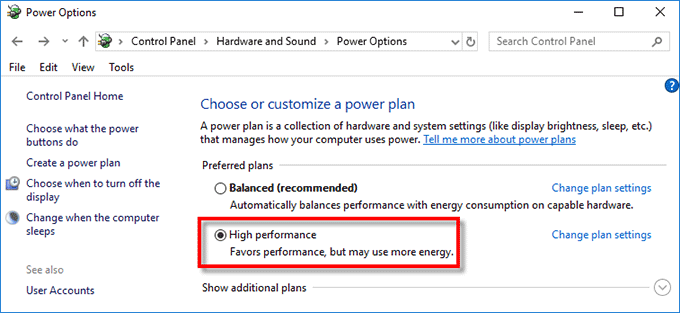
According to a survey, the 100% disk usage problem is more likely to occur on computers with HDDs or a mix of HDDs and SSDs. Changing the power plan to High Performance may help fix the problem. To do this, open Control Panel, go to Hardware and Sound > Power Options, and then choose High Performance.
A few HP users find HP CoolSense to be the cause of 100% disk usage. After uninstalling HP CoolSense, their disk utilization dropped rapidly from 100% to less than 10%.
Step 1: Right click the Windows icon on the left side of the taskbar, and select Apps and Features.
Step 2: Find the HP CoolSense app from the list, click it and select Uninstall to uninstall it from your Windows 10.
Step 3: Restart Windows 10 and check if the 100% disk usage problem has been resolved.
That's all the ways that have helped other users successfully fix the 100% disk usage problem on Windows 10 HP laptop. If none of them works for you, reinstalling Windows 10 is the last option you can try.