Some apps need to access camera to work as intended. The app will require your permission before it can access the webcam and microphone. You can control which apps can use your camera, which apps have no access to the camera in Windows 10. Here shows you how to allow or block apps use camera in Windows 10.
You can decide to allow or block specific apps and services using the camera in Settings.
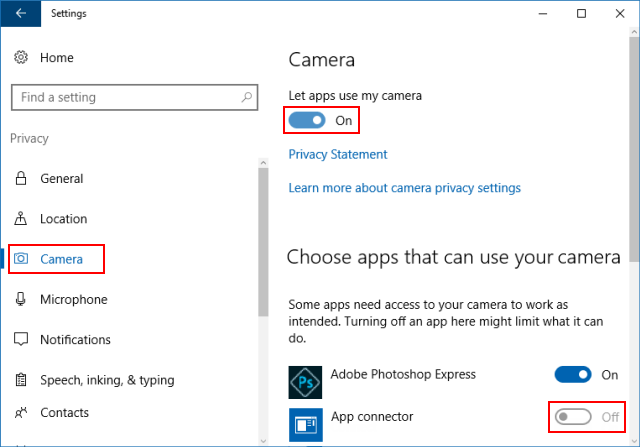
Step 1: Go to Start menu, click Settings > Privacy.

Step 2: Click on Camera tab, turn on Let apps use my camera at the top of the right pane. Under the Choose apps that can use your camera option, you can limit an individual app and service to use the camera by turning it off.

You can control whether apps can access the camera or not in the Group Policy Editor.
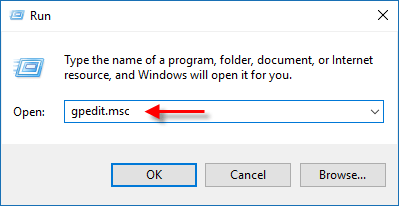
Step 1: Open the Group Policy Editor.
Press Win + R keys to open Run box, type in gpedit.msc, and then hit Enter.

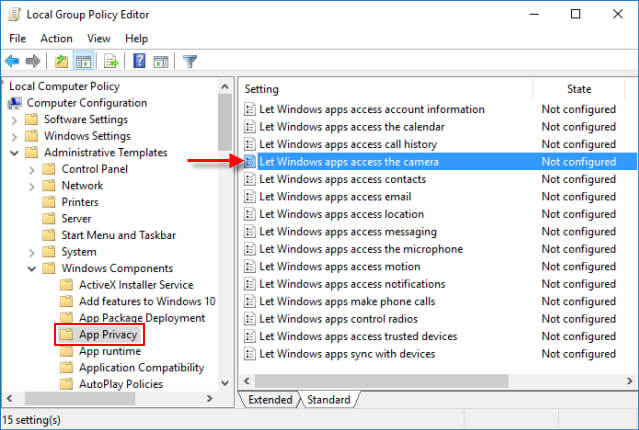
Step 2: In the Group Policy Editor, navigate to the following location:
Computer\ Configuration\Administrative Templates\Windows Components\App Privacy
Step 3: In the right pane of App Privacy, double-click on Let Windows apps access the camerapolicy to edit it.

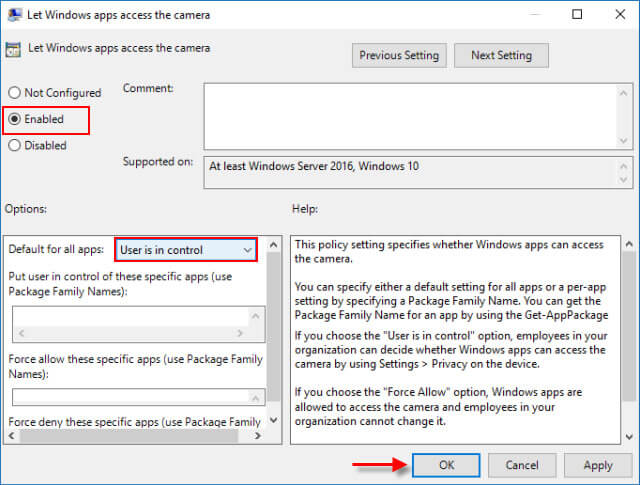
Step 4: To let Windows apps access the camera, select Enabled, then select User is in control option.

To block Windows apps from using the camera, select Disable option. That means you cannot turn on Let apps use my camera in Settings.
In Windows 10, a camera is a part of your device and system which lets users make Skype video calls, take pictures, Sign in to your device if you have set up Windows Hello, and more. It's not recommended to disable the Let apps use my camera feature.