
Since there is no built-in option to protect a folder with password on Windows, usually you may encrypt the whole hard drive with BitLocker to protect your folder. However, if you are using a shared hard drive, you may need to find a way to password protect your specific file instead of encrypting the entire hard drive using BitLocker. Here this article will show you 3 easy ways to password protect a specific folder on Windows 10.

7-Zip is open-source archival software that can not only help you zip file but also password protect a zip file. Here you can follow the steps to password protect a folder on a shared hard drive with 7-Zip. Before start, install 7-Zip on your Windows 10.
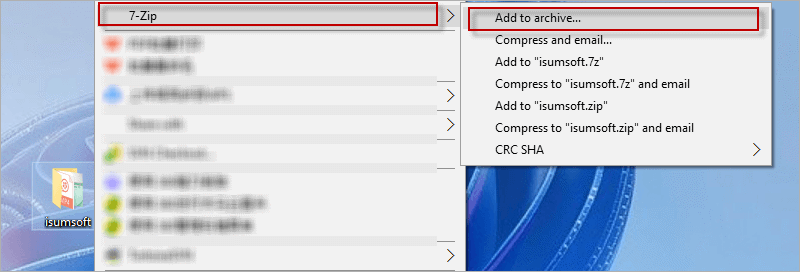
Step 1: Right-click on the file you want to protect and choose 7-Zip > Add to archive…
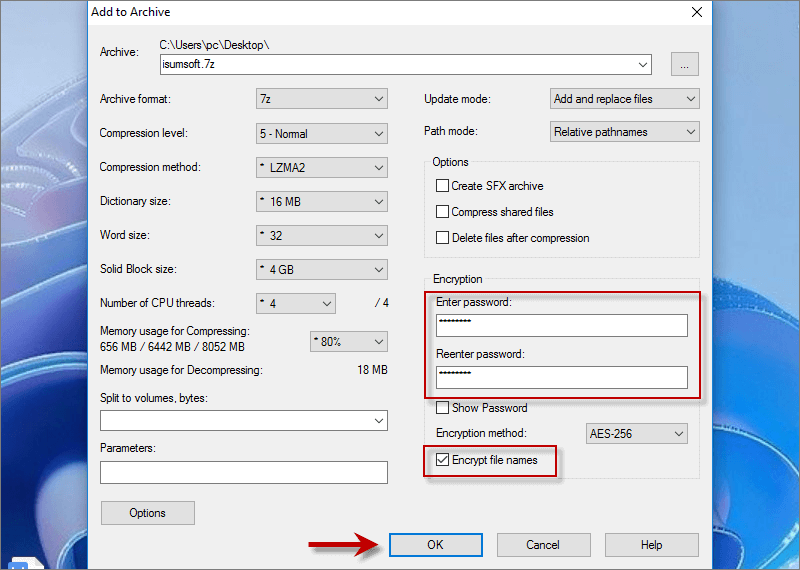
Step 2: Enter a desired password twice and check the box for Encrypt file names. Then click on OK.
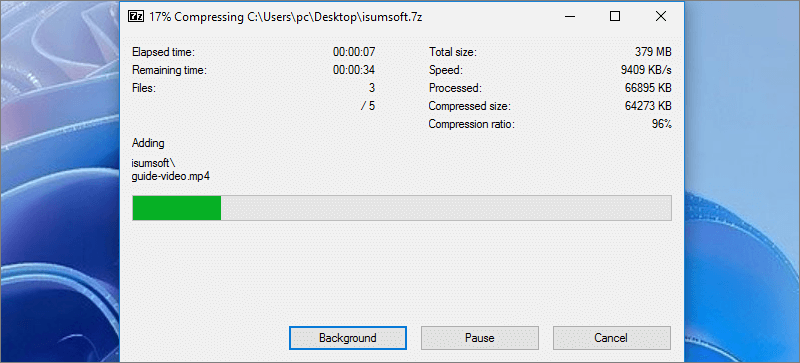
Step 3: Wait for 7-Zip encrypting your file.
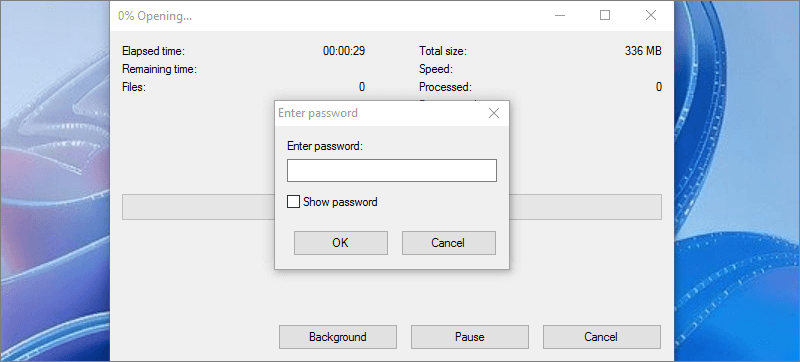
After encryption, you can not open the file unless you enter the password you have set.
Another easy way to password protect a folder on shared hard drive is using a professional file encryption tool iSumsoft FileCarer. With this powerful tool, you are able to password protect files and folders on Windows 11/10/8/7 without any leakage.
Here you can install iSumsoft FileCarer. After installation, run it on your Computer.
DownloadStep 1: Select Encrypt feature and click the folder/file icon to choose the data you would like to encrypt.
Step 2: Set a password for your selected files and then hit the Encrypt button.
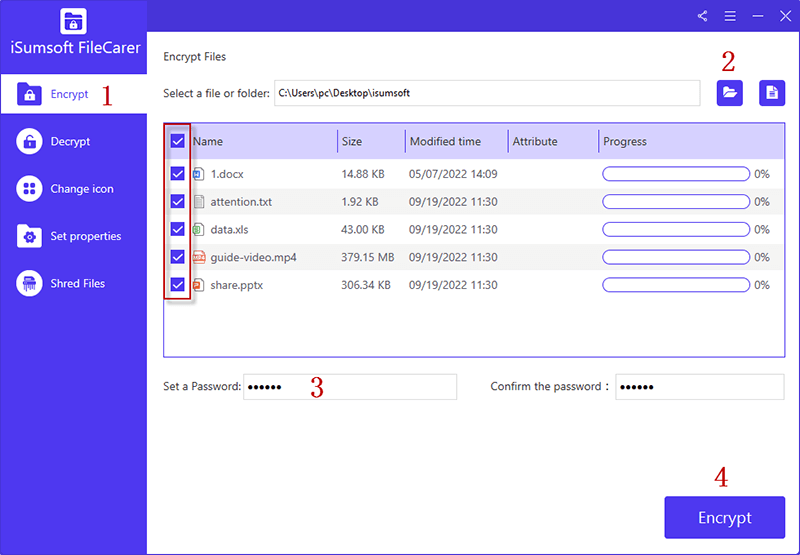
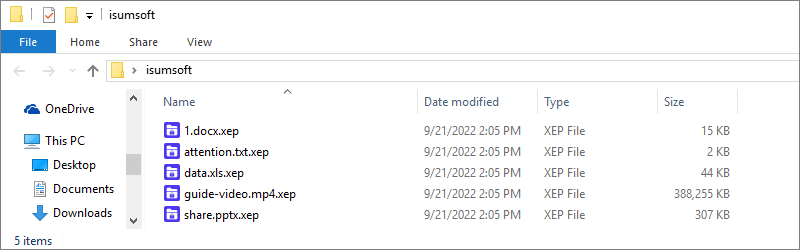
Once encrypted, your files will be added the .xep extension and you are required to use a file password to decrypt and access the encrypted file.
If you don’t want to use software to password protect your folder on Windows, you can choose to lock and hide a folder with password using batch file. Here are the steps.
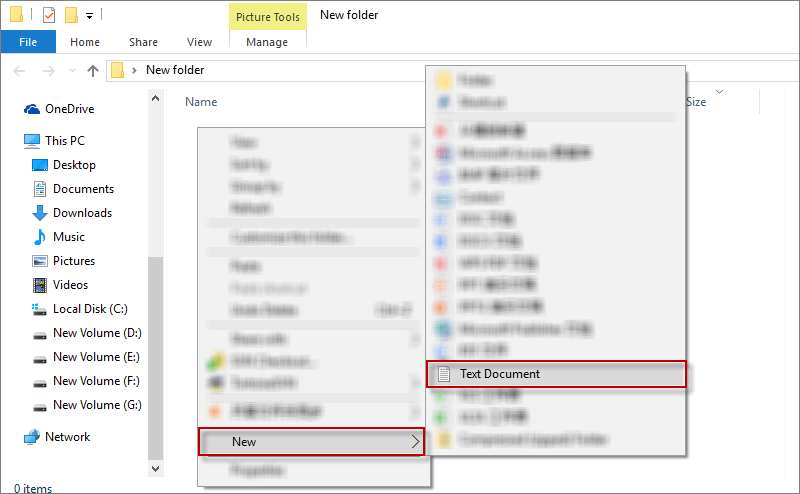
Step 1: In a new folder, right-click on the blank and create a new text document.
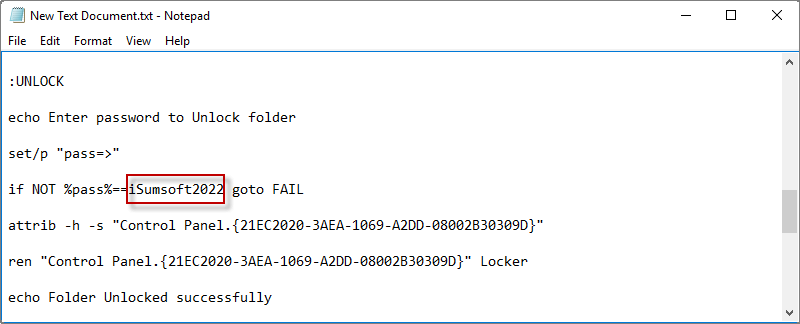
Step 2: Copy the following command to the new text document.
cls
@ECHO OFF
title Folder Locker
if EXIST "Control Panel.{21EC2020-3AEA-1069-A2DD-08002B30309D}" goto UNLOCK
if NOT EXIST Locker goto MDLOCKER
:CONFIRM
echo Are you sure u want to Lock the folder(Y/N)
set/p "cho=>"
if %cho%==Y goto LOCK
if %cho%==y goto LOCK
if %cho%==n goto END
if %cho%==N goto END
echo Invalid choice.
pause
goto CONFIRM
:LOCK
ren Locker "Control Panel.{21EC2020-3AEA-1069-A2DD-08002B30309D}"
attrib +h +s "Control Panel.{21EC2020-3AEA-1069-A2DD-08002B30309D}"
echo Folder locked
goto End
:UNLOCK
echo Enter password to Unlock folder
set/p "pass=>"
if NOT %pass%==iSumsoft2022 goto FAIL
attrib -h -s "Control Panel.{21EC2020-3AEA-1069-A2DD-08002B30309D}"
ren "Control Panel.{21EC2020-3AEA-1069-A2DD-08002B30309D}" Locker
echo Folder Unlocked successfully
goto End
:FAIL
echo Invalid password
pause
goto end
:MDLOCKER
md Locker
echo Locker created successfully
pause
goto End
:End
Then replace iSumsoft2022 in the command with your own password.
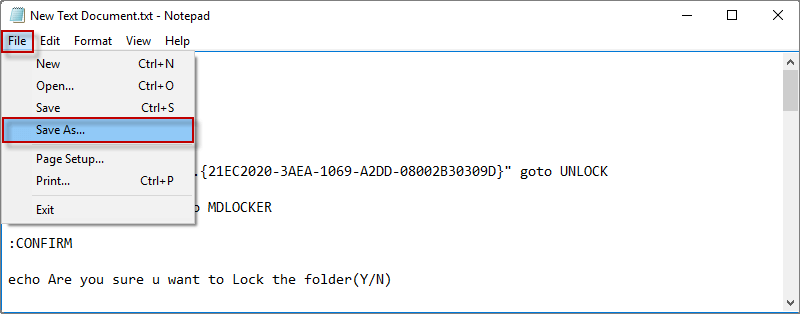
Step 3: Click File tab and choose Save As…
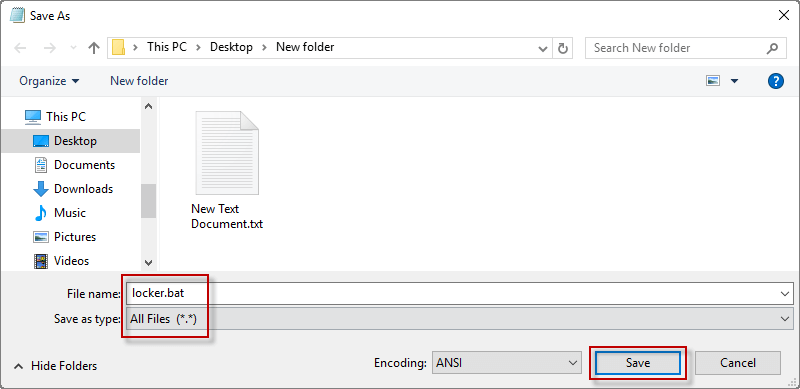
Step 4: Set the file name as locker.bat and the file type as All Files. Then click Save.
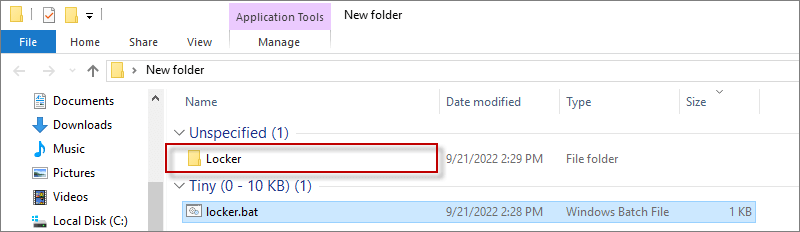
Step 5: Double-click on locker.bat and there will be a pop-up Command Window showing you "Locker created successfully". Then press any key to continue and you will see a Locker folder on your new folder.
Step 6: Add the files you want to protect to the Locker folder.

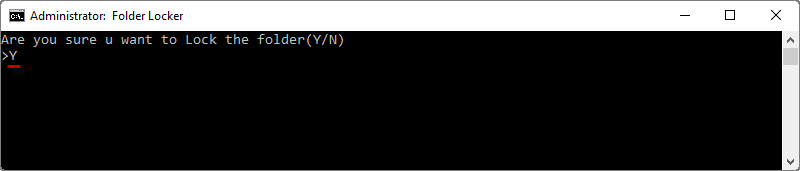
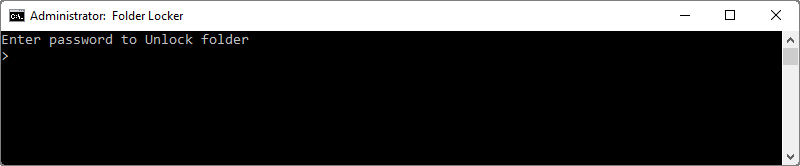
Step 7: Double-click locker.bat again. When a popping up window appears, type Y and press Enter button. Then the Locker folder will be locked with password and hidden on the shared hard drive..
To unlock and unhide the password protected folder, double-click locker.bat file and enter a correct password. Then the Locker folder will be visible and accessible again on the drive.
That's how to password protect a folder on a shared hard drive on Windows 10. Generally, BitLocker is a popular encryption method to protect the entire drive including your folders. Only when you use a shared hard drive that can not be encrypted privately, should you consider using above ways to protect your folder. If you find this article useful, please share it with anyone in need. Thanks for reading.
 How to Lock/Encrypt/Password Protect Folder in Windows 11
 PDF User and Owner Password - Secure PDF Document
 How to Protect Word Documents with Editing Restrictions
 How to Encrypt USB Drive with or without BitLocker in Windows 10
 How to Encrypt Android Phone Protecting Your Information Security
  How to Retrieve Passwords Used on Your Computer