
The Snipping Tool is a screen-capture tool built in Windows, with which users can take screenshots and edit them. If you rarely or never use Snipping Tool or if you prefer to use a third-party capture-screen program, you might want to disable the Snipping Tool. In this post, I will show you how to disable or enable Snipping tool in Windows 10. Two ways are available.
Step 1: Open Local Group Policy Editor in Windows 10.
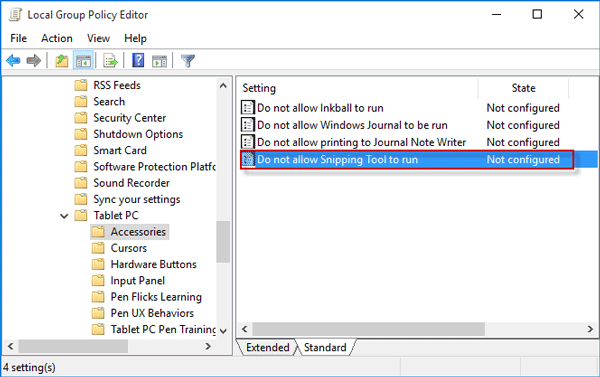
Step 2: In the Group Policy Editor, navigate to: Computer Configuration -> Administrative Templates -> Windows Components -> Tablet PC -> Accessories. With the Accessories selected, look for the policy setting named "Do not allow Snipping Tool to run". This policy is not configured by default. Double-click it to configure it.
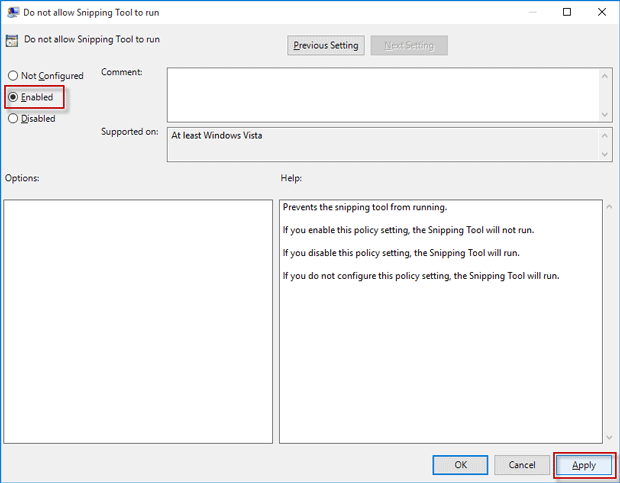
Step 3: Select the Enabled radio button, and click Apply followed by OK. This will disable the Snipping Tool.
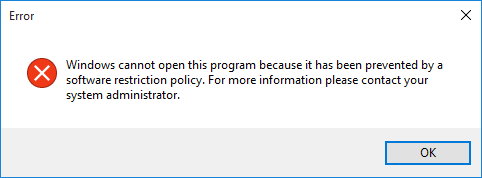
That's it. The policy changes will take effect immediately. When you try to open Snipping tool in Windows 10, you will get the "Error" dialog that says, "Windows cannot open this program because it has been prevented by a software restriction policy", as shown below.
If you want to enable Snipping Tool, you just need to disable or do not configure the "Do not allow Snipping Tool to run" policy.
Group Policy Editor may not be used in the Home edition of Windows 10. Hence, Windows 10 Home users have to disable or enable Snipping Tool with Registry Editor. Here are the steps.
Step 1: Open Registry Editor in Windows 10.
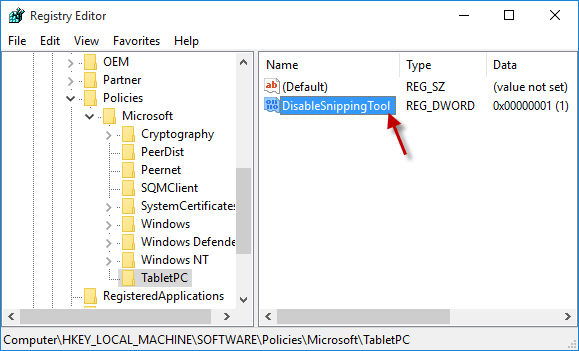
Step 2: In the Registry Editor, navigate to the key: HKEY_LOCAL_MACHINE\SOFTWARE\Policies\Microsoft\TabletPC.
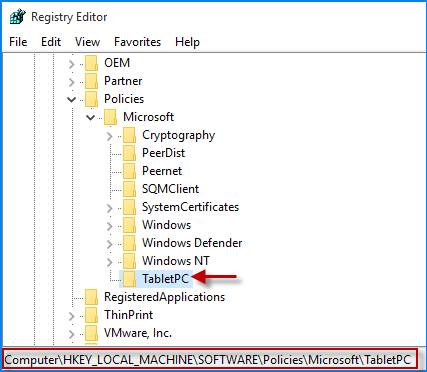
Tips: If the "TabletPC" key doesn't exist, you need to create it. Right-click the "Microsoft" key, select New -> key, and then name the new key as "TabletPC".
Step 3: Under the "TabletPC" key, look for the value named "DisableSnippingTool", double-click it, and set its value data to 1.
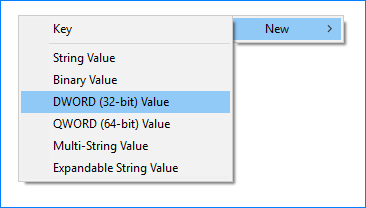
Tips: If the DisableSnippingTool value doesn't exist under the TabletPC key, create it. Right-click on the blank space on the right-side panel, select New -> DWORD (32-bit) Value and then name the new value as DisableSnippingTool.
That's it. The Snipping Tool is disabled. From now on, when you try to open Snipping Tool, you will get the "Error" dialog. If the Snipping Tool still can run, you need to restart Windows 10 for the registration changes to take effect.
If you want to enable the Snipping Tool, you just need to set the "DisableSnippingTool" value data to 0, or simply delete the "DisableSnippingTool" value.
 How to Open and Use Snipping Tool in Windows 10
 How to Take Screenshots of Lock Screen in Windows 10
 3 Ways to Take Screenshots on Microsoft Surface Tablet
 How to Enable or Disable Auto Save Screenshots to OneDrive
 How to Disable or Enable Cortana in Windows 10
 How to Disable or Enable Run Dialog Box in Windows 10