Learn how to create a Windows Defender Security Center shortcut on your Windows 10 PC with this step-by-step guide.
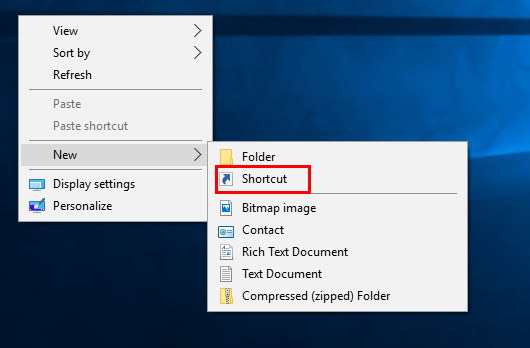
Step 1: Right-click on an empty area of your Windows 10 desktop, then select New > Shortcut from the context menu.
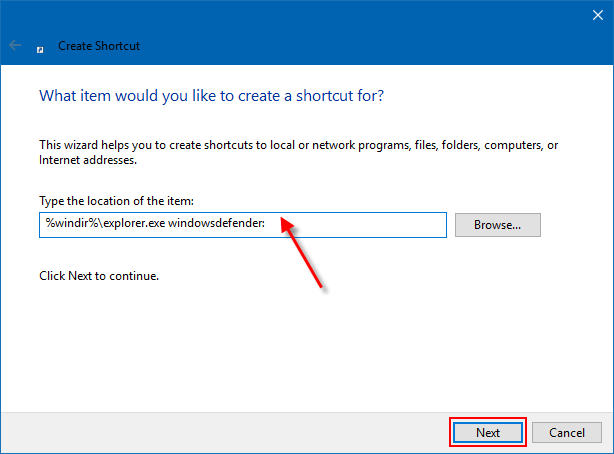
Step 2: Copy and paste %windir%\explorer.exe windowsdefender: into the location field, then click Next.
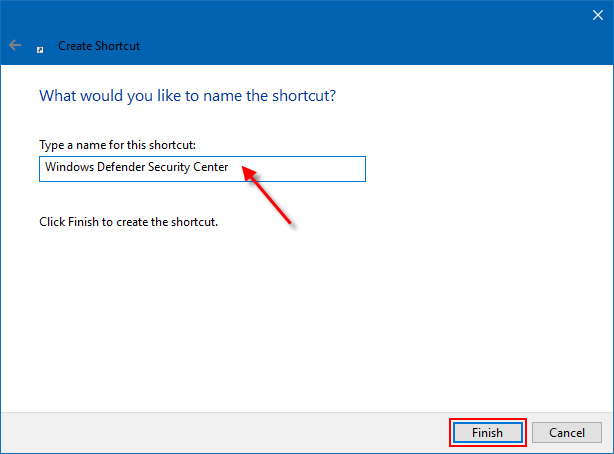
Step 3: Enter Windows Defender Security Center as the shortcut name, then click Finish. The shortcut will now appear on your desktop.
Step 4: Right-click the new Windows Defender Security Center shortcut and select Properties. On the Shortcut tab, click the Change Icon button.
![]()
Step 5: Copy and paste %ProgramFiles%\Windows Defender\EppManifest.dll into the file path field, then press Enter. Select the Windows Defender icon and click OK.
![]()
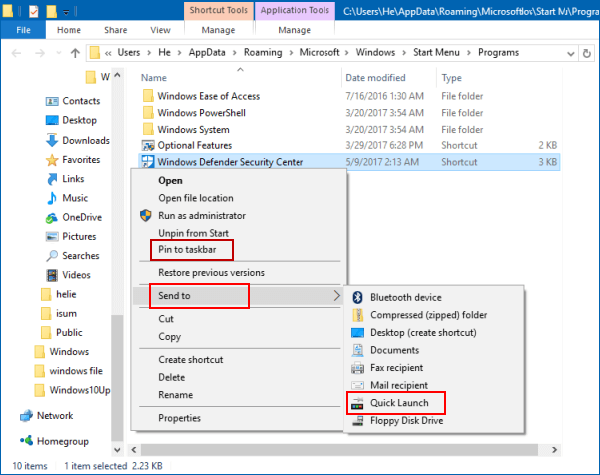
Click Apply and OK to save the changes. You can now Pin to Taskbar, Pin to Start, add to Quick Launch, or move the shortcut as needed.