Encountering issues while trying to connect to WiFi on a Windows 10 laptop is a common problem. This article provides a step-by-step guide on how to connect to a WiFi network on Windows 10 and offers practical solutions for when Windows 10 fails to connect to WiFi.
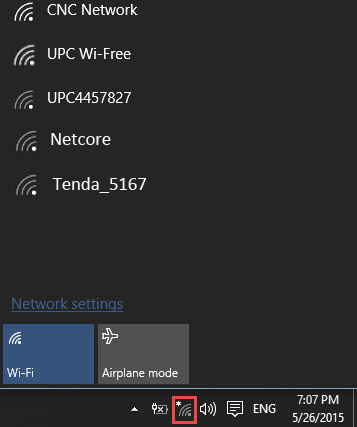
To successfully connect to WiFi on Windows 10, ensure your laptop has a wireless network adapter, the adapter is functioning correctly, and the wireless feature is enabled. The presence of a wireless network icon on the taskbar indicates that your laptop is WiFi-capable and the feature is enabled.
Step 1: Click the wireless network icon in the lower right corner of the Windows 10 desktop to view available WiFi networks.
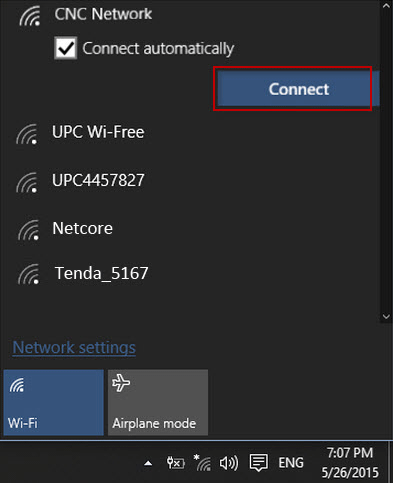
Step 2: Select the desired WiFi network and click on its name, then click the Connect button.
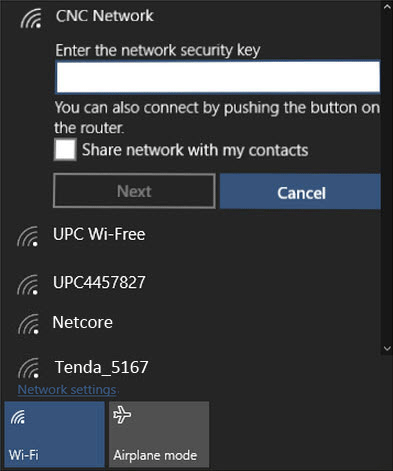
Step 3: For password-protected WiFi networks, enter the correct security key and click Next to verify and establish the connection.
Note: Ensure Airplane mode is turned off, as it disables WiFi connectivity.
Several factors can prevent a Windows 10 laptop from connecting to WiFi.
If the wireless network icon is not visible, it may indicate a missing wireless network adapter driver. Installing or reinstalling the driver is necessary to enable WiFi connectivity.
A red 'X' on the wireless network icon typically signifies that the wireless network is disabled. Enable it to resolve the issue.
Step 1: Right-click the wireless network icon and select 'Open Network and Sharing Center'.
Step 2: Click the Change adapter settings link.
Step 3: Right-click 'WLAN' under Network Connections and select Diagnose.
Step 4: After diagnosis, troubleshoot the issue as an administrator to resolve the problem.
If no WiFi networks are detected despite having a compatible adapter and drivers, use the Command Prompt to resolve the issue.
Step 1: Open Command Prompt as administrator.
Step 2: Execute the first command.
![]()
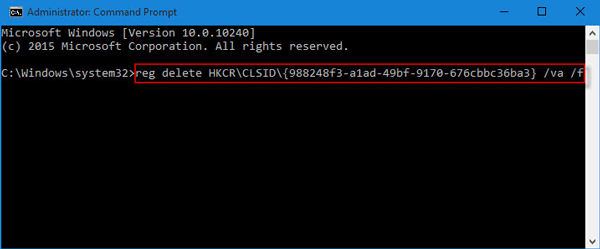
Step 3: Execute the second command.
![]()
Step 4: Restart your laptop to detect available WiFi networks.