If your HP touchpad stops working suddenly, it's likely due to accidental disabling via function keys or settings, or a corrupted/outdated touchpad driver. This guide provides 7 effective methods to resolve the issue of a disabled touchpad on your HP laptop.
1. Press the function key (F1-F12) with a touchpad icon along with the Fn key to enable or disable the touchpad.
2. For some HP laptops, an indicator light at the top left corner of the touchpad indicates its status. If the light is off, the touchpad is enabled; if it's on, the touchpad is disabled. Double-clicking the dot can toggle the touchpad on or off.

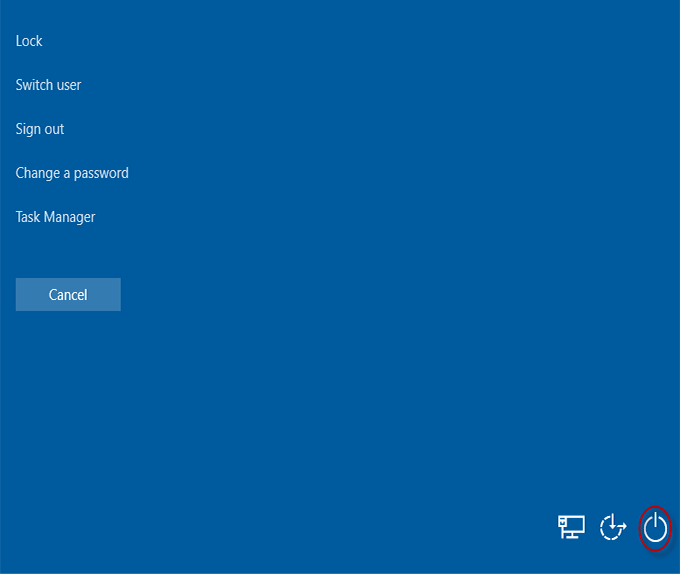
Step 1: Use Alt + Ctrl + Del to restart your laptop if you don't have a mouse.
Step 2: Navigate to the Power button using the ↑ key, select Restart, and press Enter to restart your HP laptop.
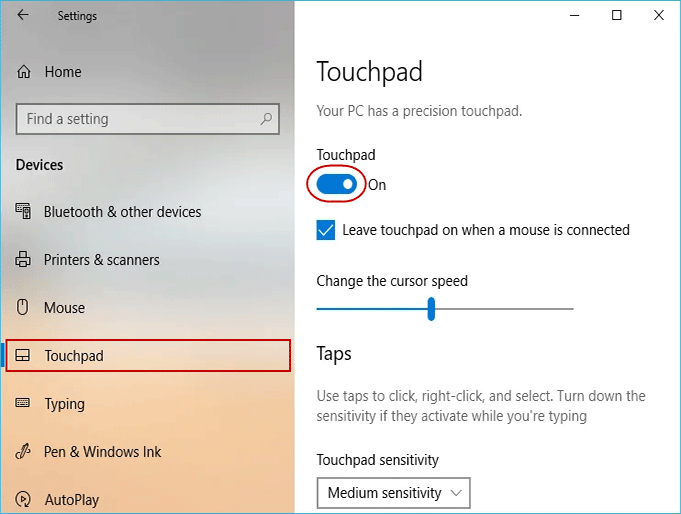
Step 1: Open Settings from the Start menu and select Devices.
Step 2: Click on Touchpad and ensure the toggle is turned On.
Step 3: Check if the touchpad works after a reboot.
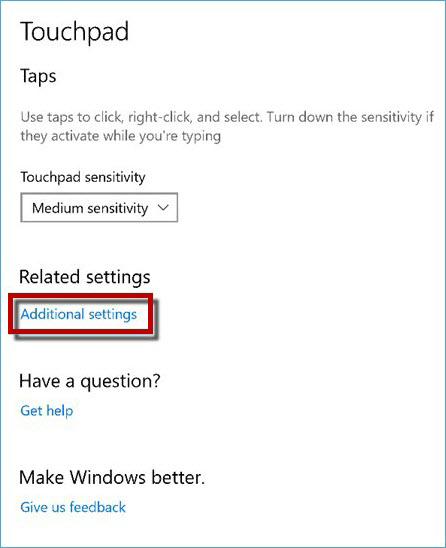
Step 1: Open Devices and click on Touchpad, then select Additional settings.
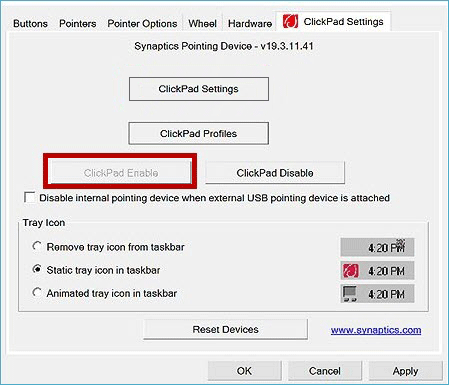
Step 2: In the TouchPad or ClickPad Settings tab, ensure Clickpad Enable is checked, then click Apply and OK.
Step 3: Restart your PC and check if the touchpad works normally.
Step 1: Restart your laptop and press F2, F8, or DEL to enter the BIOS setup.
Step 2: Navigate to the Advanced tab and locate Internal Pointing Device, ensuring it's enabled.

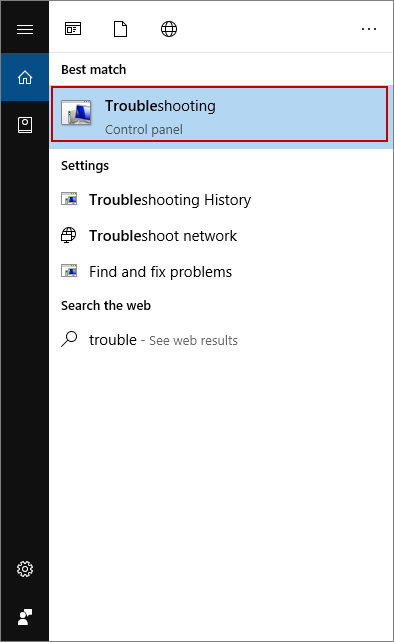
Step 1: Search for Troubleshooting and open the best match.
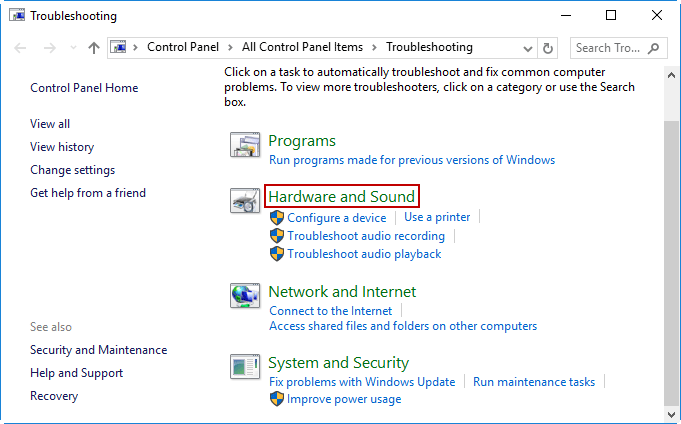
Step 2: Click on Hardware and Sound, then Hardware and Devices, and follow the prompts.
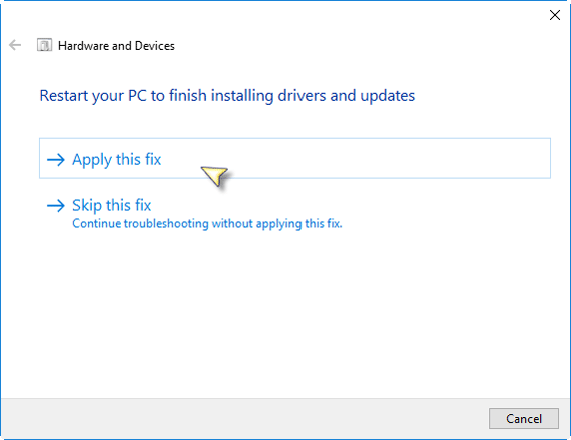
Step 3: Apply any recommended fixes and restart your laptop.
1. Update your touchpad driver using the HP Support Assistant.
2. Run HP PC Hardware Diagnostics to diagnose hardware issues.
If these methods fail, visit the HP official website for personalized support or locate a nearby HP service center.